If you’re in need of keeping babies (or a dog in our case) from going up or down stairs, this is the project for you! We’ve got a 13-year-old dog that can still go up the stairs but can’t get down. And he weighs about 80 pounds so it’s not very easy to carry him back down. So this DIY Baby Gate project was a necessity.
Our sweet dog Charlie has come to the point that he just can’t be upstairs any longer. So to keep him from coming up, our solution for months was a turned over chair in front of the stairs. I know – amazing solution, right? And finally, we’d had enough of “the chair”. Not only was my chair getting ruined, but we had to step over a chair anytime we went up or down. Don’t judge, but we seriously lived with this “solution” for months.


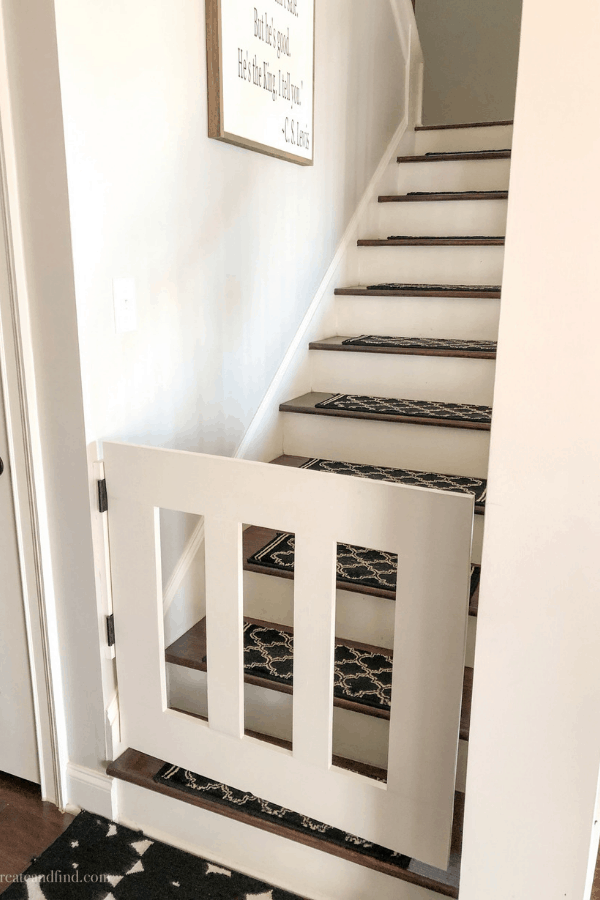
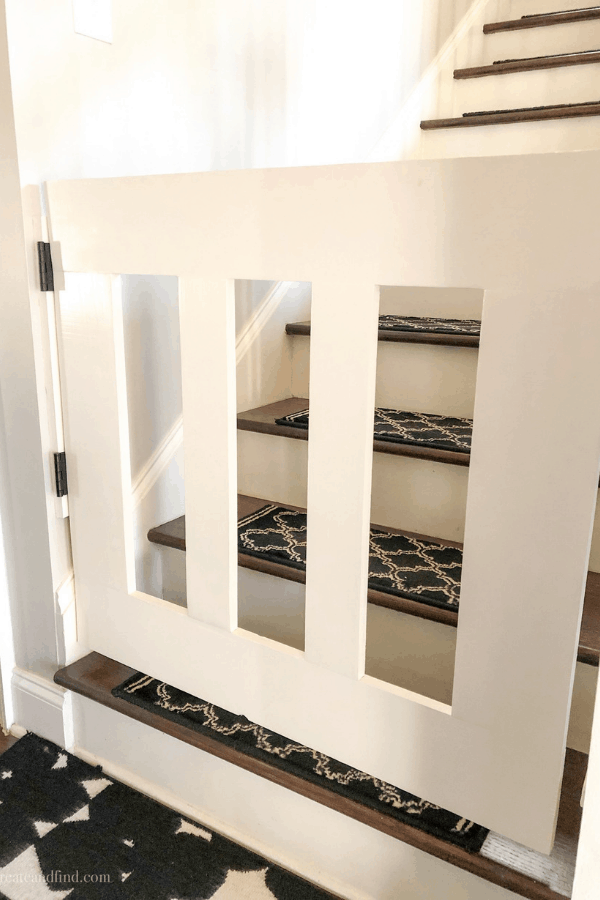
The problem is we have a column on one side at the end and a closet on the other. And they aren’t in line with each other. So we needed an easy fix that looked decent but also does the job of keeping Charlie downstairs.[mailerlite_form form_id=10]
DIY Baby Gate
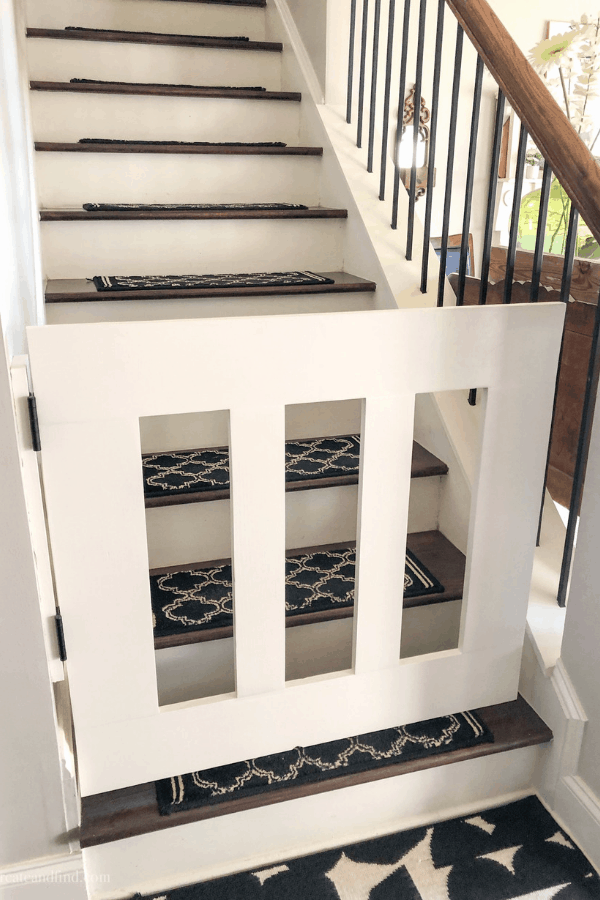
I did lots of research prior to this project, but couldn’t find exactly what we needed because the bottom of the stairs is so wonky. And since ours is technically a “dog” gate and not a baby gate, we didn’t add a latch to it. It just swings open on hinges. So if you need a latch, you’ll need to extend your measurements to accommodate a latch. As well as make sure that you’re gate extends to a solid surface that you can attach the latch to. Ours is set in the stairs a bit so we wouldn’t be able to attach it, but since it’s for our dog, it works for us.
Supplies:
- 2 – 1×6 boards @6 feet long each
- 1 – 1×4 board @6 feet long
- 2 hinges (we chose 3-inch hinges)
- wood glue
- wood filler
- sanding blocks
- Kreg jig and 1&1/4″ Kreg screws (this can still be done if you don’t own a Kreg jig, just not as easily)
- Paint or stain
Cuts:
- measure and cut a 1×4 to 20 inches long – this is what you’ll use to attach the hinges to the wall
- cut 2 pieces out of 1×6’s at 34″ – this is for the left and right vertical side of the gate
- cut 2 pieces out of 1×6’s at 21″ – these are the top and bottom slats of the gate
- cut the 1×4 into two pieces at 21″ each – these are your middle slats of the gate
Putting It Together:
Once you’ve made all the cuts, lay out the gate to make sure everything fits before you start attaching with screws or wood glue.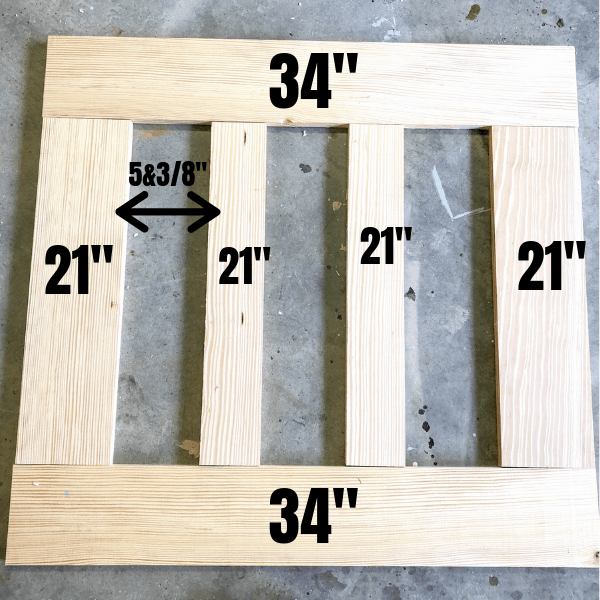
-
- Drill pocket holes for each slat and side of the frame. For our measurements and the thickness of our wood, we set the Kreg Jig depth collar at 3/4″ and used the mini Kreg and clamps that came with the Kreg set. There is a handy chart in the instructions that tells you exactly what depth to use depending on how thick your material is.

- The pocket hole screws help keep it all secure when joining pieces of wood together.

- Now you need to add a small strip of wood glue to each piece before screwing it together. We used 1&1/4″ screws based on the directions from the Kreg Jig
- Once you’ve screwed it together, fill in all the holes with wood filler, let dry, sand, then repeat if necessary. We had to fill in a second time because the pocket holes are deep. This gave me a good chance to show my little tiny just how to do it.

- Drill pocket holes for each slat and side of the frame. For our measurements and the thickness of our wood, we set the Kreg Jig depth collar at 3/4″ and used the mini Kreg and clamps that came with the Kreg set. There is a handy chart in the instructions that tells you exactly what depth to use depending on how thick your material is.
- Once it’s all smooth, paint or stain any color you like
- Attach the 20″ piece of 1×4 to the studs in the wall and now it’s ready for hinges
- Attach the hinges to the 1×4 that you attached to the wall. It may be necessary to drill pilot holes when attaching to the gate so you don’t split the wood. Attach the gate to the hinges on the wall and that’s it!


Our DIY “Baby” Gate aka Dog Gate is a huge improvement over the chair at the bottom of the stairs! In all, we spent around $30 on supplies. I already had wood glue, the Kreg Jig, sanding blocks, and paint on hand. So we had to buy the wood, hinges, and wood filler. I wish we would’ve done this project months ago!! It’s an easy fix for keeping Charlie from going upstairs and looks so much better than a chair!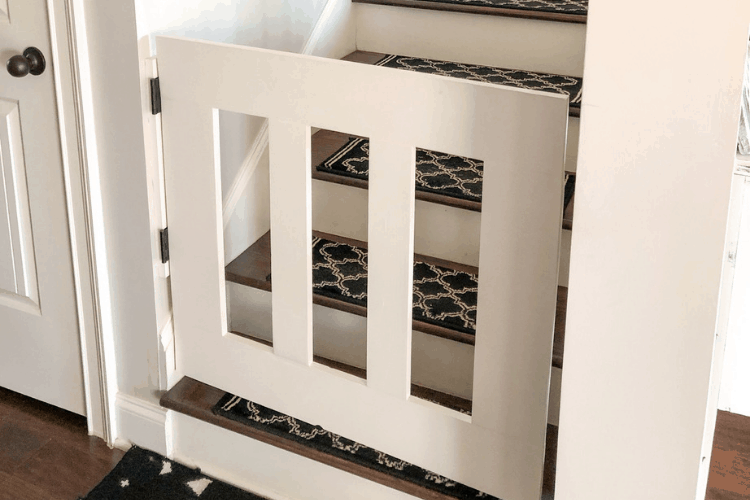
Don’t forget to pin it for later!
And the reason for this whole DIY Project – the best dog on the planet!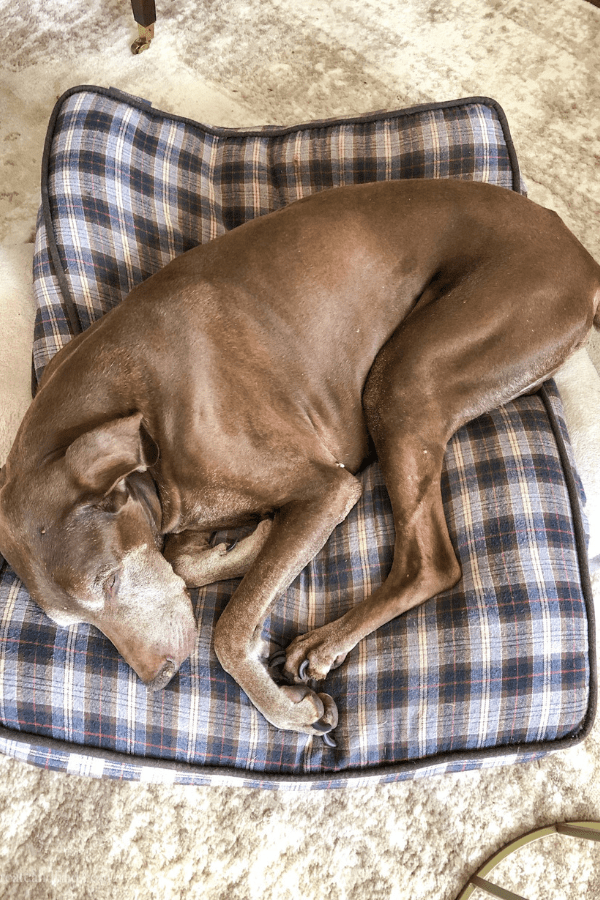

[mailerlite_form form_id=10]
Jackie
Monday 5th of December 2022
This baby gate turned out so good! I love it. Hoping to try and recreate one. We are painting our kitchen cabinets next week so maybe after that! Thanks for sharing!
create and find
Monday 26th of December 2022
Thank you - Hope your cabinets turned out well!
Wendy Duffy
Saturday 5th of January 2019
Oh Charlie! He's such a cutie. I just love your gate. Where was this when I had little kids! But it's true, sometimes we need them for our pets as well. Great details here!
Melissa
Saturday 5th of January 2019
Thanks friend! We should've done this project months ago and it was so easy!!