Hello friends! If you have dated brick that needs an update, check out this tutorial on how to whitewash brick! My new friend Marly from A Brick Home created this fabulous wall and it’s amazing!
This post was originally published on A Brick Home. Enjoy and happy painting!
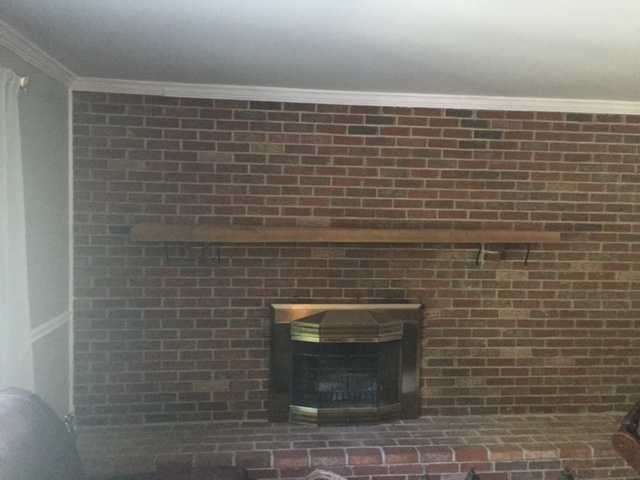
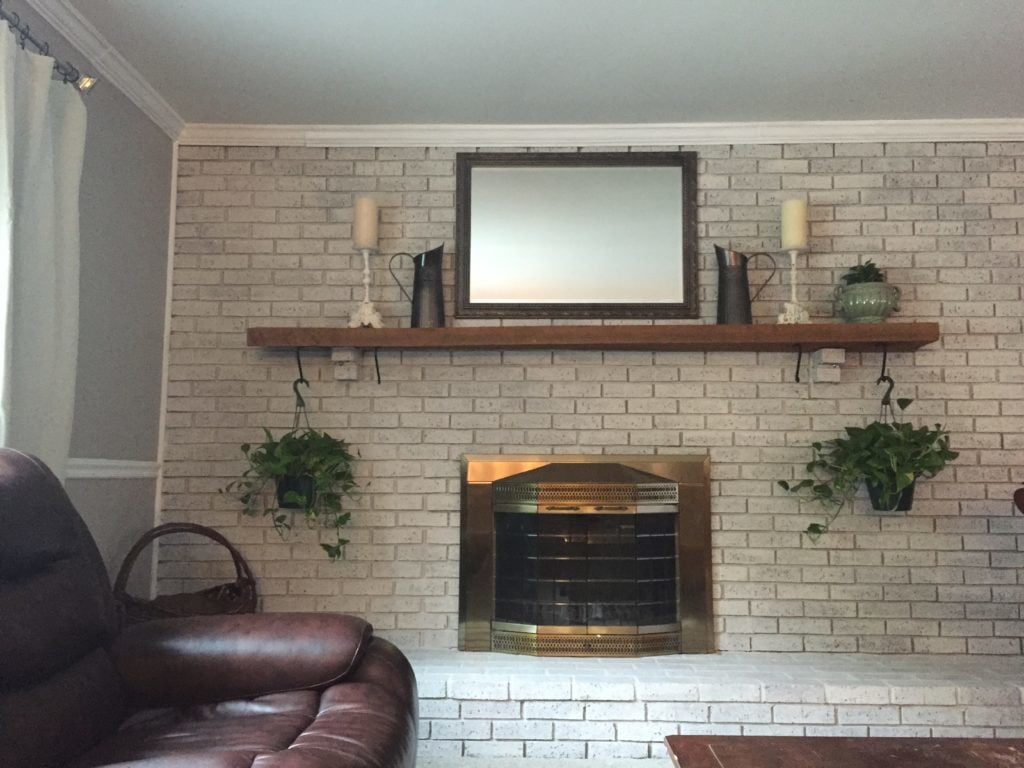
When my husband and I moved into our home in 2013, we walked into a home with barely any updates and mostly original fixtures from 1978.
I had been wanting to update our fireplace ever since I saw it. Not only was the brick color a bit dark for the space, but the fireplace came with an additional challenge: it’s off-centered on the brick wall. This meant that I had be very strategic about staging it after I got the color perfected.
Here’s what the wall looked like prior to whitewashing:
I knew I wanted to whitewash the brick since I moved into the house in 2013, and we finally decided to take the plunge three years after moving in.
Whitewashing can lighten up the room and create a completely different feel. I was struggling for a bit because I knew I didn’t want the brick to look stark white, and I also wanted it to blend with the wall color.
That’s when it hit me. Instead of using the typical 1/2 water and 1/2 white paint combo, I decided to add in a bit of the paint color of my walls, too. I wouldn’t advise adding your room’s paint color unless it’s on the lighter side. If your surrounding walls are in the light gray/beige tones, then I’d say you’re safe to mix it into your paint.
Here’s the combo I used: 1/4 white paint, 1/4 wall color paint, and 1/2 water.
For my particular case, I decided to use a paint brush as opposed to a paint roller. I did this because I could control exactly how much paint I used on each brick. Of course, this method takes way longer than it would to use a roller, but I only had one wall to paint, so it was feasible.
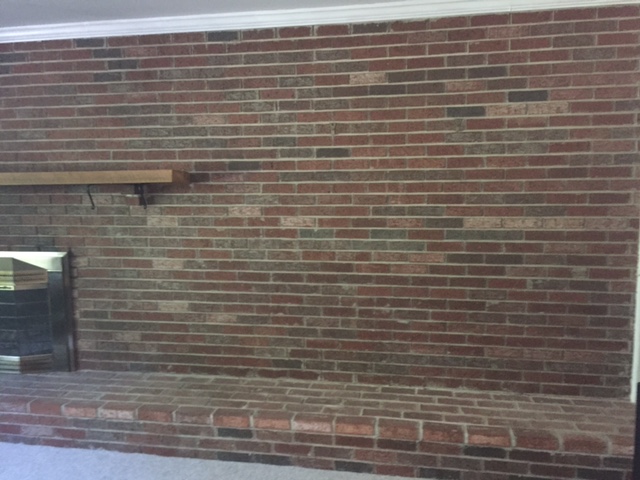
When I painted the walls, I dabbed the bricks until I achieved the desired look I wanted. I let the first coat of paint dry and decided that I wanted some more inconsistency with the bricks. So, I went back in and painted random bricks with a second coat.
Note: You may think you have overpainted, but the bricks will soak up the paint. Let the bricks dry so you can judge how they look before you add more paint.
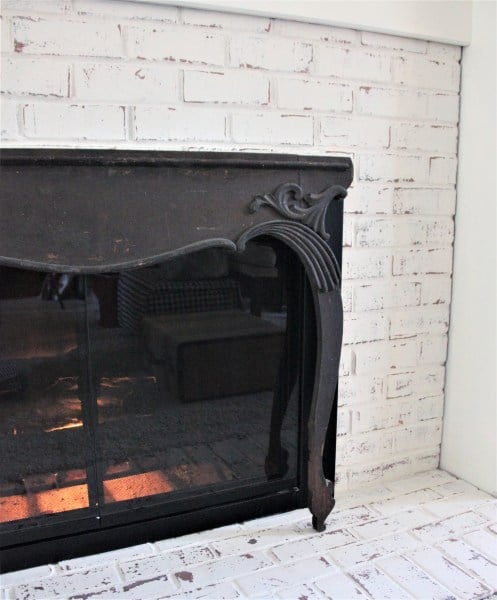
Here’s how the brick looked after painting:
You’ll notice some bricks look whiter than the others. That’s because I did a second coat of paint on the whiter ones to make it look less uniform.
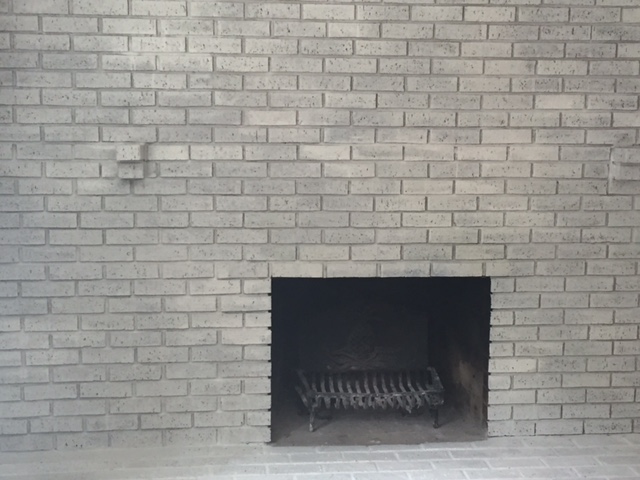
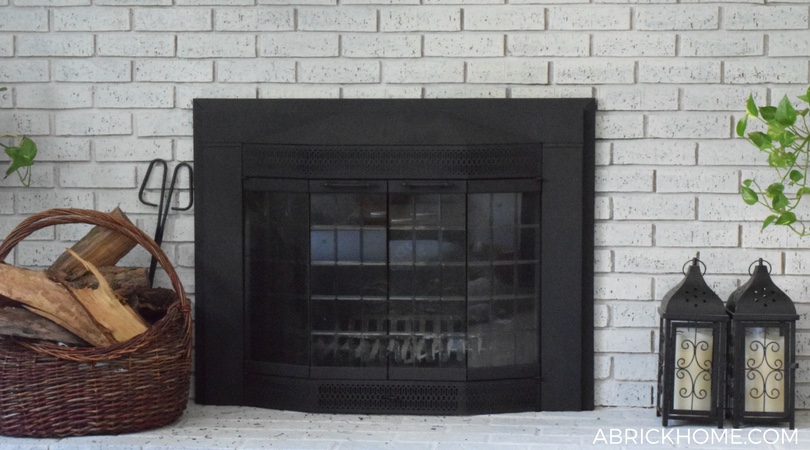
As you can see in the above photo, we put our fireplace doors back in. We left the doors brass, just as they had originally been. Once we put it all together, we realized we weren’t quite happy with the look. We didn’t have any other brass fixtures in that room. That’s when we decided to paint the fireplace doors black.
Here is the finished brick wall and finished fireplace doors:
Be sure to check out Marly at A Brick Home and thanks to her for letting me share her amazing DIY project!
More Fireplace Transformations
Fireplace Transformations

Follow this simple beginner tutorial for how to paint a brick fireplace white.

Here's how to refresh a dated, 70s-style stone fireplace with white paint.

Here's how to whitewash a brick fireplace for a muted light finish.
Easy, step-by-step tutorial for a brick fireplace German Schmear finish (Fixer Upper-Style!)
Before and after brick fireplace makeover with white paint.

How to paint a large brick fireplace white, on a budget.
Nina Newton
Tuesday 6th of June 2017
Hi Melissa - thanks so much for visiting my at Vintage Mama's Cottage from the #HomeMattersParty This morning I was just taking a few quiet minutes before my girls get up to visit a few of the other bloggers from the party, and I stopped here and . . . . this is exactly what we have been contemplating doing with our fireplace wall! Ours looks just like yours did (that must have been the popular way to do fireplaces back when our house was built, because I have seen so many exactly the same) - so now you have inspired me to take the plunge. Thanks so much for the tutorial, hopefully we can get busy on this project on the next day we have to work inside. I'll post pictures and tag you when it is done! Nina @ Vintage Mama's Cottage
PS may I do a feature article on my blog about this, with links back here, of course?
Melissa
Tuesday 6th of June 2017
Hi Nina! This is the handiwork of my sweet friend Marly from A Brick Home. She was kind enough to guest post for me - I've got the link to her post at the beginning and I'm sure she would love for you to feature it! Thanks for stopping by Brown Dog Vintage!