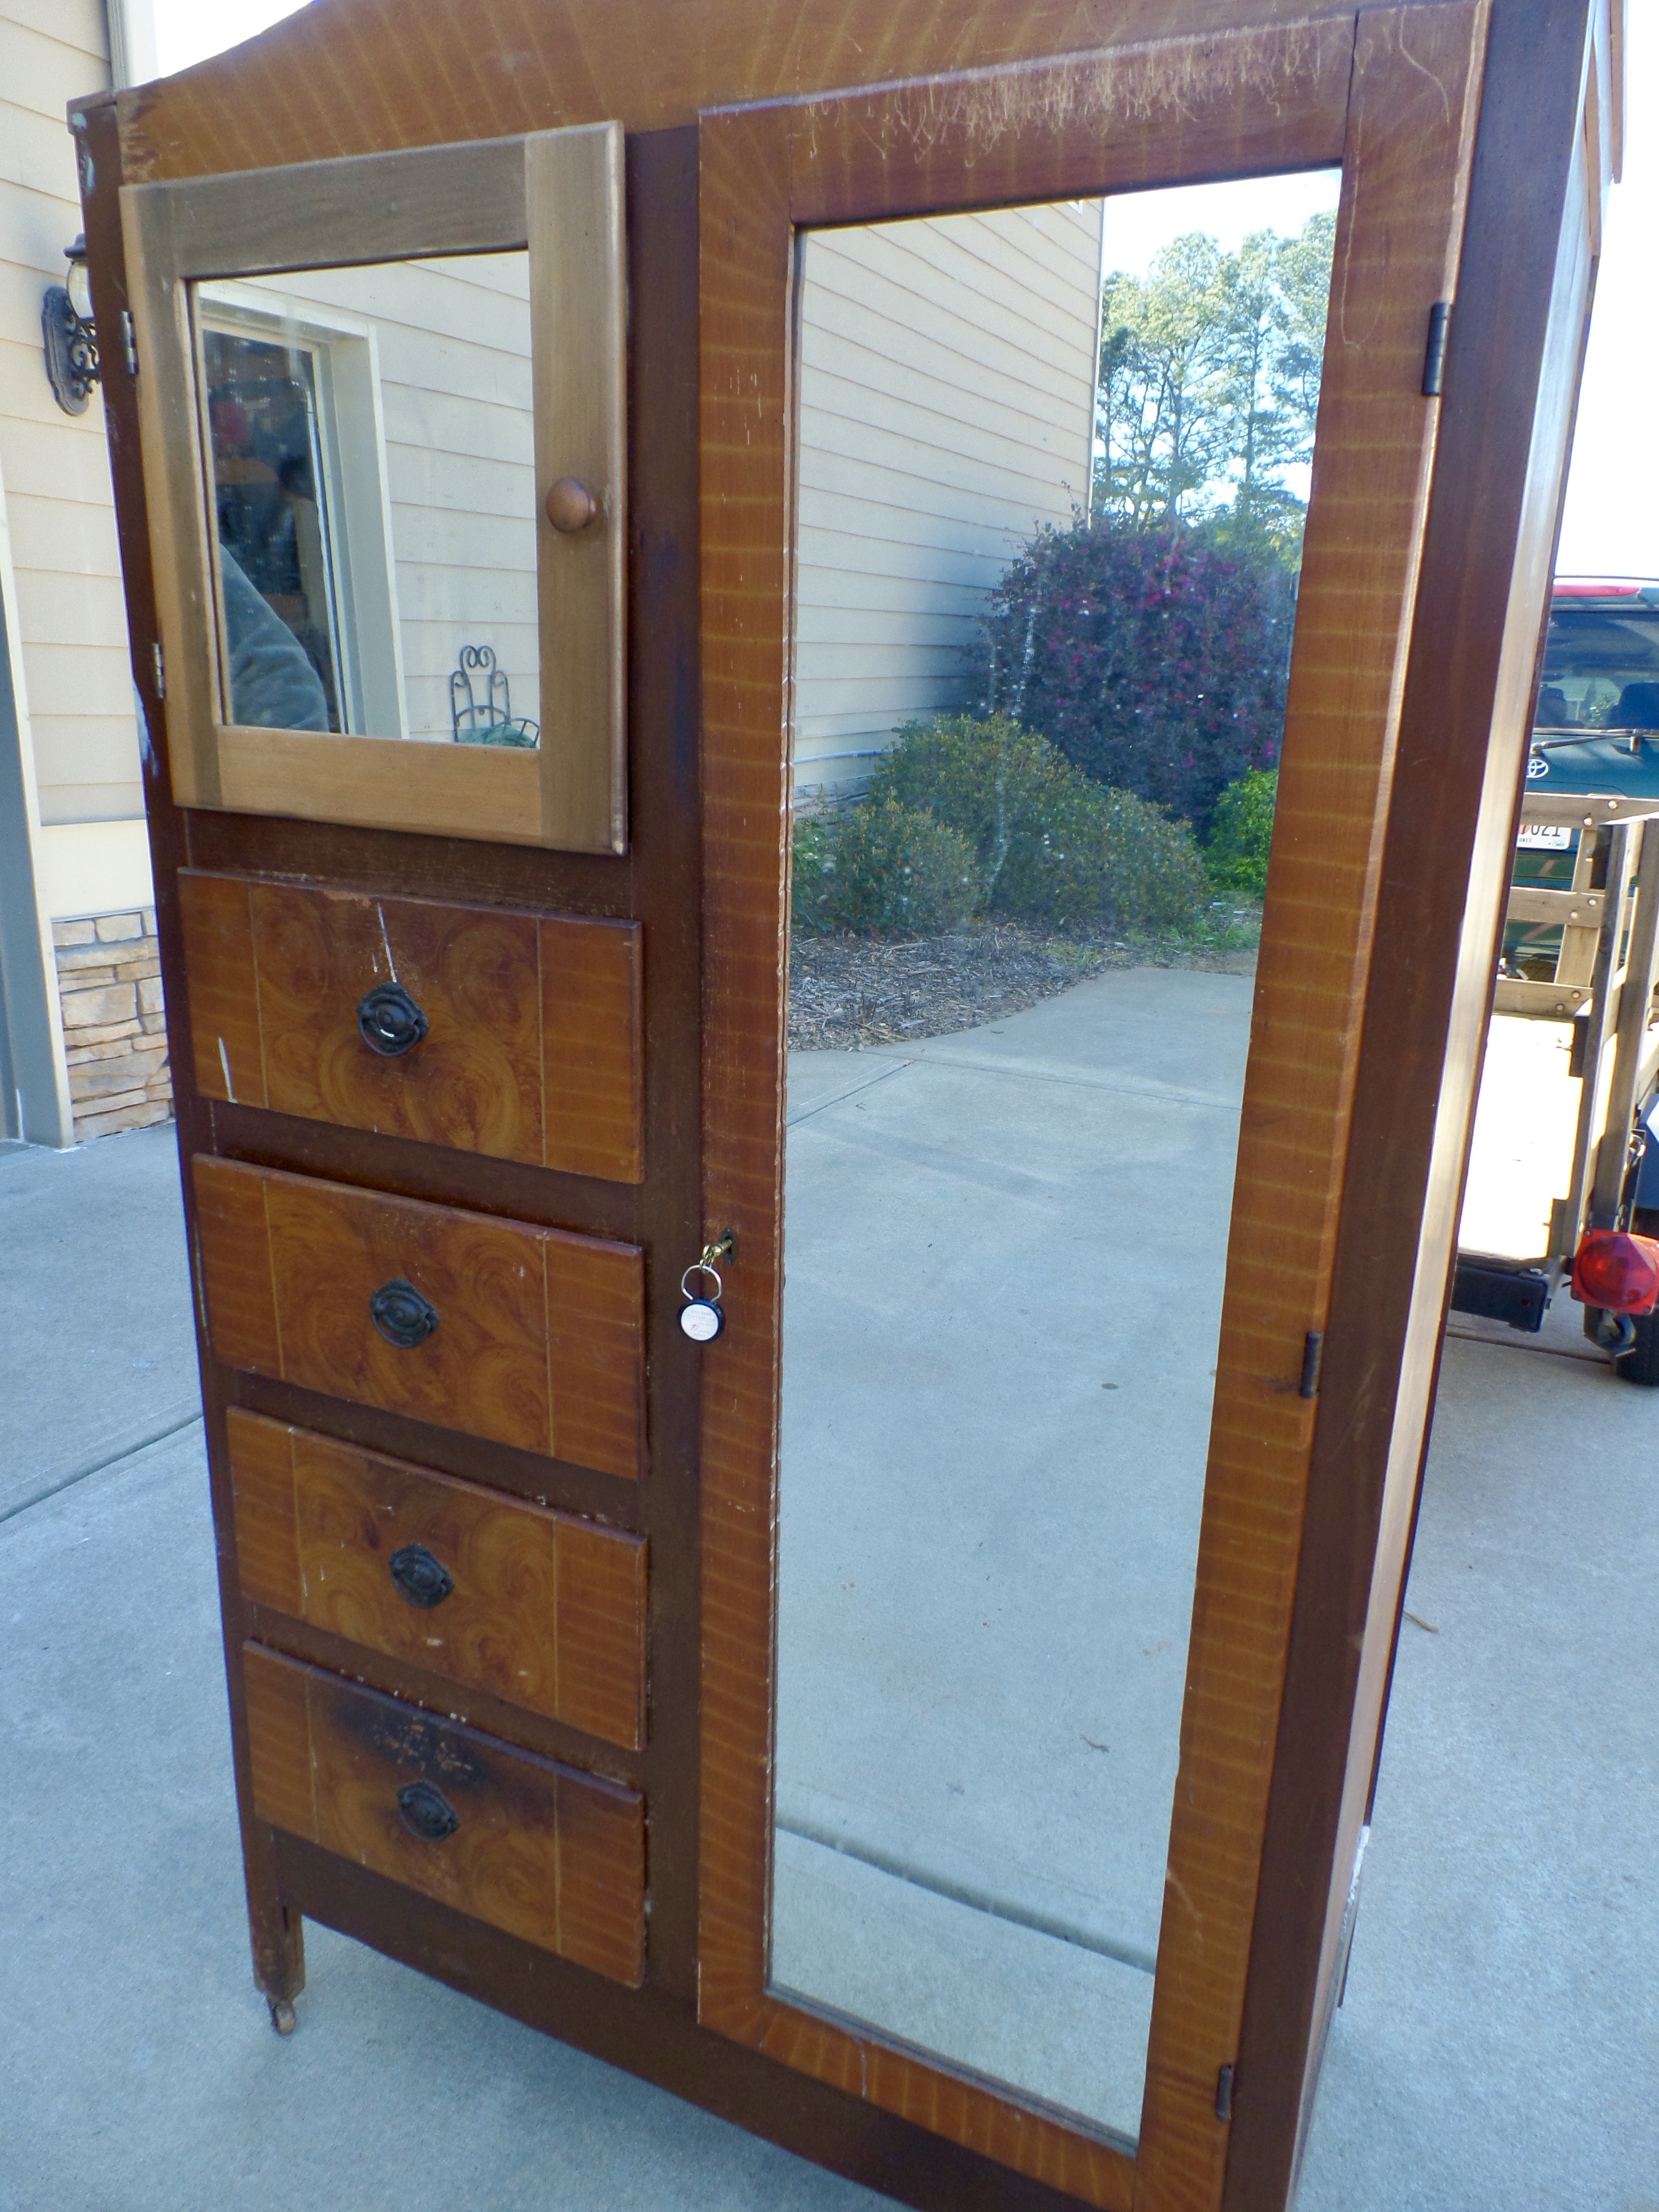
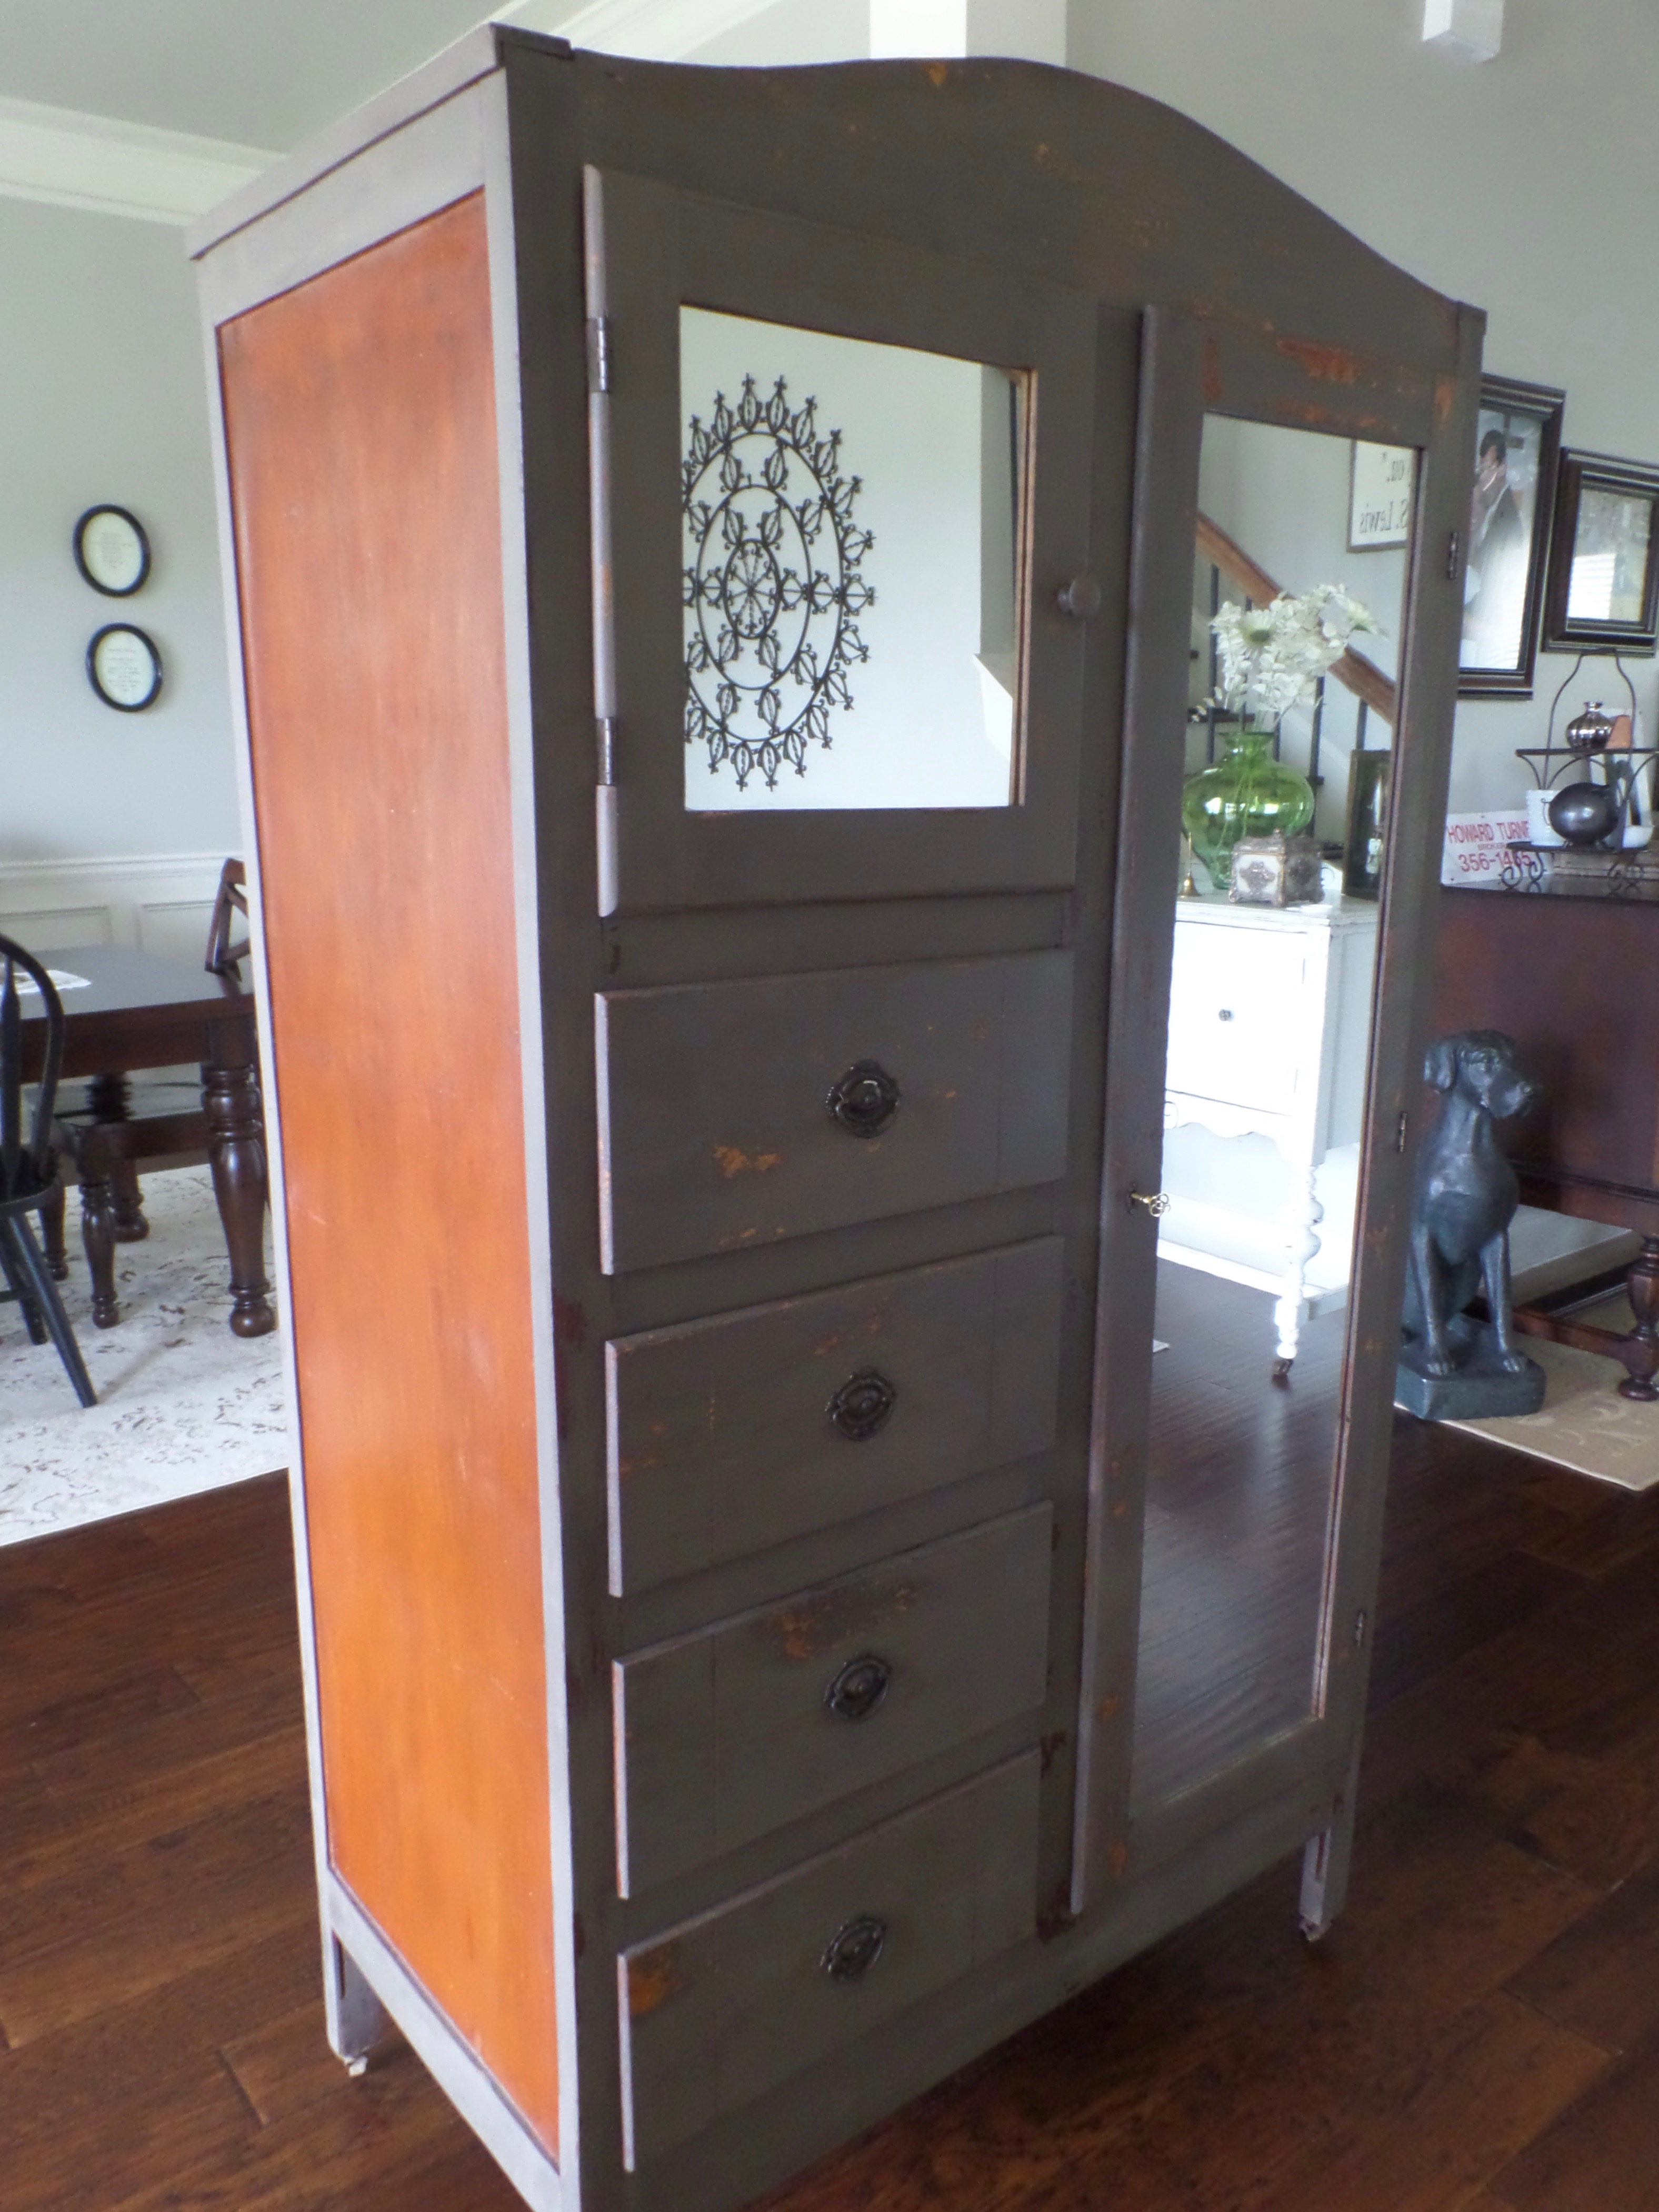
Recently, I came across an antique chiffarobe online and I knew it had amazing potential. It was quite a steal, but also needed a lot of work. However, it had good bones, the original hardware, and even the key! When my husband brought it home, I fell in love instantly. Old furniture just screams “buy me, paint me, give me a new home”. Well, at least that’s what I hear in my head.
This antique chiffarobe is my first attempt at using milk paint. Since some of the wood had been replaced over the years, this one had to be painted. It seemed to be a hodgepodge of different woods and finishes.
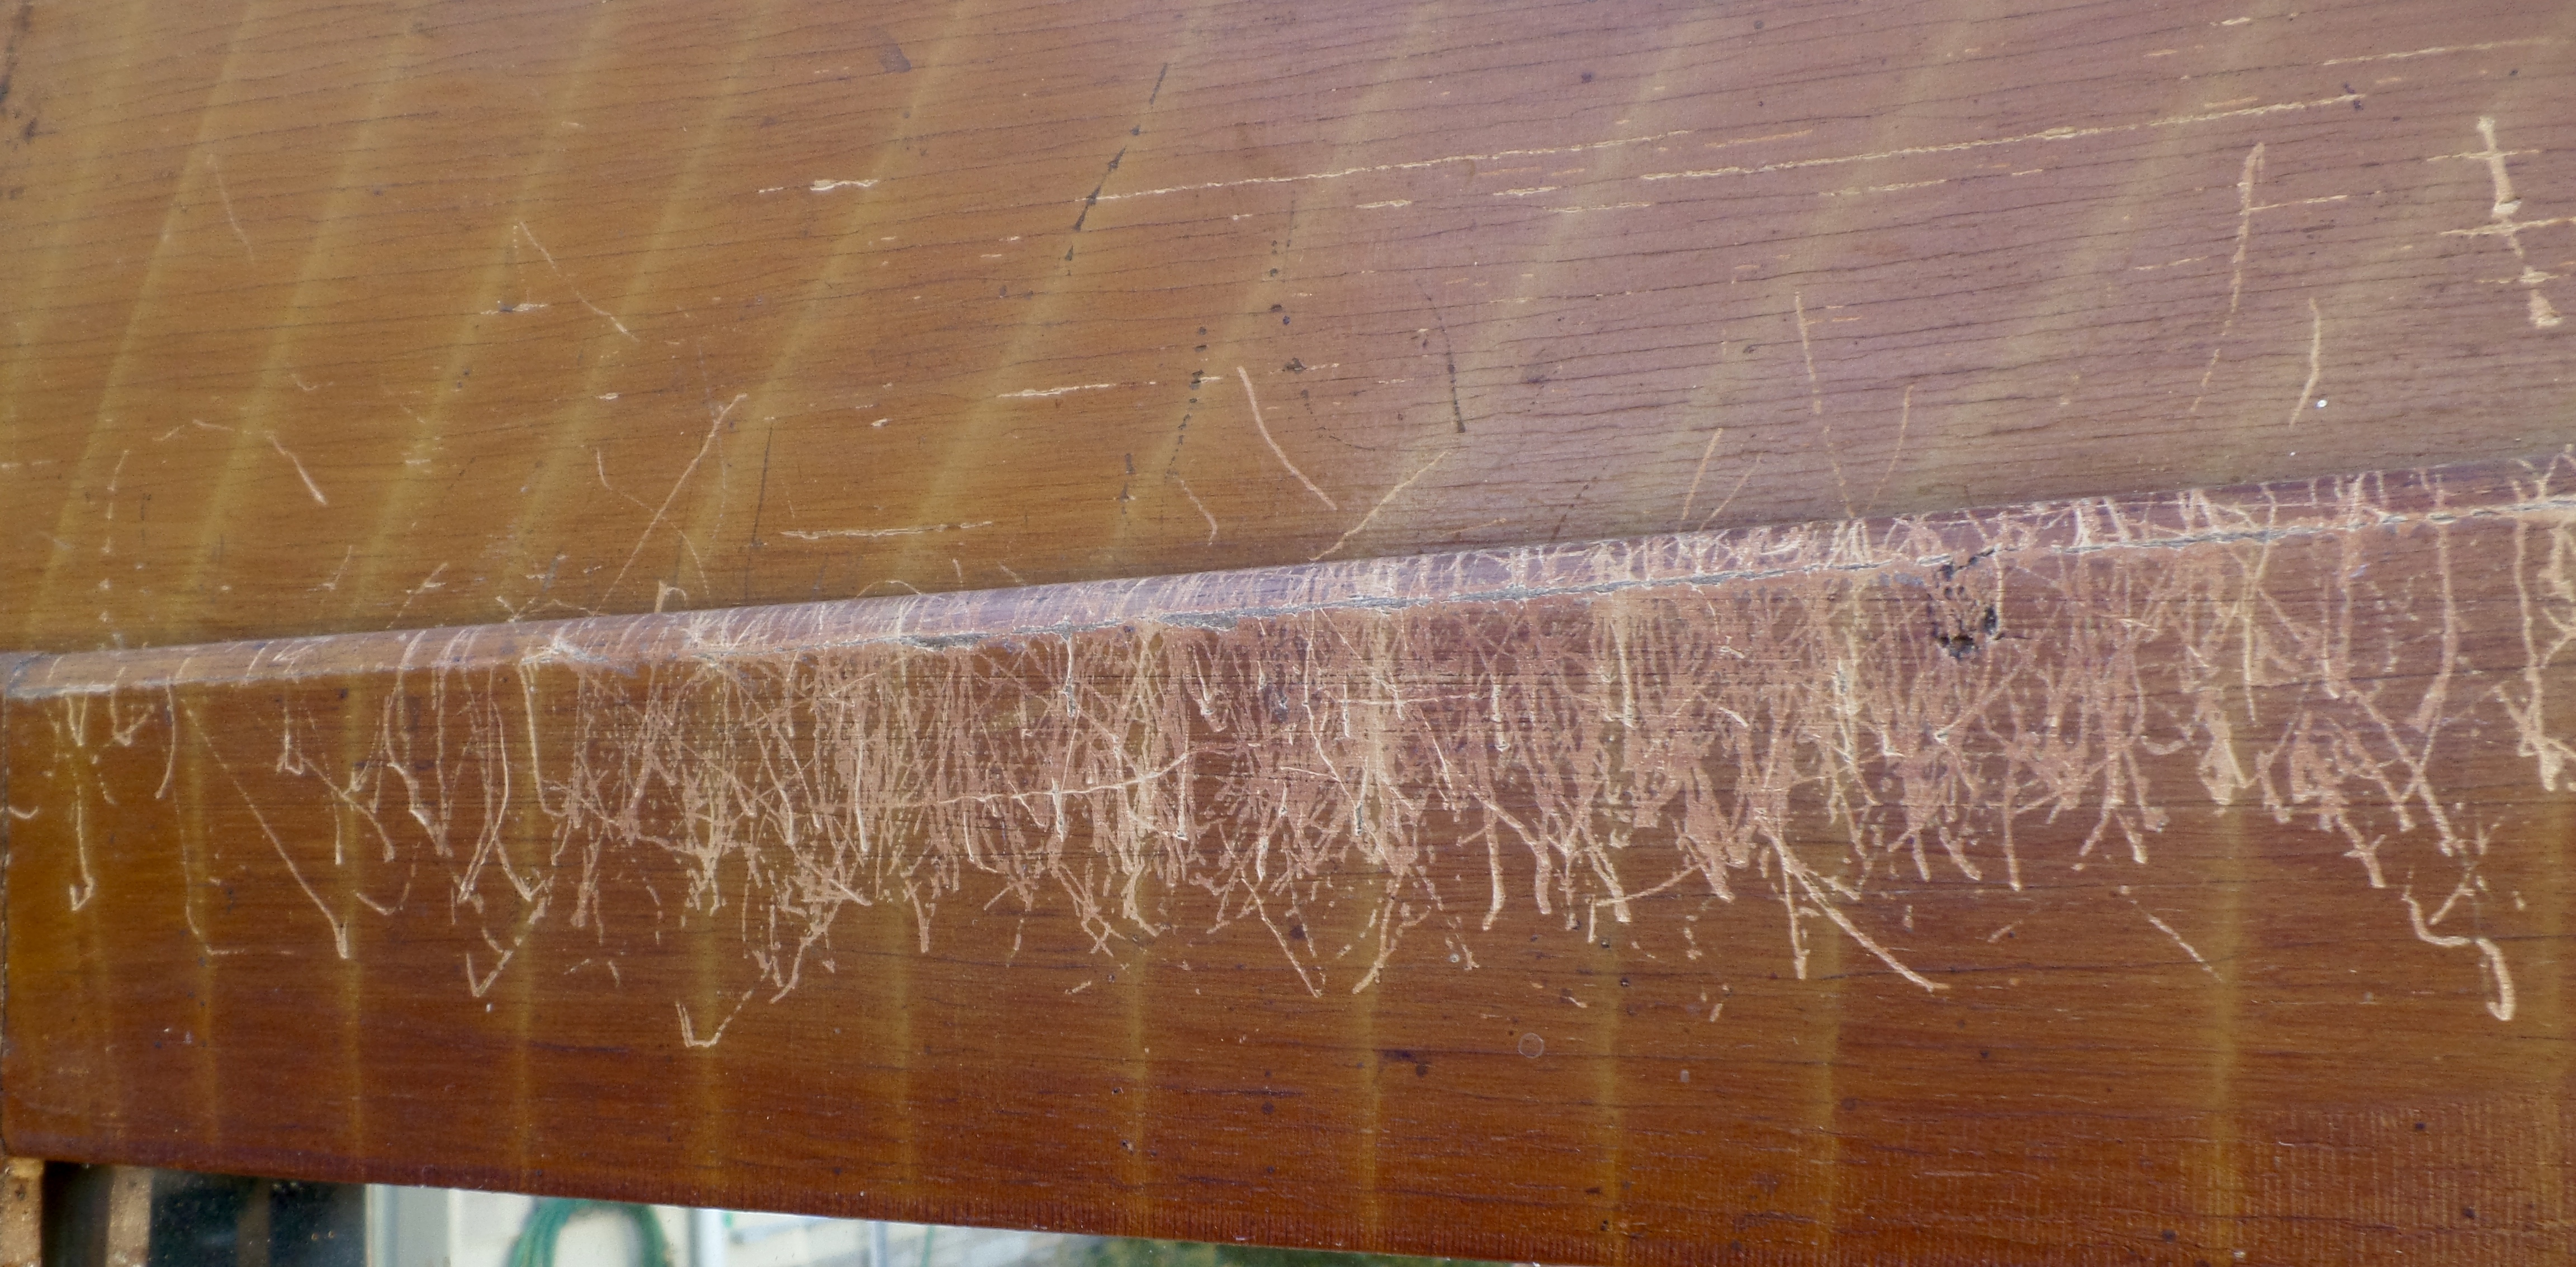
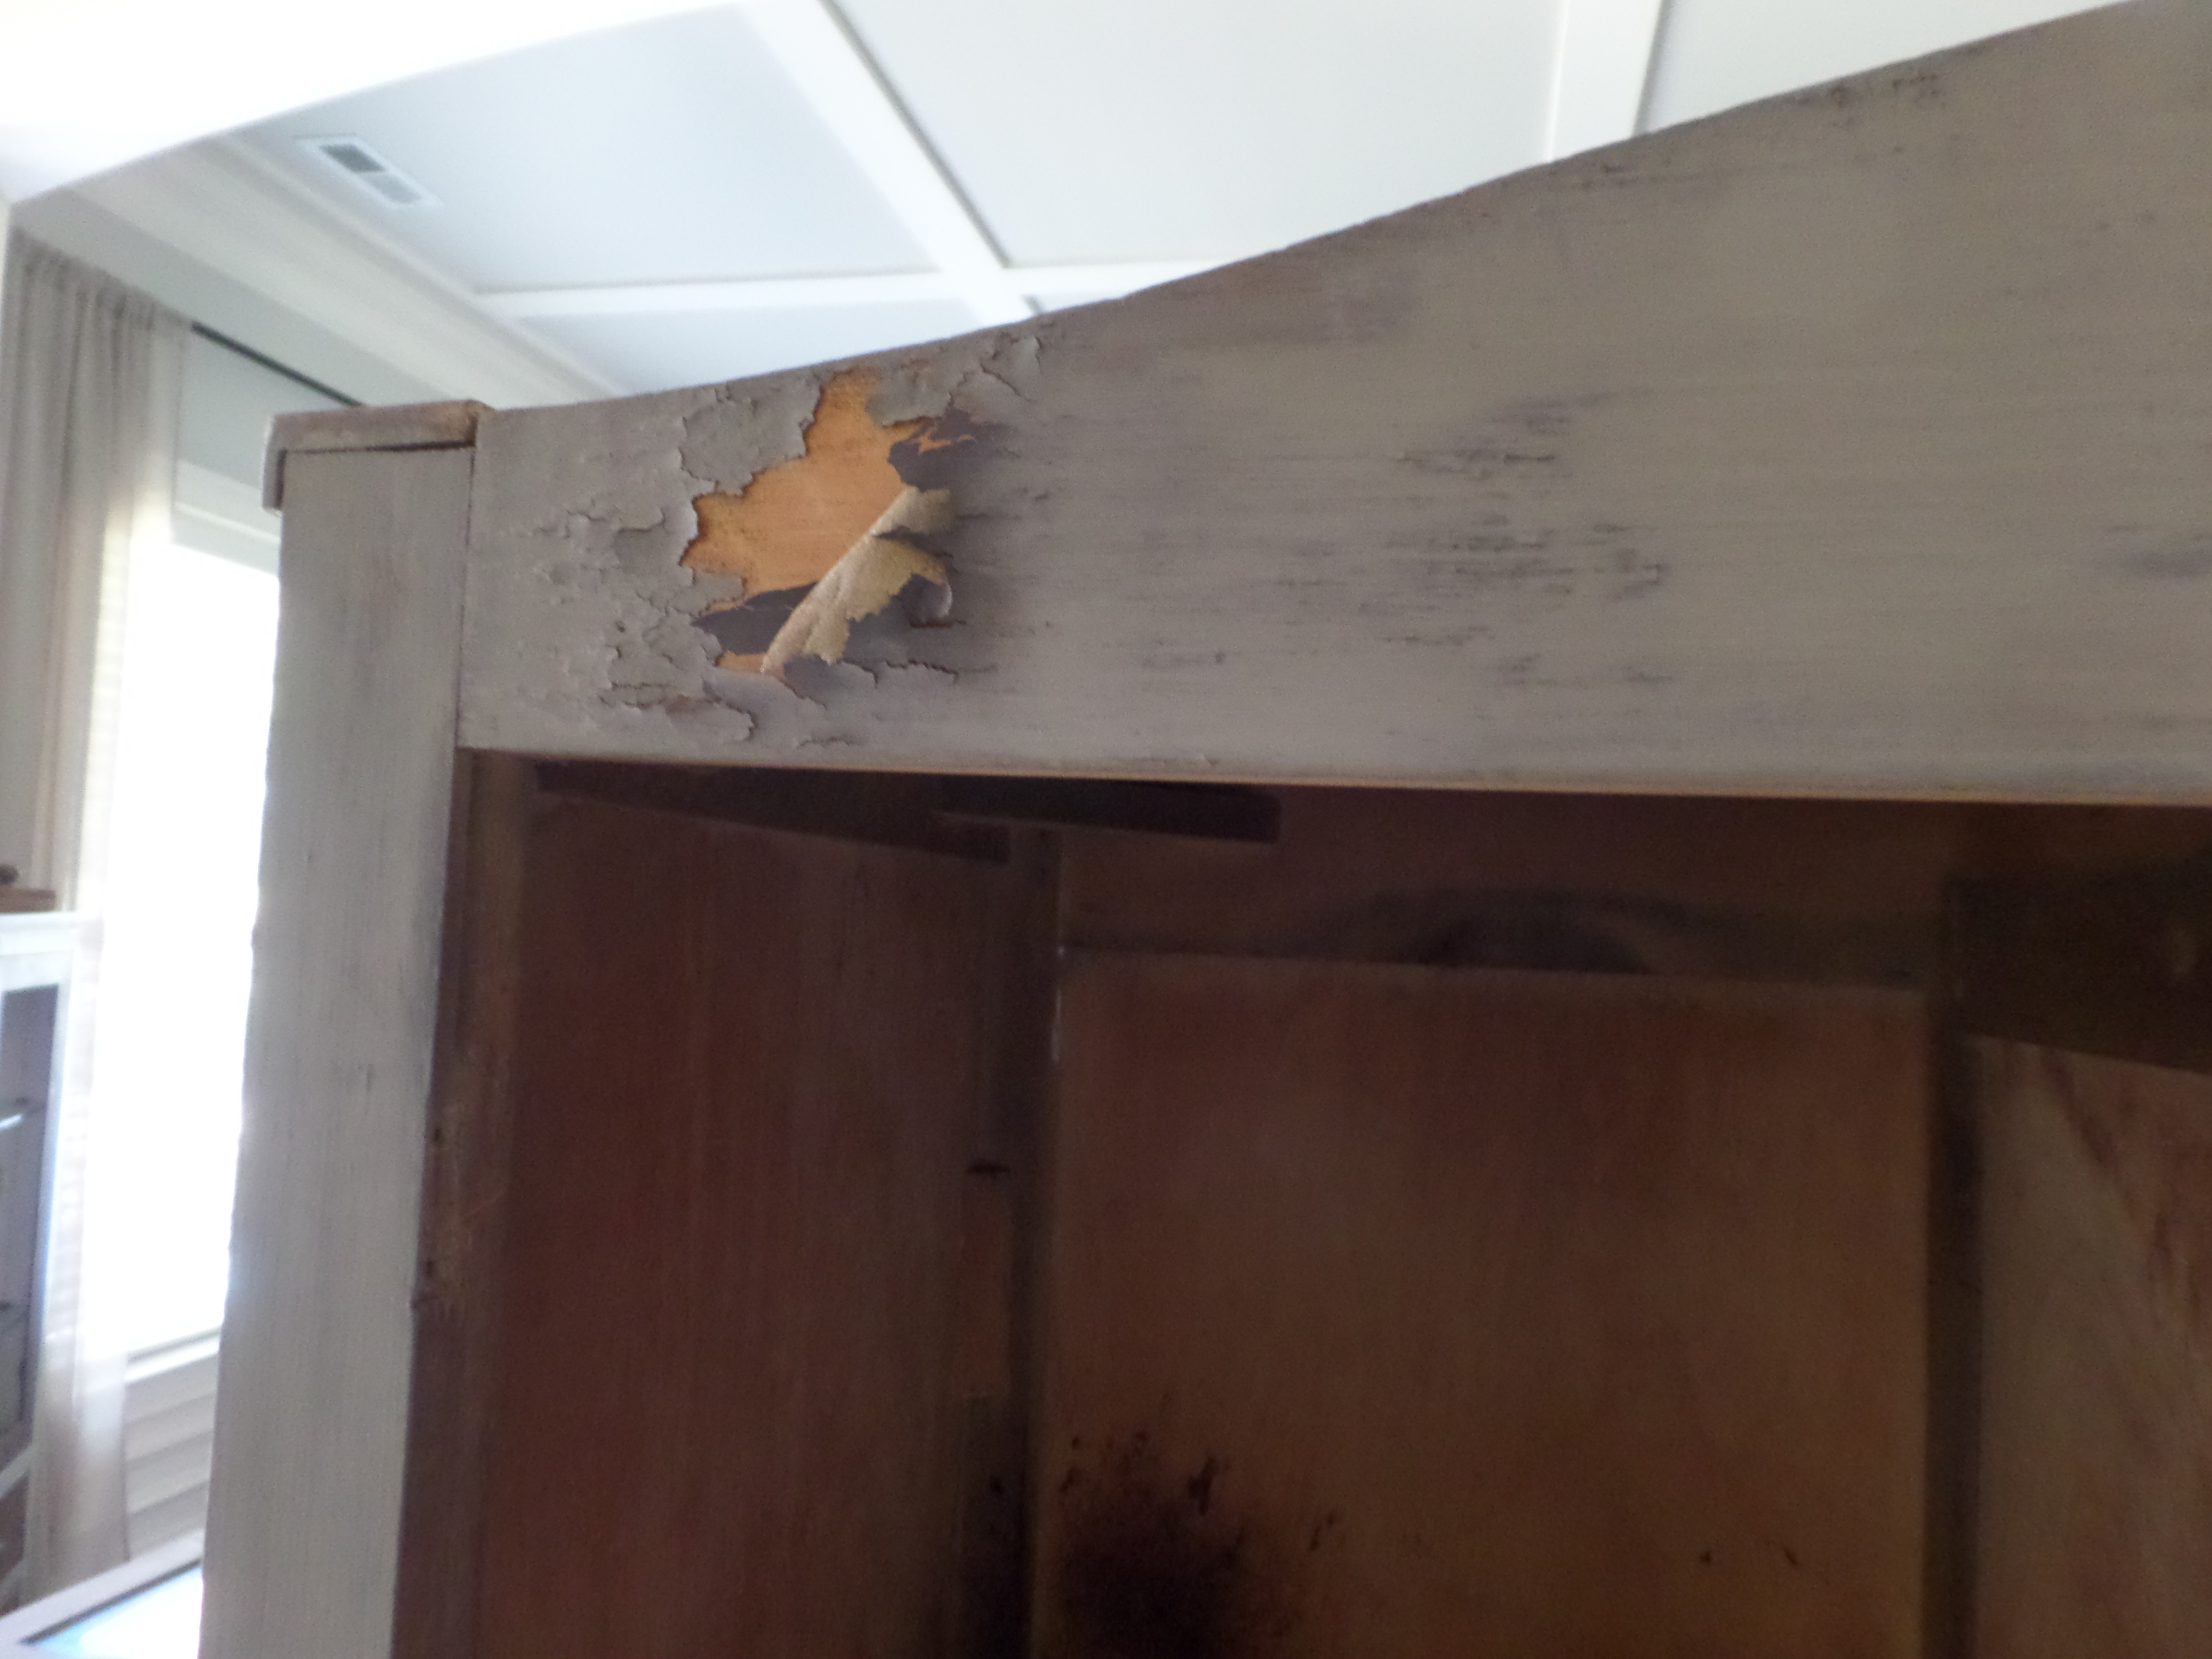
Also, there was some damage to the top where someone obviously used to park their wire hangers on the door – cue my inner Mommie Dearest when I imagine those wire hangers dragging across that wood!
Related Posts:
Handsome Black Dresser Makeover
Milk Paint Chiffarobe makeover
Prep Work
I started by removing all the hardware and giving her a good cleaning. Some of the drawers were a little damaged – one was even being held with duct tape! I found some old papers behind one of the drawers with information someone wrote about a church that was started, along with someone’s prescription for some eye drops!
Never know what you will find when you buy old stuff! I nailed/glued the drawers back together and moved along.
I sanded it lightly with my trusty sanding blocks (you can see my favorite furniture painting supplies here). Everything got a good wipe down with a clean cloth and I was ready to paint.
Painting
I’ve painted lots of furniture. I typically use latex paint because it’s so affordable and easily accessible. Plus, I know what to expect. However, I had some antique white on hand and painted one drawer front with that and knew instantly that this piece was not meant to be white.
It just didn’t give it any character in my eyes. One evening on my nightly Instagram stalking sessions, I ran across the most amazing piece painted with Old Barn Milk Paint. This was the inspiration piece I found from @finn_and_bo on Instagram:
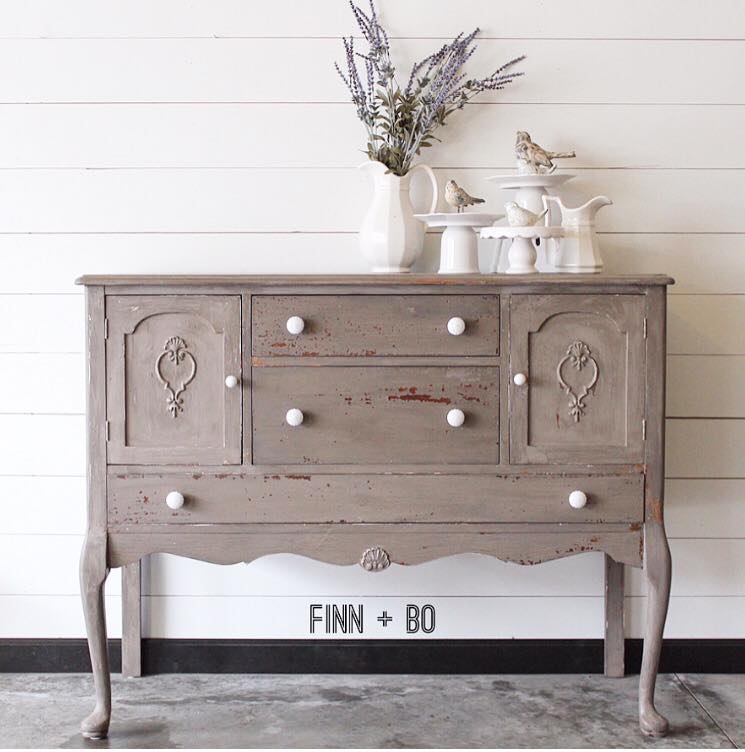
This got my wheels spinning. A. I’ve never painted anything that color and B. I’ve never used milk paint. I contacted @finn_and_bo with some questions on milk paint and Jen was so kind to answer with some helpful hints. From what I’ve gathered online and from Jen is that milk paint is slightly unpredictable and you just kinda have to go with it. So that’s what I did.
I ordered one of the starter kits from Old Barn Milk Paint in Pistol Annie, and figured here goes nothing. I’m not good at “here goes nothing”. I’m a planner, I like to know what’s coming. But hey, I am always open to learning.
Major Learning Curve Ahead
This was a test of my “control” nature. I followed the directions that were included in the paint. If you’ve never used milk paint before, it comes in a powder that you mix with water. The starter kit comes with a mixing container and a tiny whisk. I started with about 1/2 cup of powder and added warm water slowly. I mixed until I had a consistency that was similar to gravy.
However, I did add more water (warm water) because my first paint strokes were a little thick and tried to drag along the furniture. First coat goes on pretty easy and I wait patiently (total lies, there is nothing patient about me).

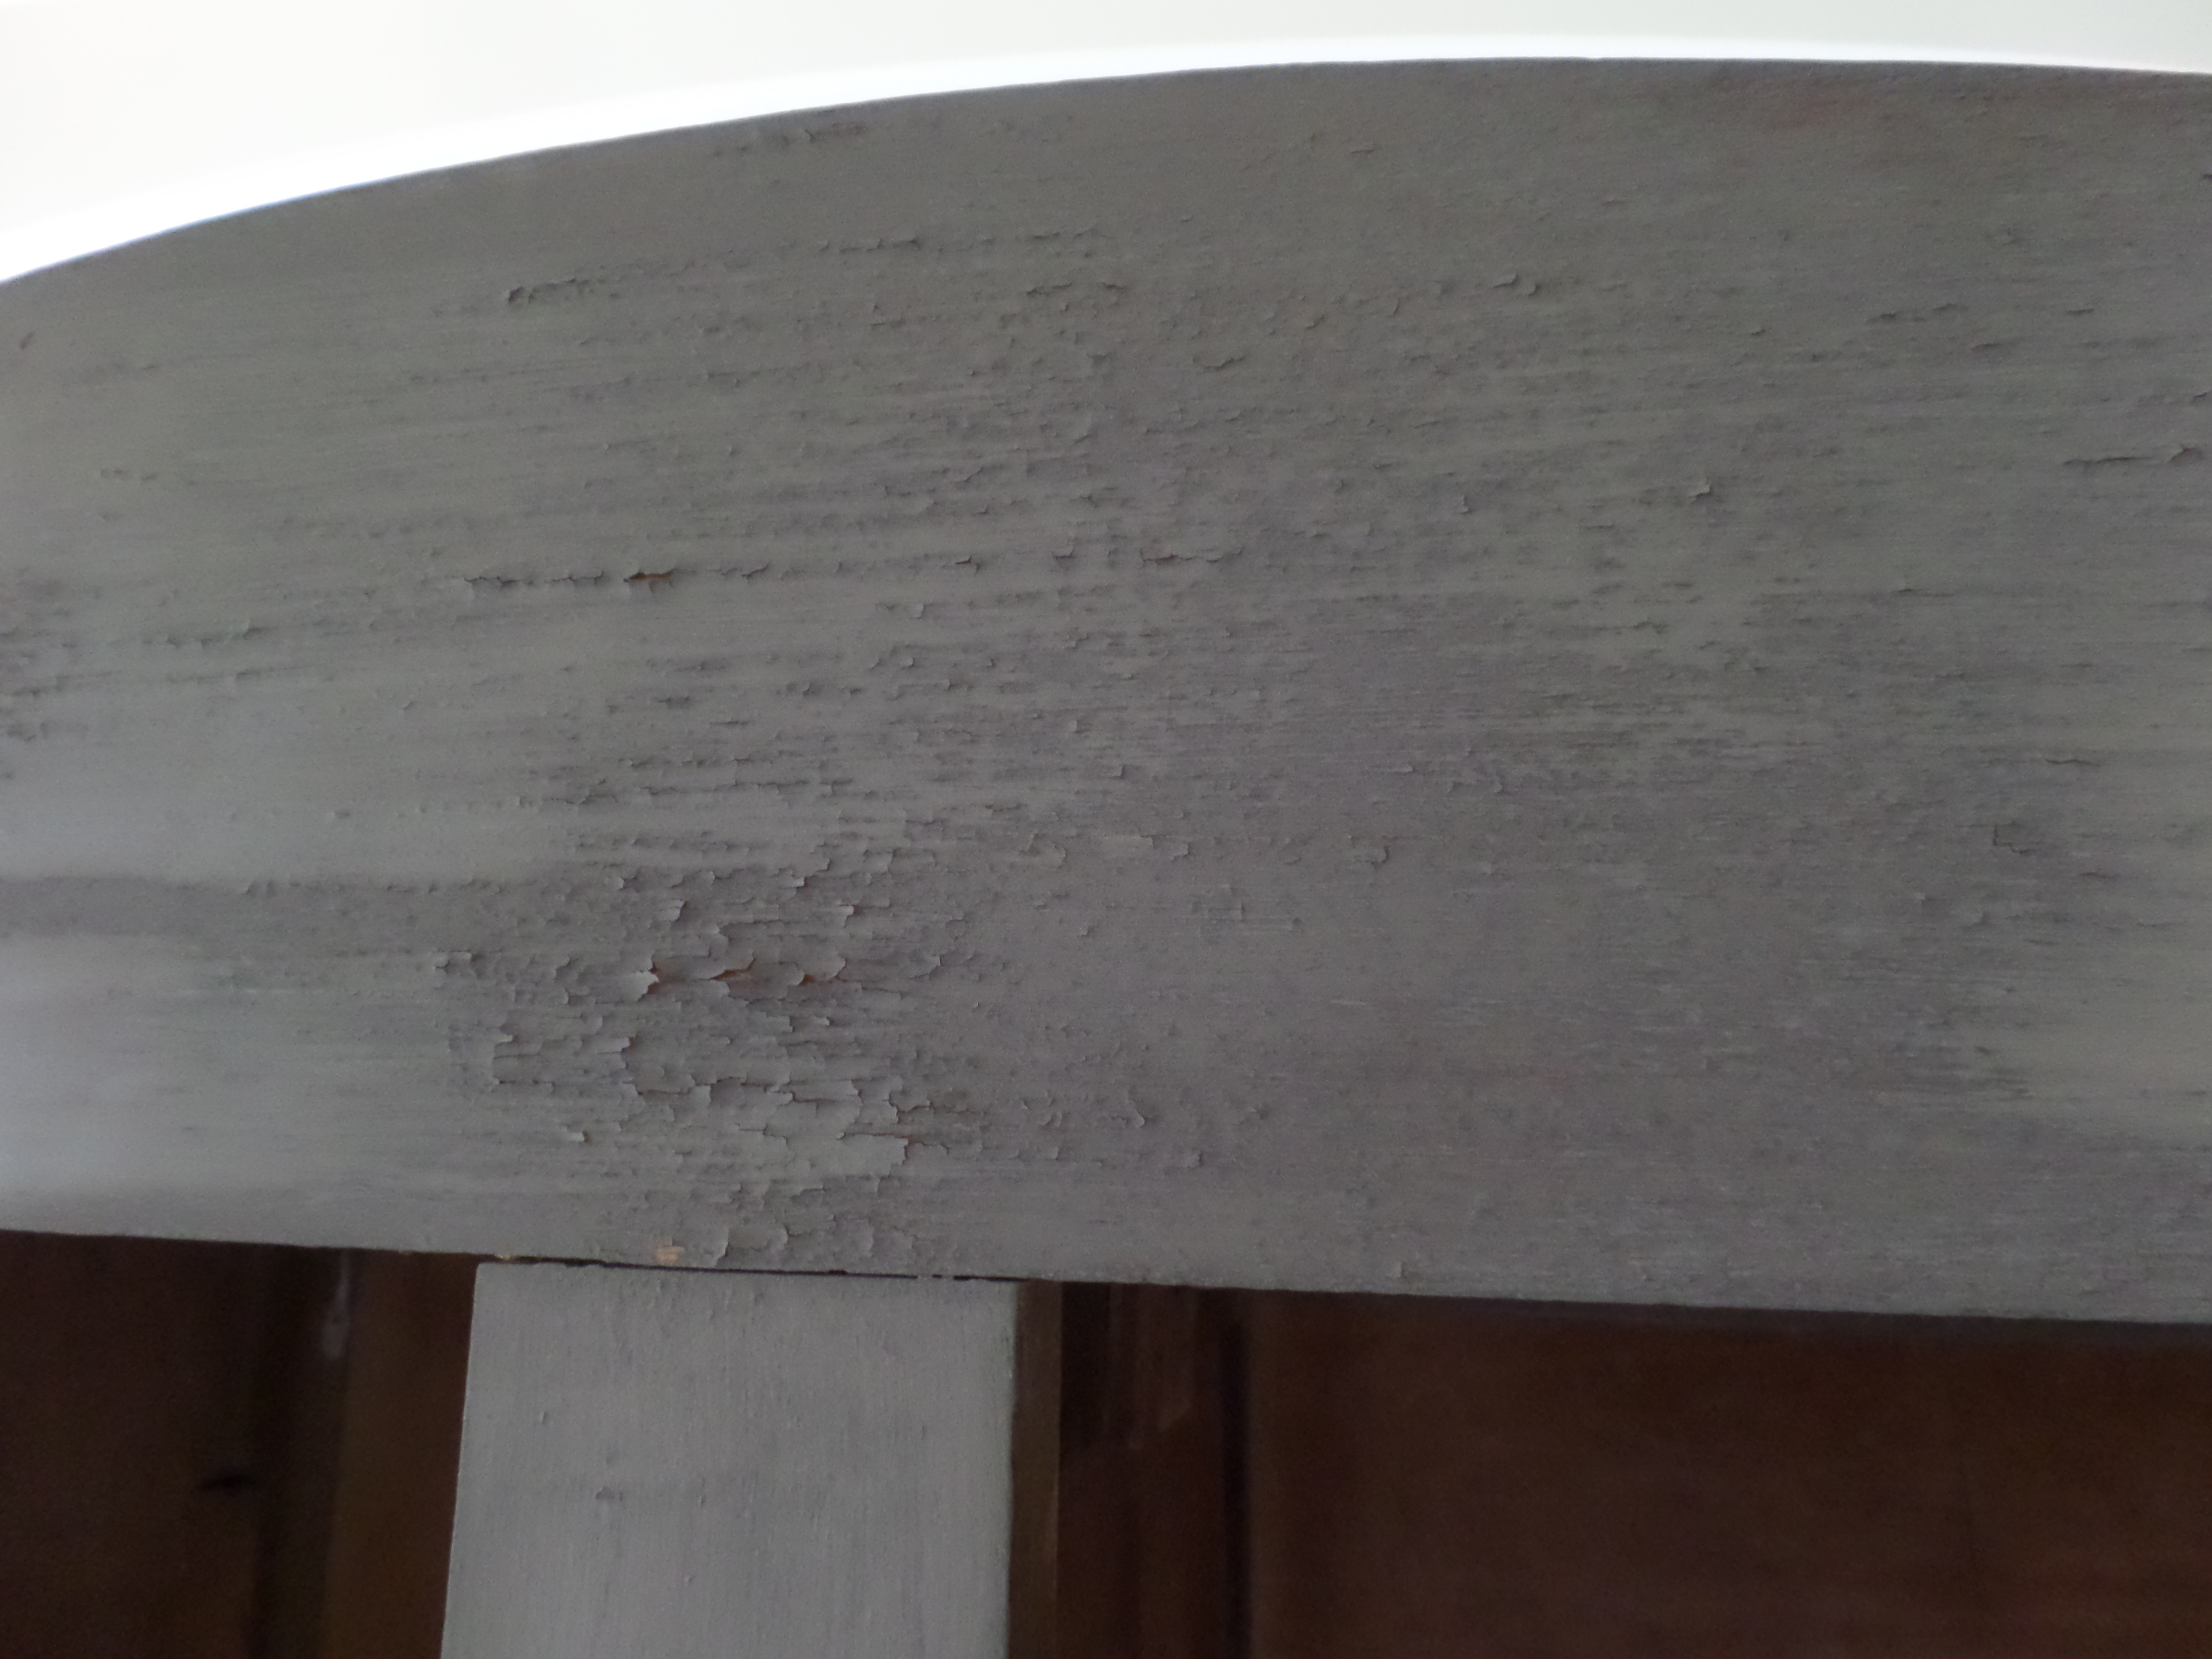
I come back to look and pretty much all the paint on one side of the door, 2 drawers, and a good portion of top was chipping off. Ummm – this is about the time I started to panic.
I immediately messaged my new found Instagram friend and she agreed I should sand it and add the bonding cream that came with the starter kit and repaint. Ok – quit freaking out and start sanding. In hindsight, I can tell the most paint chipped off where people would have normally put their hands on the furniture over the years.
So I sanded those spots again after brushing off most of the paint chips. I added equal parts of bonding cream to my paint and started over. Then I wait patiently again (yep – total lies again). I was stalking this thing like a hawk. Insert panic mode again. Where I repainted, it was darker. Much darker than before.
However, I decided to give it a day, let it dry completely, and then come back to it. And by the way, the dry time on milk paint is significantly less than latex. It was ready to recoat in about an 1 & 1/2 hours. After it was completely dry, I used a sanding block to distress a few spots and add to the “aging” process.
Finishing Steps
After the second coat, and adequate drying time, there was still a noticeable difference in the colors where I repainted with bonding cream. However, I decided I liked the variation. I think that’s the beauty of milk paint – it’s going to be varied and apparently no two times turn out the same.
It has a very flat finish before any sealers, but it didn’t feel as chalky a chalk paint. I used the Old Barn Milk Paint Oil and Wax:
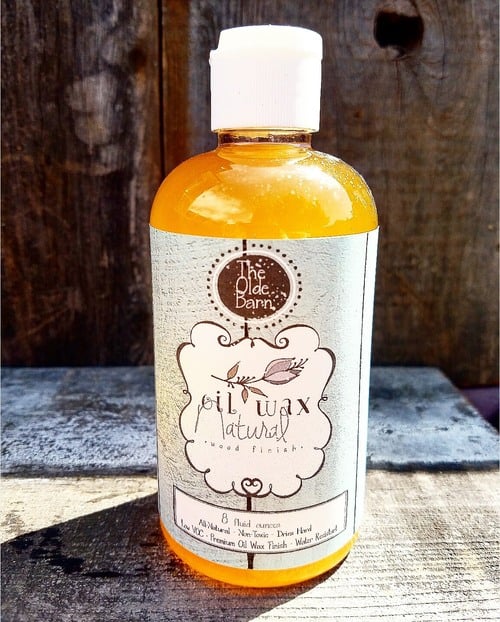
I applied it following the directions on the bottle and I used a clean small paint brush, but you can use a roller or foam brush. Then I waited 15 minutes or so and then used a clean cloth to wipe the excess. I use old t-shirts that are lint free for this step. Works like a charm.
I have used traditional furniture wax before and never loved the result. I’m sure it was an operator error, but for ease of use, the Old Barn Milk Paint Oil and Wax is my new fave. You don’t buff like traditional furniture waxes. Wipe on, wipe off (cue your inner Karate Kid while you say that).

And poof – just like that, I was in love. The oil and wax blend darkened the surfaces a bit and made everything look like they were friends instead of the dark side against the light side. It still had a few bits of paint that were chipping, but again, I just let it go and decided to embrace the chippiness.
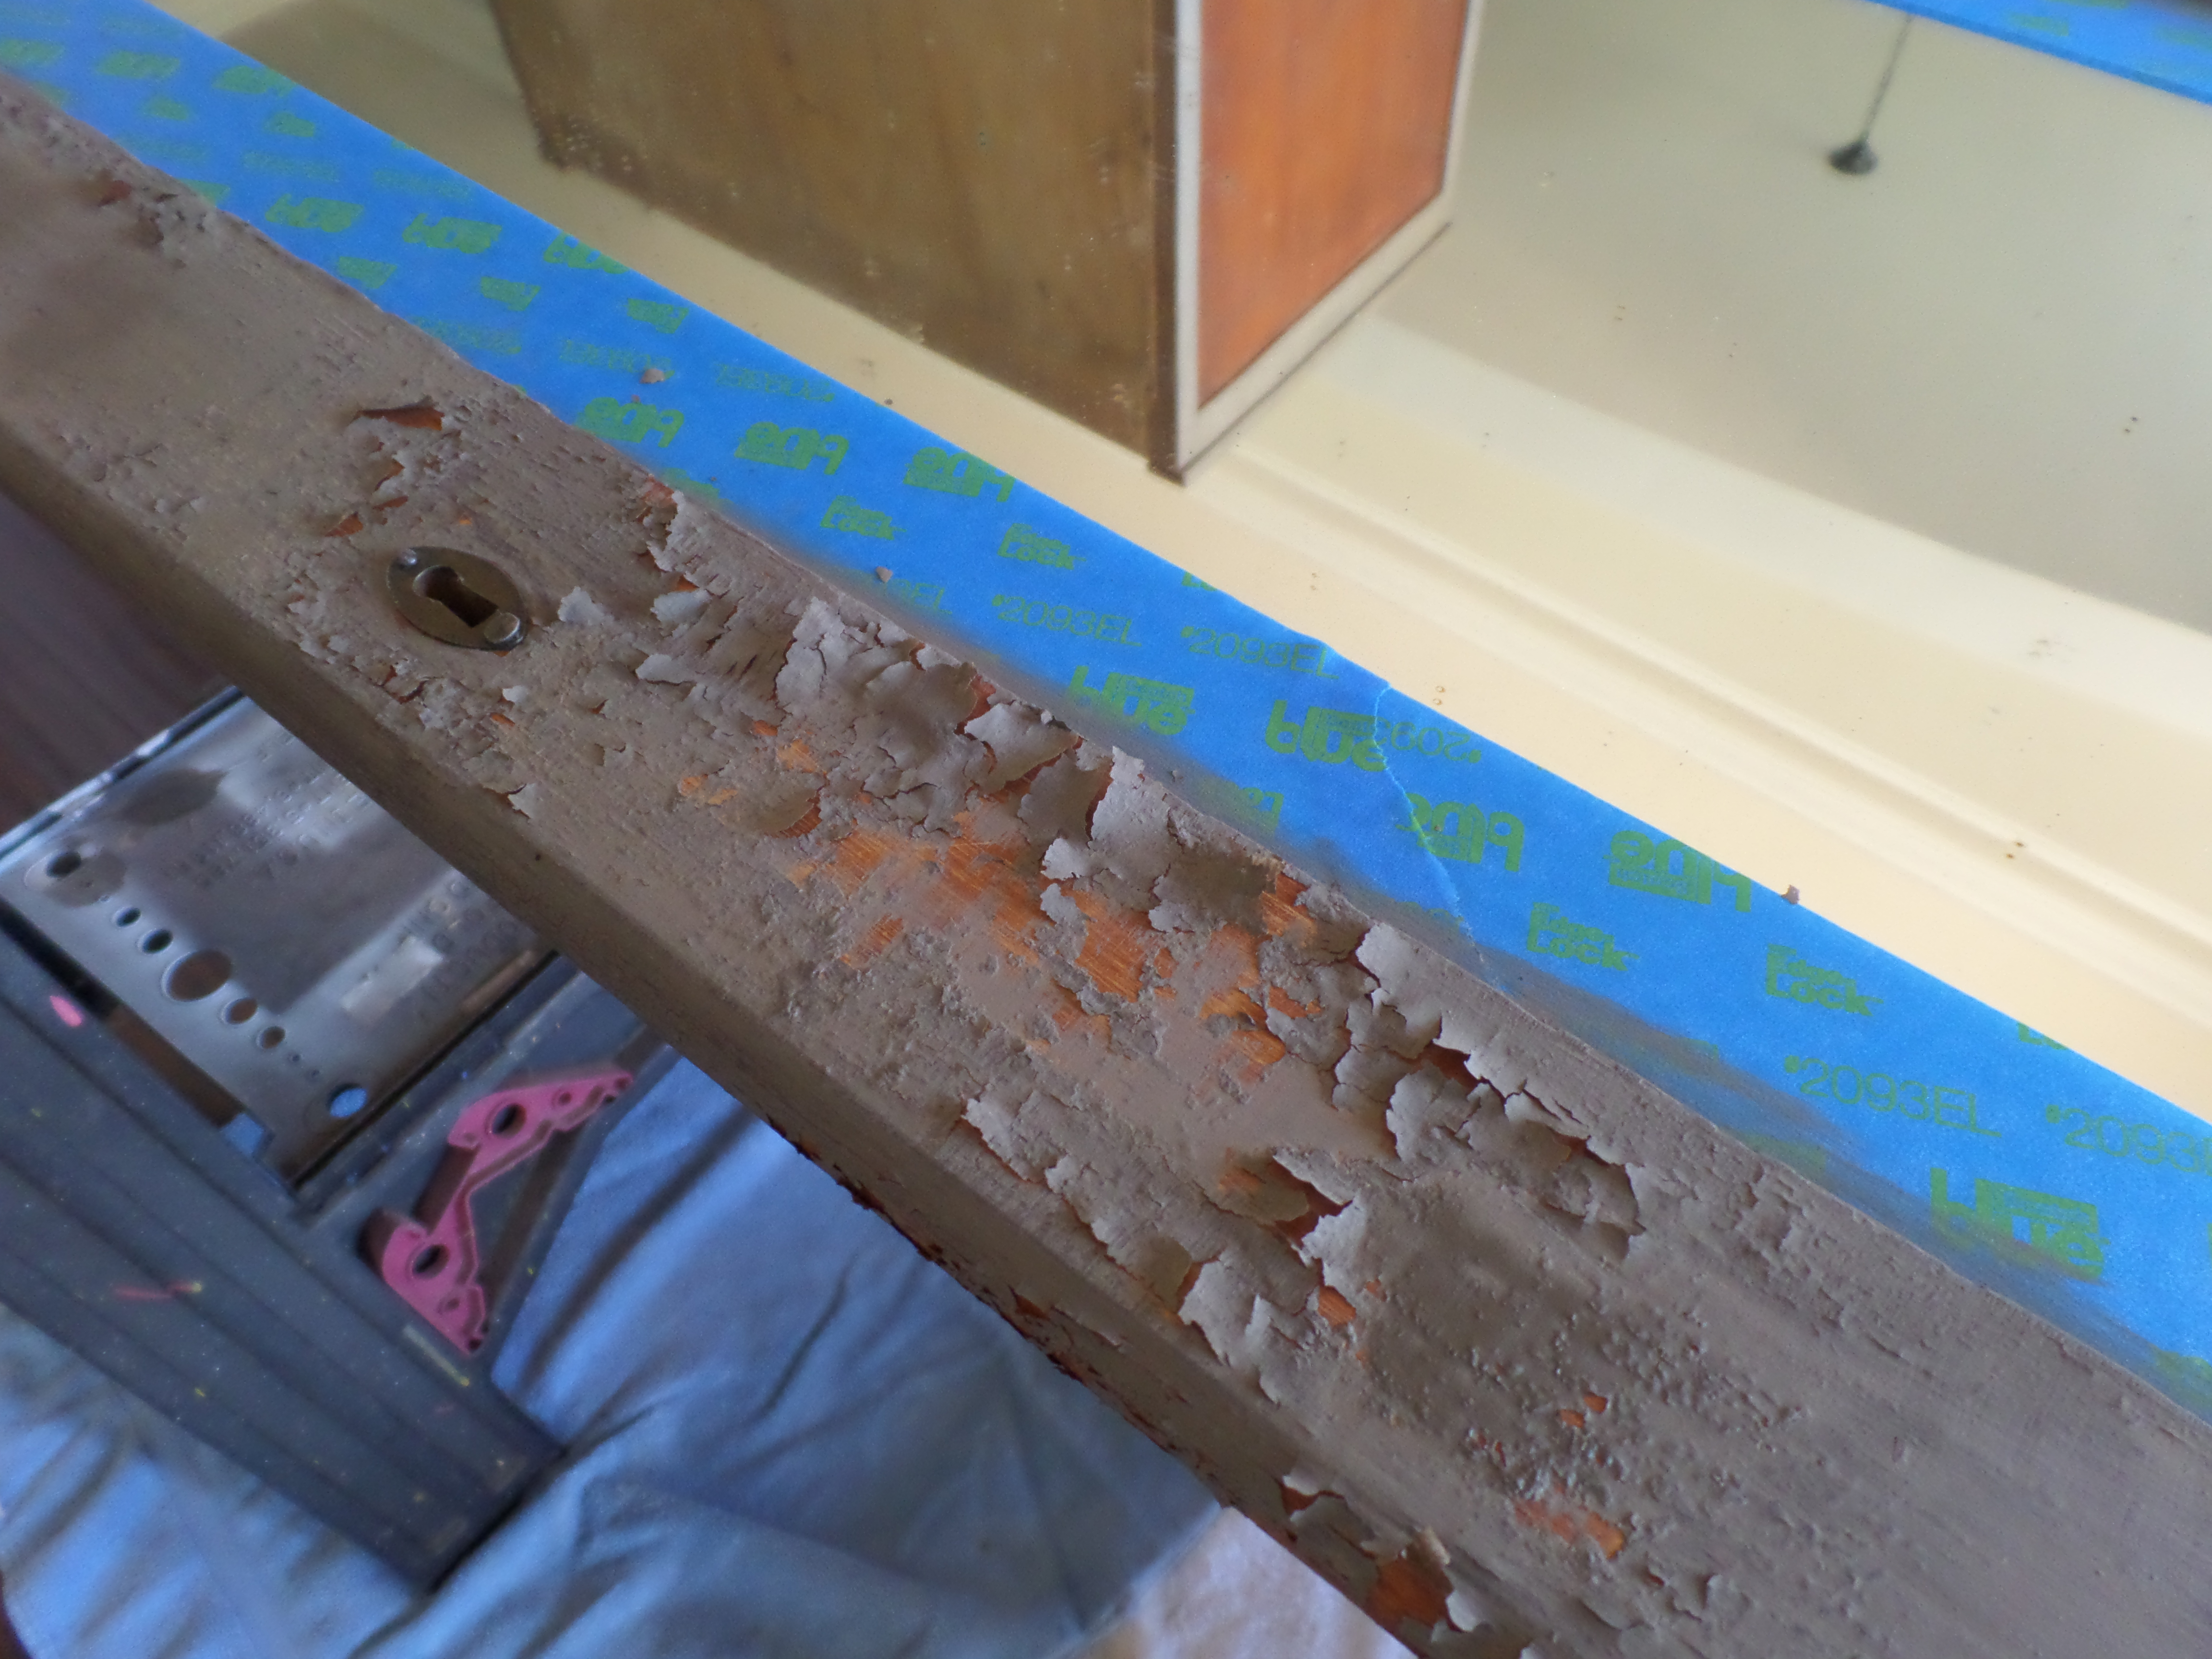
For the sides, I decided to keep the natural wood. I love old wood and didn’t mind keeping some of this piece natural. It was pretty dry and beat up though. One of my all time favorite products to use for old wood is Restor-A-Finish. I use the Dark Walnut finish and it is amazing. I use a lint free cloth and just wipe it on like stain. You can see the difference in the photo below – the top area has the Restor-A-Finish and the bottom does not:
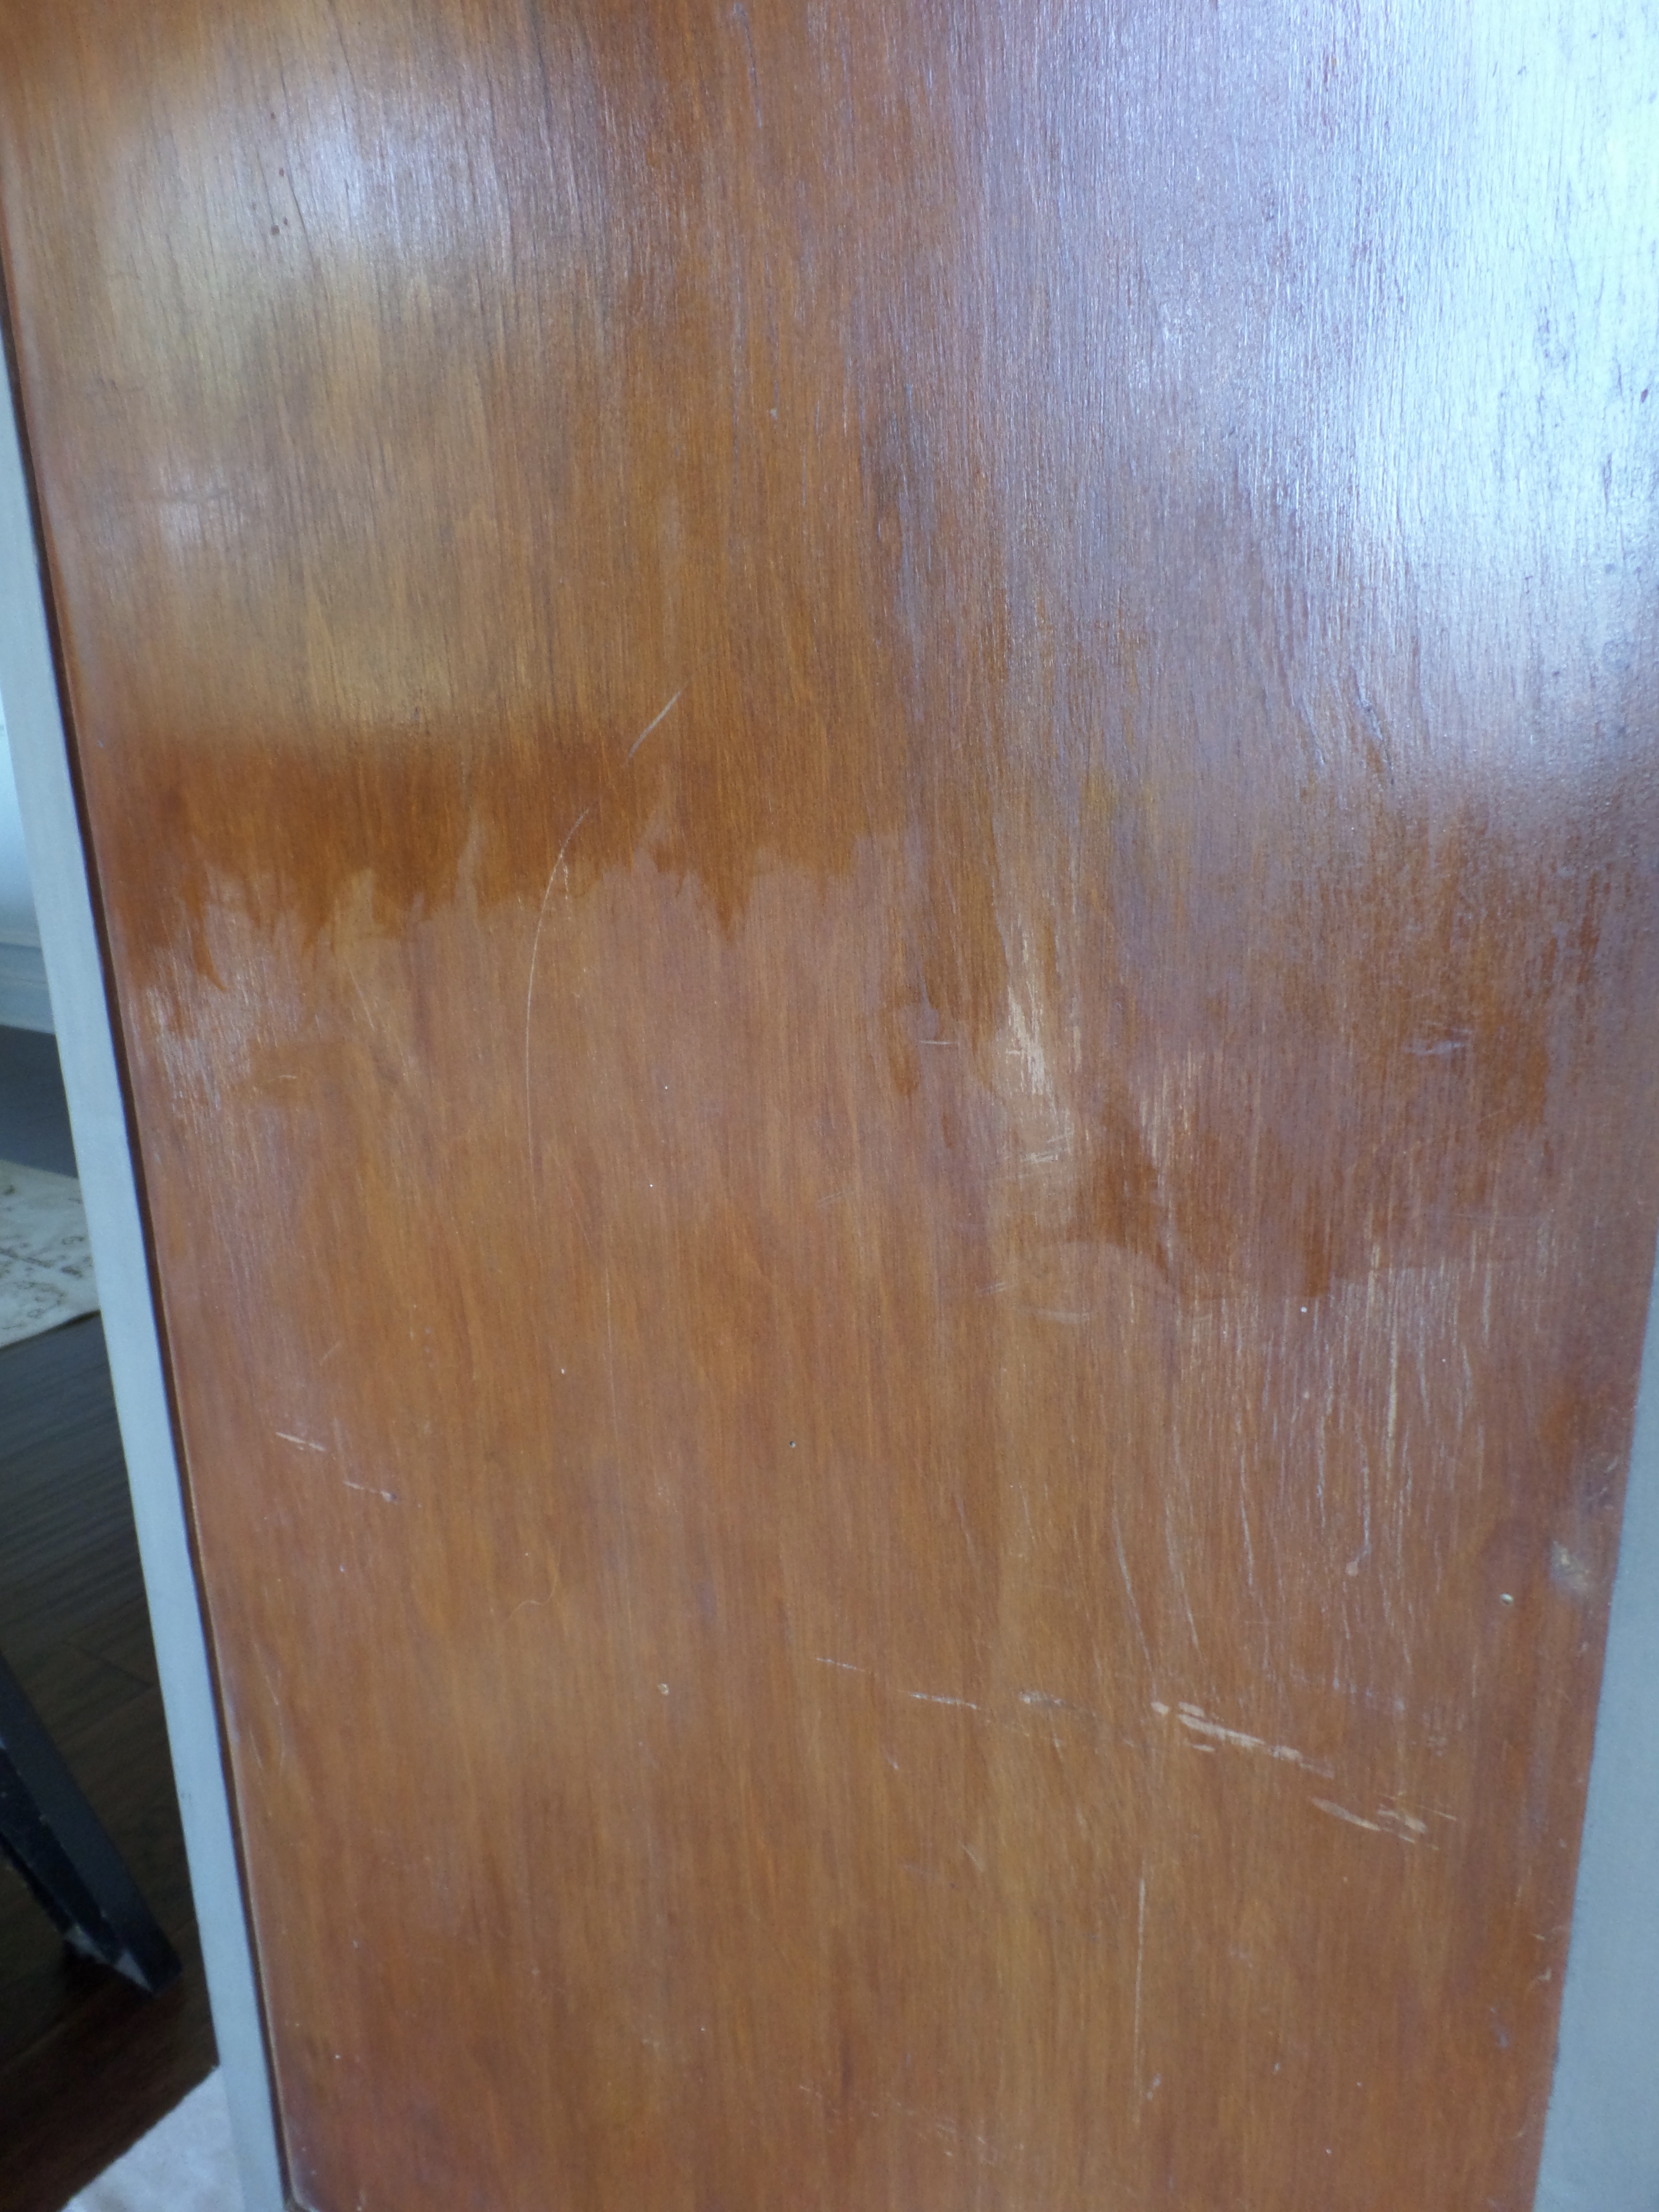
It won’t completely transform it, but it does a pretty good job. I let that one dry and added a second coat to each side. This stuff works wonders when you want to preserve the character of the wood, but just make it shine again. I’ve had the same bottle for over a year – it goes a long way!
Done!
I put the doors back on and added the hardware. I use the original hardware when possible – just clean them up a bit and you’re good to go. One thing I really struggled with on this piece was the variation of wood tones.
The original wood was dark and at some point, someone had replaced some with lighter wood. I was concerned because when the chipping festivities started, it was very uneven – dark wood exposed on some places and lighter wood on others.
But, after the wax was applied, I loved it. It isn’t supposed to look perfect. This chiffarobe is old and worn and the milk paint helps to highlight its beauty.
When my hubs saw it all put together, his words were “I think it looks great, looks like s&%*, like it has been sitting in a barn for 50 years”.
Mission accomplished. It’s supposed to look old and worn. Now, I’m in love with milk paint. I can’t wait to try something else! If you’re thinking of trying milk paint, here are some tips I would keep in mind:
Tips
- I wouldn’t start your milk paint career with a family heirloom unless you are positively a “go with the flow” kind of person. If you are used to predictability and will be heartbroken if you don’t get the exact results you are going for, don’t start with an heirloom.
- Find a test piece if you have more patience than me. I will say that milk paint is a little pricier than latex, so if you’re going to use a test piece, pick something small.
- Be prepared for variations. From what I’ve learned, sometimes you get a ton of chipping and sometimes not. If you are not going for a chippy look, sand your piece well and use the bonding cream from the beginning. You will add it to the first coat of paint, but not the second coat.
- Buy the oil/wax products. This makes a huge difference in the feel of the paint and it will protect the surface leaving a durable finish.
- One bag of paint goes a long way. I didn’t use quite half of the bag that came with the starter kit and this chiffarobe had a fairly large area to paint. If you are doing a large dresser, it may take a bit more.
- Mix the paint according to the directions and let it sit for about 10 minutes to get the air bubbles out. Mix frequently while painting also. If it’s too thick, add small amounts of water until you get it right. This is trial and error – one time I mixed and it was too thick, the next too thin. I’m sure this will come with practice. If your brush is dragging on the piece, it’s too thick and you need to add some water. If it’s too runny, add some paint or you will have drips.
Overall, I’m pleased with how this piece turned out. Again – don’t pass on something just because it needs work and don’t be afraid to get out there and try something new. I was nervous to use milk paint for the first time, but now I think I’m hooked! Happy Painting!

Michelle Proctor
Monday 9th of March 2020
Can you tell me where to buy pistol Annie milk paint? I’ve looked everywhere on the internet. Please help!
griffore
Monday 29th of May 2017
What a beautiful makeover!!! I cannot wait to try milk paint... Thanks so much for the inspiration!
Melissa
Monday 29th of May 2017
Thank you! It's a learning curve from what I'm used to but I love it! Can't wait to see what you do with your first try with milk paint!
Brenda Mueller
Saturday 22nd of April 2017
Very pretty! The first time I ever heard of a chiffarobe was in "To Kill a Mockingbird."
Melissa
Saturday 22nd of April 2017
Thanks so much! And that's funny you mention "To Kill a Mockingbird"! There are so many different spellings for chiffarobe and I saw that book mentioned several times when trying to figure out the one to use!
Mihaela Echols
Saturday 22nd of April 2017
wow I have so much respect for people who remodel furniture. I do not have the patience.
Melissa
Saturday 22nd of April 2017
Thank you so much! And I'll admit, it definitely tests my patience frequently!
halzitoon
Tuesday 18th of April 2017
I have yet to try milk paint so thank you for this tutorial. I am getting ready to paint a little dry sink type thing that I found on the curb...this may be the answer! Thank you for sharing, a pleasure to read as usual!
Melissa
Tuesday 18th of April 2017
I appreciate your kind words! Thanks for following along and I bet your dry sink will turn out amazing. Sounds like the perfect piece for milk paint. And you found it on the curb!! Lucky day for sure. Let me know how it turns out! I'd love to see.