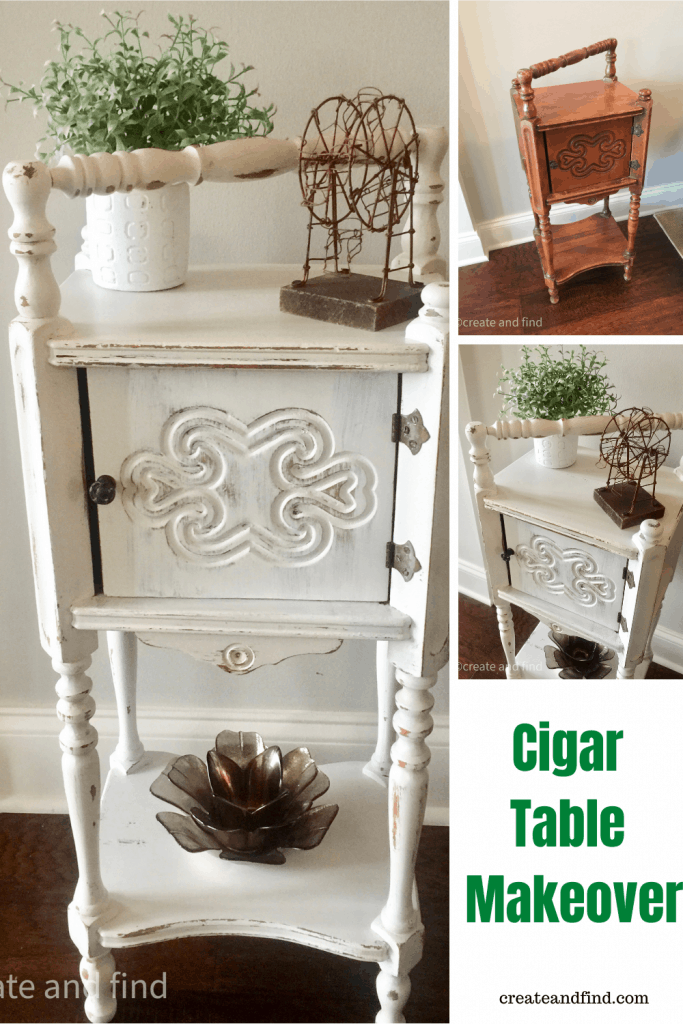
This cigar table makeover is a quick and easy DIY project I did in no time. I actually received this cute little table for free. Since I don’t have any use for cigars, I decided to make it into a sweet side table using paint.
This table came to me by default. Someone offered it to me or they were taking it to Goodwill. I couldn’t turn it down. It was a bit beat up but had potential. With a little paint, it’s now used as an end table.
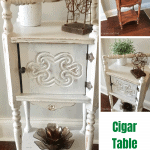
Vintage Cigar Table Makeover
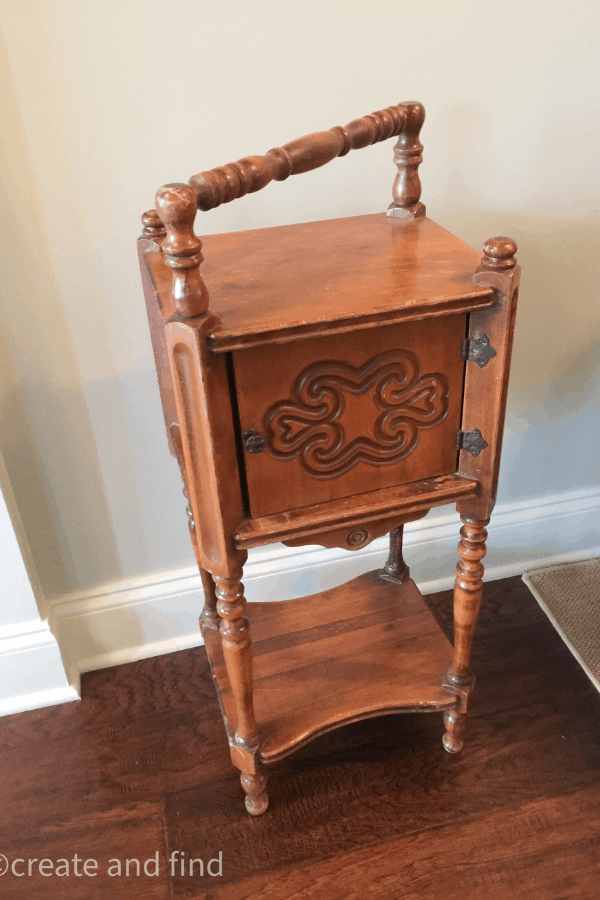
Here’s what this table originally looked like:
Most of my coworkers know that I love to paint and rescue unloved furniture. That’s how this little cutie fell into my lap. This table was getting donated and I graciously took it – It just needed a little love.
I’m fairly certain it’s an old cigar table – the tiny door and the carrying handle on top make me think that (plus I googled “cigar table” and I saw several that look like this one). And I could be 100% wrong, but either way, this one was getting re-homed and I was the lucky winner.
My sister has been searching for a tiny table for quite a while and this is just perfect.
This is the perfect kind of project if you’re just starting out or trying to experiment. This guy was in pretty good shape to start with – He just needed some cosmetic improvement.
PREP
For something simple like this table, start by cleaning it well. My favorite cleaner to use for projects is Zep 505. But any degreasing cleaner will work.
Decide if you are going to sand it or not – If I’m hoping to get a super smooth finish with no distressing, sanding is a must. Unless you are using chalk paint or another type of “no prep required” paint.
I mainly paint with latex paint right now, so usually I’m sanding. However, for this little guy, I didn’t. I skipped the sanding because I knew I wanted a chippy/distressed look.
It’s an old table and has great details on the legs, handles, and door that will stand out when distressed. So I cleaned him good and he was ready for the next step.
REMOVE HARDWARE
Remove all the hardware. If you don’t, do not pass GO, and do not collect $200. Especially if you have an old cool piece, you definitely do not want to paint over the hardware. This includes hinges, pulls, knobs…
My Dewalt Screwdriver is my new favorite tool for this step:
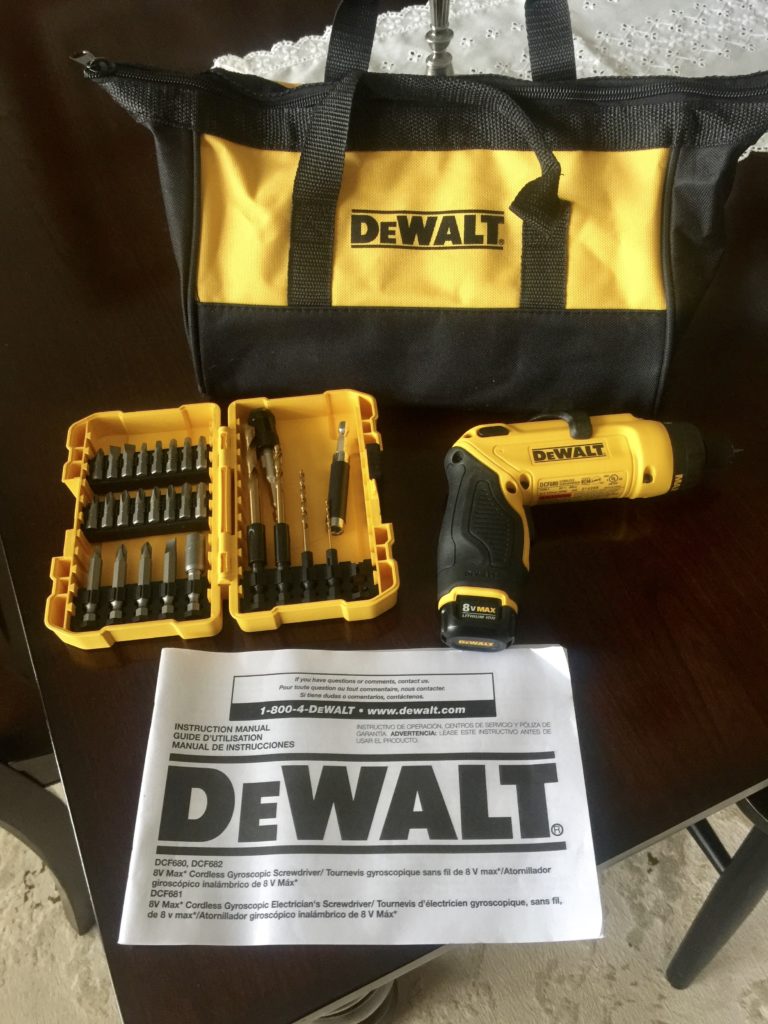
However, if you don’t have this, no problem. A regular screwdriver will work – it will just require a little more elbow grease. Old screws can be pretty set in their ways and not want to come out.
If you are working with something with lots of drawers/doors..it’s helpful to use ziplock baggies and label everything so it goes back together right. I even take pictures of hinges so I know exactly how to put them back on.
There’s nothing worse than getting 99% of the screws in and realizing it’s upside down or backward. Clearly, this has happened to me a time or two. Anyway – onto the fun part!
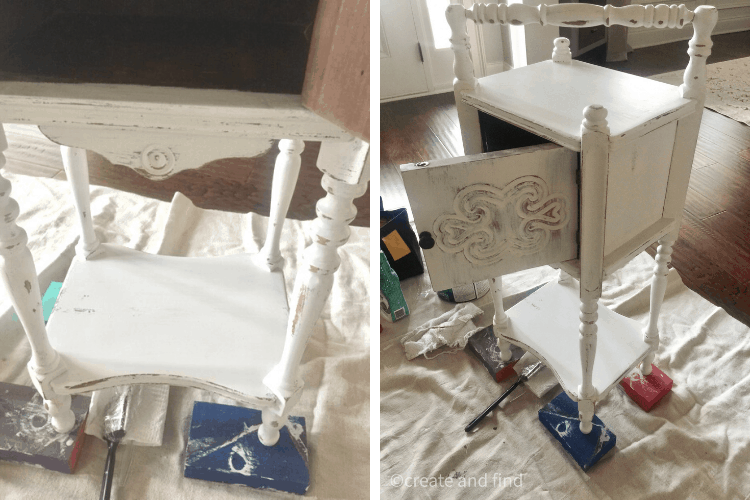
Painting
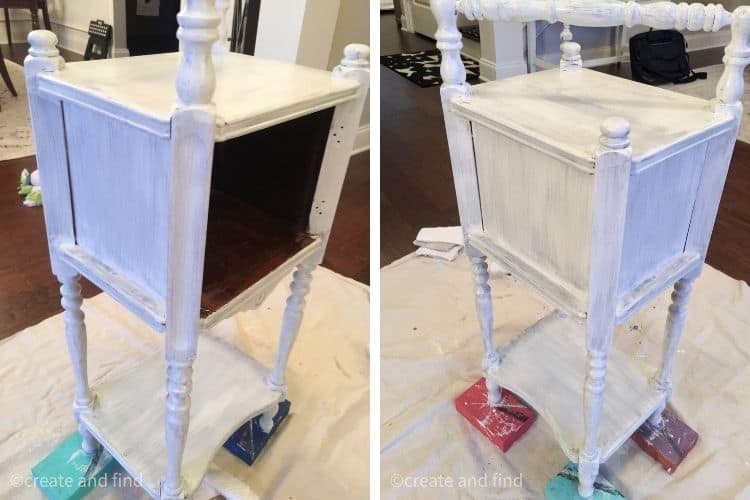
I was painting this one inside so I laid down a drop cloth (I prefer the canvas ones over the plastic), got my trusty risers out (old scraps of wood from a previous project), and now it’s time to paint!
And I had some leftover light grey paint in the garage and I wish I knew the name or color or what I even used it for, but no clue. It’s been out there a while.
I painted one light coat with a 2-inch brush. Normally, I use a bigger brush, but this little guy was pretty small and had thin legs so smaller was better for this one. Purdy and Wooster’s brushes are my go-to brushes for painting.
You’ll find if you go the cheap route of choosing brushes, you’ll be left with a lot of bristles in your new masterpiece.
Let this dry according to the paint instructions (or if you’re like me, you get impatient and wait about half that time. However, if you are hoping for a flawless finish and you actually want the paint to cure properly, follow directions.
For this, I started the second coat too soon on this one and some of the previous paint lifted right off. But, again, this is a distressed piece, so I didn’t mind.
DISTRESSING FURNITURE
I let this dry overnight and then moved him outside to sand. I try to keep an assortment of sanding blocks on hand in fine, medium, and coarse. For small projects like this, it is easy to sand by hand.
No need for an electric sander and it wouldn’t be ideal for a small piece like this anyway.
I sanded around the edges, the details on the door, and the handle. Try to pick places that would naturally get scuffed during years of use. The distressing helps to bring out the pretty details. Just start slow and step back and look at it every now and then to see if you want to keep going.
For something like this piece, distressing is ideal. It wasn’t flawless and had some bumps and blemishes. Those bumps and blemishes make for a perfectly distressed table!
And that’s it! This paint is a satin finish so it doesn’t necessarily have to have a topcoat. If you do want to use a topcoat and you are putting it over a light color paint, make sure not to use an oil-based topcoat. It will yellow over time.
Satin latex paint generally dries to a nice durable finish so if it’s a piece that won’t get banged around much, I skip the topcoat. If you are doing a dresser or chairs, definitely add a protective coating of some kind.
And here is the after of this cigar table makeover:
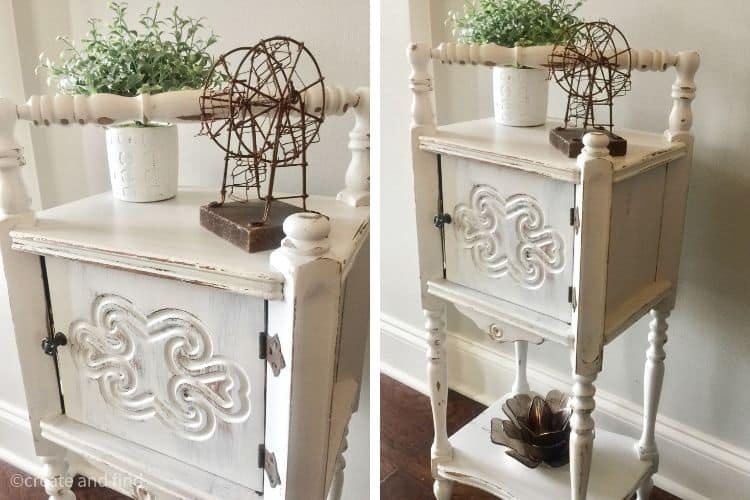
Add some decorative pretties and you’ve got a new table in just a few hours. This cigar table makeover is an easy project to update an old piece into something that fits my style.
If you want more info on DIYs – check out my Beginner’s Guide to Refinishing Wood Furniture.
Total time – 3 hours
Total cost – Free!
Amy Odom
Monday 13th of March 2017
I'm so thankful I have a crafty sister! Thank you for my new pretty! I love him!
Melissa
Monday 13th of March 2017
Thank you so much! I can't wait for you to have it!