I’ve painted tons of furniture over the years and I’ve also made tons of mistakes! But, painting furniture takes practice. Not many people get it right the very first time and it can be overwhelming at first. Where do you start, what do you need, and how do you do it? I’ve got a handy guide for beginners about painting wood furniture for you.
If you’re just starting out, I wouldn’t recommend starting with a precious heirloom or antique unless you’re okay with a few mess ups. Mess ups happen. To everyone. Myself included. But painting wood furniture is a skill you can learn for sure!
One of the best things I ever did starting out was buy a super cheap nightstand on an online yard sale and it became my practice piece. If I wasn’t sure what paint would look like or how much distressing is too much, I practiced on my nightstand. I’m pretty sure it had no less than 20 colors of paint and stain on it when I sold it!
Painting Wood Furniture
Everyone has different preferences when it comes to types of paint and finishes, but here are the basics to get you started. Paint is a game-changer when it comes to wood furniture. Maybe you have something that just isn’t your style, but functions well. Or maybe you’ve been given a lovely antique, but antiques just aren’t your thing.
Paint allows you to change it to suit your style. And I know there are plenty of people that say you should never paint wood furniture. Why not? It’s yours. It’s going in your house and you should love it. If you want to take a brush to your wood furniture, then do it!
I’ve seen plenty of gorgeous antiques painted in bright colors or distressed, or any other way you can imagine and they can be stunning. Furniture is expensive and painting existing pieces saves money, keeps them out of the landfills, and you’ll love it!
Follow this guide for painting wood furniture to get you started and create a beautiful piece of furniture you love.
Prep
Don’t be afraid of a piece of furniture because it’s dirty or it’s been sitting in someone’s basement for years. I promise you can get it clean with some elbow grease!
Prepping your furniture for painting might be the most important step.
There’s no use spending your precious time painting multiple coats of paint and then adding a sealer if you don’t prep correctly. Especially with older pieces. Years of dirt, grime, oils, and who knows what else are built up on the surfaces and could make it difficult for your new paint to adhere.
Remove all the hardware and store in labeled baggies – this will prevent a lot of guessing when it comes time to put it all back together
Take off doors and remove any drawers
Clean it – Use a cleaner formulated for removing oils and grease. And don’t use a cleaner that is meant to leave a shine or finish behind. You don’t want more oils building up.
Use an old t-shirt, rag, or whatever you have on hand and start spraying and scrubbing
Don’t forget the insides of drawers, slides, and insides of cabinets. If your piece is particularly gross, you may want to vacuum it out first.
Depending on how dirty it is, it may take a few rounds of cleaning.
If you don’t love using smelly chemical cleaners or sanding, you can use something like Retique-It, which is a “liquid wood” paint that can be painted on any surface to give it a wood-like finish. I refinished a small table and did a cabinet makeover with Retique-It.
Sanding Wood Furniture
If you’re using a paint that doesn’t require sanding like chalk paint, you can skip this step. I’ve painted with chalk paint before and didn’t love it, so I stick with other paints. However, that means I end up sanding most of the time. It’s just a preference and you’ll find out what you like more.
Now that your piece is clean, it’s time to get it ready for paint. This is particularly important if you have a glossy or shiny finish. If you’re painting over the wood stain (which you’ll find on lots of old wood furniture), you need to make sure that your paint has something to adhere to.
If you don’t, you’ll run the risk of watching your paint peel right up and you’ll have a mess on your hands or your paint job won’t stand up to daily use.
You aren’t trying to get down to bare wood, but you need to rough up your surface a bit. You’ll be able to tell the difference when you run your hands over your sanded parts.
Using a sanding block, electric sander, or sandpaper sheets, sand your furniture in even lines. You don’t want to go in circles or get all wonky with your pattern because it’s possible to scratch lines into your furniture that’ll be noticeable when you paint.
Wipe off the sanding dust with either a tack cloth or a clean rag.
Start with medium or coarse grit sandpaper first, wipe the dust away, and then finish with a fine grit to give your piece a smooth surface (be aware of how much pressure you use if you choose a coarse grit)
If you have a large surface area like a tabletop or buffet, an electric palm sander will save your elbows and forearms and make the job much quicker!
Be sure to remove all sanding dust and particles before painting.
What if your furniture has grooves or crevices that you can’t get to with sanding blocks or paper?
In my experience, it hasn’t been a problem getting the paint to adhere to these grooves or crevices. If you really want to get off an existing paint or stain, you can use a stripper. We’ll get to that shortly.
Sanding is the most effective way to ensure your paint will adhere properly and remove the existing finish from your wood furniture.
But:
What if you can’t sand furniture the traditional way?
Maybe you live in an apartment with no patio or maybe you’re snowed in for the winter? Whatever the reason you can’t sand, there is another option that I’ve used with success.
Liquid Deglosser
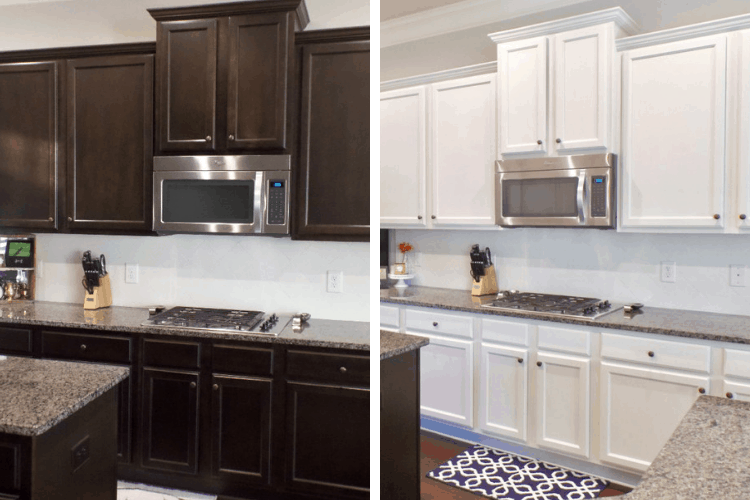
Liquid deglosser is another option to use when sanding isn’t feasible. I’ve used each method and honestly had amazing results with both. I painted our kitchen cabinets (which is a massive job in itself) and since I was on a timeline and had what felt like a million surfaces to sand, I used liquid deglosser instead.
And it worked like a champ.
We have wood cabinets that started out shiny and very dark. I cleaned them with TSP, then applied the liquid deglosser (or liquid sander) per the instructions and there has been no peeling or chipping of the paint. And my cabinets were slick! I worried a bit if it would work good enough, but it’s been almost 2 years and no issues whatsoever. Check out our $100 Kitchen Makeover and all the details!
Primer
Now your wood furniture is clean and sanded and free of dust. Primer is the next optional step. You don’t always have to prime a piece of furniture before you paint. However, it’s almost a guarantee that your paint will adhere perfectly.
Again, there are some paints that don’t require a primer – chalk paint is one of them. But chalk paint generally requires waxing at the end and that’s a step I just don’t love to do. I’d rather prime and use latex or mineral paint. Always follow the directions on your paint.
Here’s what I stick to when deciding when to prime:
Priming Preferred
When painting a light color over dark stained or painted furniture
I prime when I’m not distressing a piece. If I want clean lines and no distressed marks, priming helps to ensure that my paint stays put.
Painting a heavy traffic piece like a dresser or table, particularly the tops of those surfaces. You don’t want random chips of paint coming off.
If your furniture has smells you don’t like (think musty, smoke, and other unpleasant smells that you want to hide)
Skipping the Primer
Painting light colors over light colors
When I want the original color to show through if I distress the piece after painting
If I’ve sanded down to bare wood, I’ll skip the primer
If I’m super impatient (like I was with this cabinet in our playroom) but so far so good. I don’t recommend my “winging it” approach unless you’re okay with unpredictable results. Frankly, I can’t believe this cabinet hasn’t chipped, but it hasn’t.
How to Use Primer
Primer is tricky if you’ve never used it before. It will look like you’ve messed up and it won’t look good. Choose a good quality primer like Kilz and follow these simple steps:
Less is more with primer. You don’t want to glob it on your furniture. Get a little on your brush and use even strokes. You aren’t trying to get complete coverage with primer.
Don’t brush over the same spot over and over again. It dries quickly and you don’t want your brush dragging through the primer and making uneven blobs on your surface.
If you use an oil-based primer, you cannot clean your brush with soap and water. Mineral spirits are necessary to clean oil-based paints and primers.
Oil-based primer is fine to use under latex and other paints. A general rule of thumb is oil-based paints and primers are fine as the base layer for other paints, but always follow the directions on your particular products.
Let it dry completely and then use fine-grit sandpaper to lightly sand the primer. Don’t skip this step. I skipped it because I didn’t know better when I did our kitchen cabinets and you could feel the rough texture of the primer under the paint. I had to redo part of my painting to fix it.
One coat is usually enough. Again, it’ll look streaky and it won’t seem right, but it is. A light, even coat of primer is the perfect base for your paint. It won’t look completely white when you’re done and that’s ok. That means your coat of primer is thin enough.
If you mess up and end up with blobs of primer, no worries. Take a medium to coarse grit sandpaper and sand it right down.
Using Paint Stripper
So what if you’ve acquired a piece that has been painted multiple times and has too many uneven layers or a bad paint job? Unless you want to sand it all off (which is certainly an option), you can use a paint stripper. Citristrip is my favorite brand of stripper. I’ve used it many times and it always works perfectly.
Beware that even though many are advertised as non-toxic and low fumes, you still want to do this step outside if possible. It makes a huge mess and you’ll need to cover the ground with plastic sheeting. You don’t want blobs of stripper to end up on your carpet or flooring.
So – your furniture is clean, sanded, and primed if necessary. Now it’s time to paint it! This is the fun part. Prep is kind of boring and if you’re like me, you just want to get to the good stuff! Where you make your furniture your own style with the power of paint.
It’s easy to get overwhelmed with the choices of paint. I’ve tried so many over the years and I vary my favorites based on what kind of project I’m doing and what kind of finish I’m trying to achieve.
There are different “rules” to follow based on what paint you choose. Accessibility and expense are also two factors to consider when choosing paint. If you tend to do things on a whim and don’t want to order something specific, latex paint is the most affordable and easiest option. A quart of inexpensive latex paint will more than cover a dresser or table in most cases and will only set you back around $20 depending on what you buy.
Choosing a Paint
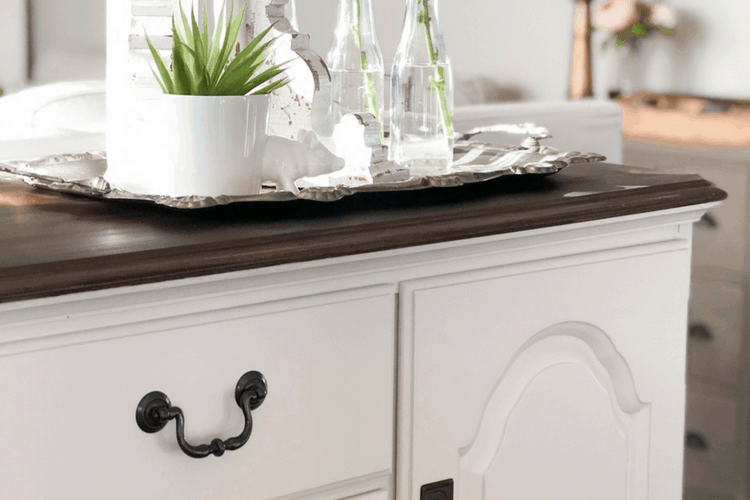
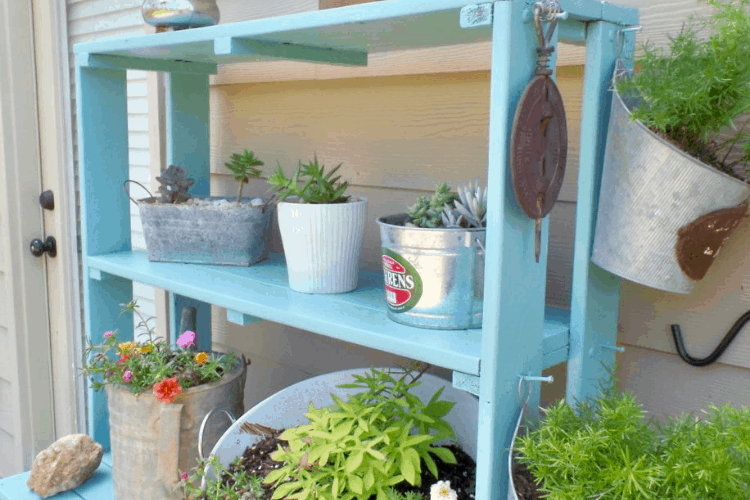
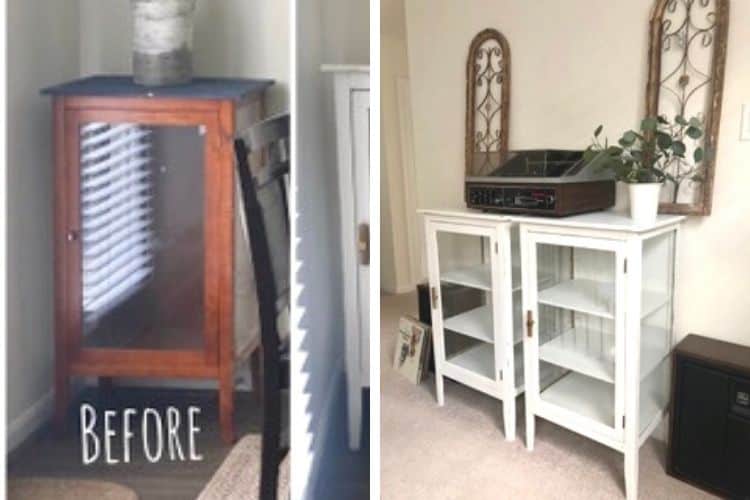
Latex paint – an affordable option, easy to find, and easy to use. Prep your piece as described above and paint away. If you use a satin finish, you can generally skip a sealer since it’ll cure to a hard, durable finish. If you go with a flat or eggshell finish, you may want to add a sealer depending on how much traffic your piece is going to get. I used latex paint for this curio cabinet. Also, this buffet is painted in latex paint.
Milk paint – You can skip the sanding prep part with milk paint if you choose. Milk paint is unpredictable which can be beautiful with the natural chipping that occurs. It’s a bit more expensive in my experience, but I haven’t bought it in a while so that may have changed. I did an antique chiffarobe with milk paint and loved the outcome.
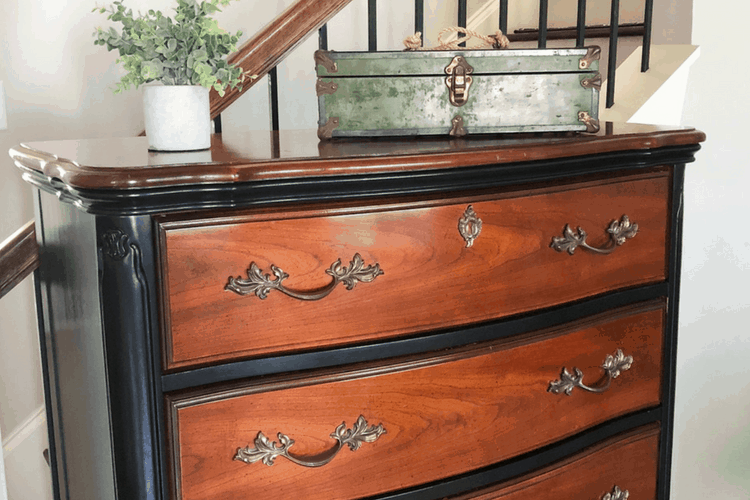
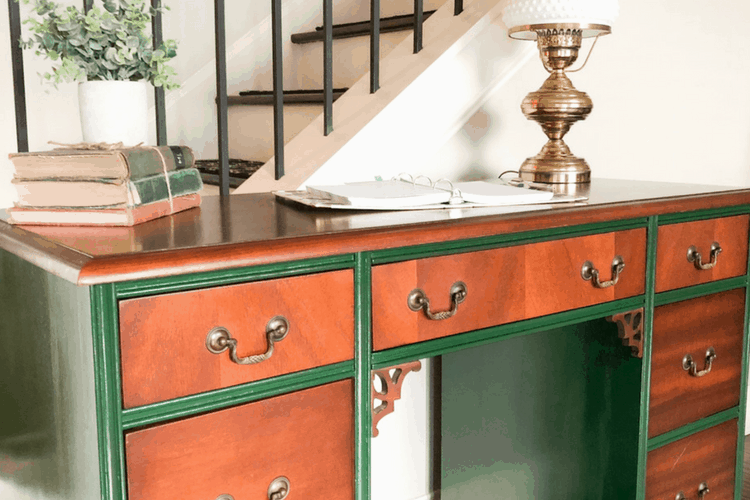
Enamel Paint – This acrylic paint hardens to a beautiful finish without requiring a top coat. One of my favorites I’ve used in the past is Deco Art brand and it’s widely available and very inexpensive. It worked beautifully on this dresser. Our kitchen cabinets are painted with acrylic enamel and they’ve held up with no sealer.
Chalk Paint – Unfortunately, I’ve not had a good experience with chalk paint. I don’t like to wax and I don’t care for a matte, chalky finish so I’m not the right person to give advice on this. It was a bit more expensive in my opinion, but again, try it and you may love it!
Mineral Paint – I’ve used mineral paint in the past, particularly Fusion Mineral Paint and loved it. It is on the pricey side and you have to order it unless you have a dealer near you. The colors are fantastic and the coverage and durability are exceptional! We did a semi DIY loft bed for my daughter and I used Fusion Mineral paint and it is holding up amazingly well!
Oil-based paint – You’ll get an incredibly durable finish with oil-based paint but it’s the hardest clean up in my opinion because you have to use mineral spirits instead of water. I used oil-based paint to paint our kitchen tileand it was more difficult to use, but worked perfectly.
Of course, this isn’t an extensive list, just an idea of the different types of paint available to use.
If I were starting out with no experience or supplies on hand, I’d probably go with latex due to the ease of getting it and the low expense. But this is all personal preference. There’s not a wrong “favorite” to have.
Painting
Whatever you decide to use, there are a few simple techniques and tips that’ll help you get a beautiful outcome.
Take your time. You’ve spent all that time prepping, you don’t want to rush through the painting and have to start over.
Have some patience. I’m terrible with this. I want it done yesterday. But every time I’ve rushed and not waited for things like proper drying time, it doesn’t work out so good.
Usequality brushes like these. You don’t want to go the cheapest route when choosing a brush. Cheap brushes shed bristles and this is definitely an area that you get what you pay for. My exception to this is the brush I use when priming. I’ll often find a middle of the road brush and toss it afterward. That’s because I don’t like the cleaning process, I don’t do it often, and mineral spirits has to be disposed of properly. You can’t put it down the sink and you don’t want to toss it in your yard!
Consider adding a paint conditioner like Floetrol to your paint. I’ve used this many times and it gives your paint an incredibly smooth and even texture.
Choose the right finish/sheen. Gloss is exactly that – glossy. It’s a little more difficult in my opinion as it shows brush strokes more. Semi-gloss is still glossy, but not as noticeable as gloss. Satin finish is my favorite because I can usually skip a sealer with this one and it’s not as tricky to get an even finish as semi-gloss. It’s not matte or flat either so it feels good. Eggshell is a little less smooth feeling than satin, but not quite flat. Flat is a flat finish – just like it sounds. Very matte and will feel chalky to the touch possibly. Flat is easy to fix mess-ups however. You can paint right over flat and it’ll blend in perfectly.
Start with a light, even coat of paint. Paint in one direction and try not to brush over the same areas multiple times. If you have a mess up, wait until it’s dry and then sand it and fix it. Don’t try to fix wet paint. It won’t work.
Take your time on legs or curvy areas of furniture. Especially if you’re painting table legs or chair legs, go back and look for drips or runs and try to fix them while painting – before they start to dry. If it’s too late, just sand and start again. Get a small amount of paint on your brush when doing legs and go light on the pressure so it doesn’t run.
If you’re painting doors – start with the backs first then the front
Watch for drips and runs around the edges of drawers and go easy on the paint here – you don’t want to risk not being able to get the drawers back in correctly
Allow proper drying time between coats – follow the instructions on whatever paint you choose.
Sand in between coats of paint with fine-grit sandpaper. This will give you a flawless and smooth finish.
If you’re distressing for the first time, go easy and only distress in the areas that would normally get wear and tear from regular use. It looks more natural this way.
Keep a wet rag handy when painting around glass edges – you can wipe any mistakes right off as you go.
Your piece is painted, it’s beautiful, and you want to protect it.
But how?
There are a huge number of sealers or topcoats you can choose if you want. You don’t always have to seal it though. I’ve gone without sealing many times and it’s always worked out when I did.
Here is some basic info for sealers:
Polyurethane is an excellent sealer for stain or dark-colored paint. I’ve used both the wipe on and the brush on and I like both. It comes in different sheens like flat, satin, and gloss so you can choose what look you’re after. Gloss is a little harder to work with both in paint and sealer – it shows brush marks more and any excess strokes you make with the brush. Polyurethane hardens to a very durable finish. Don’t shake it up before use – stir it so you don’t create bubbles.
Do not use an oil-based sealer like Polyurethane over white or light colors as your paint will yellow over time. It’s a real thing and unless you love dirty yellow looking furniture, don’t do it. There is a water-based product called Polycrylicthat you can use over light or white-colored paint and it won’t yellow. Be aware that you may have to sand with very fine sandpaper if you have any bubbles in the finish. Also – same with above, don’t shake it – stir it.
Wax is an option for many types of paint including chalk and milk paint. I don’t like to wax. I find it too tedious and I never got it quite right. That’s clearly operator error on my part though. There are plenty of people that do a beautiful job with wax. I’m not one of them so I skip it. Plus it’s not forever. You’ll need to re-wax a high traffic piece every so often.
If you’re painting a dresser or table – the top will likely need a sealer if you want it protected from scuffs and dings. And please, please don’t get impatient like me and let it cure properly before you put stuff on it! I painted a table and chairs for our breakfast area and I let it sit untouched for 30 days! It was torture, but that table gets used multiple times a day and not a scuff on it!
I usually skip a sealer on satin finishes because it cures hard enough that it’s already protected enough. That’s a personal preference though.
Most paint lines will have their own sealers – milk paint, mineral paint, chalk paint – they all have preferred sealers that have been tested to work with that particular type of paint. Just do some research based on availability and your price point.
paint sprayer (depending on how much you plan to paint, this may be overkill, but it’s amazing for big jobs)
Paint is an amazing tool to change what you already have. Again, there will be people that tell you that you should never paint old furniture – leave it alone and don’t ruin it. However, I completely disagree. If you aren’t interested in preserving something as an original, why shouldn’t you make it fit your style? It’s your house and your furniture. You should love it!
I had the sweetest email from a reader who completed her first real wood furniture project and she sent me some photos of her before and afters. Elainna – You did an amazing job!!
How to seal for table that will be on a screen porch.
create and find
Sunday 19th of February 2023
Will it be getting wet at all?
Elainna
Thursday 2nd of July 2020
This is so incredibly helpful! Thank you so much! I also wanted to ask, do you have a favorite brand of latex paint that you like to use?
create and find
Friday 3rd of July 2020
Thanks so much Elainna! I have used so many brands and most often used Valspar from Lowes since it was affordable and convenient. I'd love to see something you paint if you want to shoot me an email!
Wendy
Thursday 30th of May 2019
This is amazing. It includes everything you need to know. That you so much!


Ginny
Monday 13th of February 2023
How to seal for table that will be on a screen porch.
create and find
Sunday 19th of February 2023
Will it be getting wet at all?
Elainna
Thursday 2nd of July 2020
This is so incredibly helpful! Thank you so much! I also wanted to ask, do you have a favorite brand of latex paint that you like to use?
create and find
Friday 3rd of July 2020
Thanks so much Elainna! I have used so many brands and most often used Valspar from Lowes since it was affordable and convenient. I'd love to see something you paint if you want to shoot me an email!
Wendy
Thursday 30th of May 2019
This is amazing. It includes everything you need to know. That you so much!
create and find
Thursday 30th of May 2019
Thanks so much Wendy!