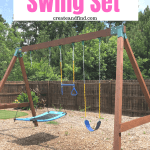
My kids are 11 and 8 and the time has come that they’ve outgrown their playset. But, they still love to be outside and they love swings. So we made a bigger, but simple DIY swing set that’ll be used for years to come.
This DIY Swing Set is the perfect addition to your backyard and will give you and the kiddos hours of enjoyment. With easy to find supplies and a bit of manual labor, you’ll have your own swing set in no time.
How Much Does It Cost To Build Your Own Swing Set?
The good part about this DIY is we sold our old playset and used that money for the DIY Swing Set so we didn’t have to come out of pocket for much cash.
If you are starting from scratch, expect to spend around $300-400 or so depending on lumber prices and swing prices.
$300 isn’t exactly chump change, but if you compare it to what you can buy, it’s a great deal considering that my kids are older. I want something that I can swing on as well, so we needed a taller and wider set than what you can buy typically.
Part of the big expense is the brackets for the wood. You don’t have to use these brackets but we used them in our playset previously and love the stability they add.
You’ll need help because lumber this long is heavy and awkward when it comes time to put it together.
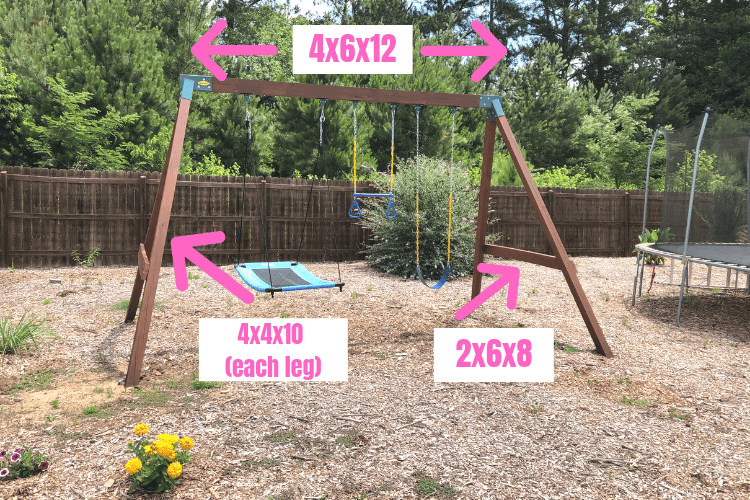
Lumber Supplies Used for our Swing Set:
- The top beam is 4x6x12 pressure-treated lumber. It’s super heavy so be prepared.
- Each leg is a 4x4x10 – you’ll need 4
- The middle braces are 2x6x8 and you will need two and you can cut them down to size.
- All our lumber is pressure treated and came from Lowes
DIY Swing Set Instructions and Materials
Swing Materials for DIY Swing Set
Helpful Tips for a DIY Swing Set
You’ll start by drilling holes into the top beam for your swing hangers. We set the beam on a pair of sawhorses to make it easier to manage.
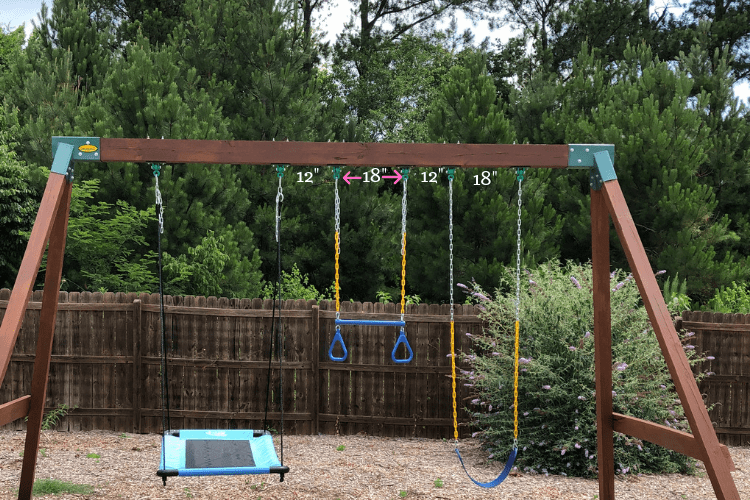
- Measurements for swing hangers – The swing and the trapeze bar are 18″ center to center of each hanger and the platform swing mat is 32″ center to center for the hangers but this may depend on what type of swings you get.
- We left 12″ of clearance in between each different swing.
- Drilling for hangers – When drilling the holes into the top beam to attach the swing hangers, it can be difficult to keep the drill straight. The beam is 6 inches thick so you need a long drill bit. My husband attached two small scrap boards together to make a guide for the bit. It worked perfectly and kept it from going in all crazy!

- Attaching the swing hangers – We used a 5/16″ bit to drill holes to fit the 3/8″ bolts we used for the three swing hangers. It turned out to be a bit tight to get the bolts in. He tried drilling again with a corded drill but it just stuck. He ended up using a mallet to push them in the rest of the way. In hindsight, he said he should’ve used a larger bit. You drill in through the bottom and then attach the nut to the bolt on top of the beam.
- Attaching brackets – Next, attach the swing set brackets to the top beam. When attaching the brackets to each end of the top beam, use a scrap board to rest up against the bracket and then tap it with a rubber mallet. This way you don’t damage the bracket. Pre-drill holes for each lag screw and then screw them in.
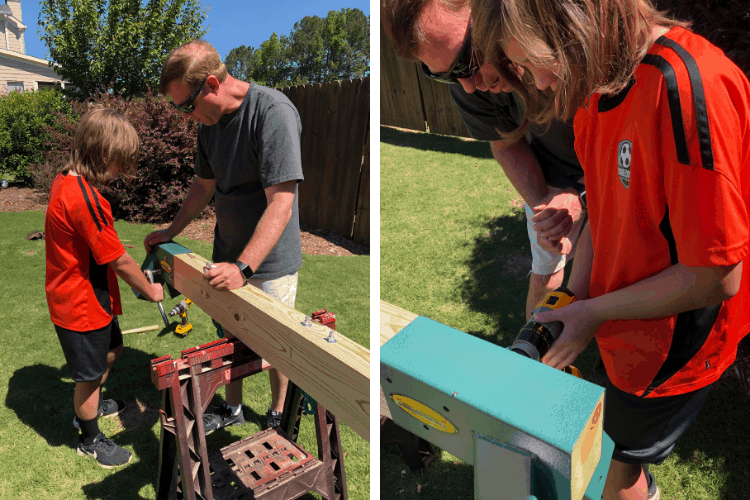
- This is a perfect learning experience for older kids too – show them how to do things! It takes a bit longer, but they can learn some valuable skills along the way!
- Bring the large beam to the location of your playset if it isn’t there already – you don’t want to have to move it a long distance after the legs are attached.
- Make sure the area is level or you may have to level the space for each leg a bit.
- Attach the legs and screw them in place. The green brackets that each leg goes into had bolts with them. We tightened the bolts so they wouldn’t slip out when we stood it up but waited until it was all upright and level to finish tightening.
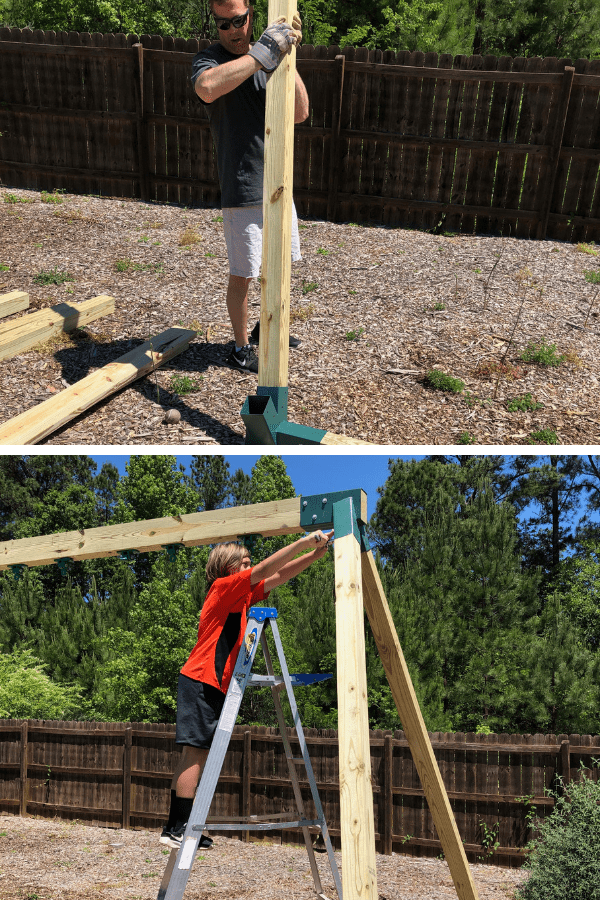
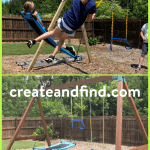
- You’ll need help lifting this thing up. The easiest way is to attach the legs to each bracket, then get help and stand it up. It’s not an easy job. We only had me, my husband, and my son, and had to attach one side of the legs, then rest the top beam on top of a ladder (with my husband holding it steady). I don’t recommend this though.
- It was virtually impossible to get the legs into the other brackets while it was balanced on the ladder. (we made sure to give ourselves room in case it fell, but it was pretty sturdy on top of the ladder). So just attach the legs on the ground, then lift it up with lots of strong peeps!
- Tighten everything once it’s in place.
- Then add a 2×6 (cut to the proper length) in the middle of each leg for added stability. We bought 8 feet boards and then cut them to fit and attached them with 3″ screws.
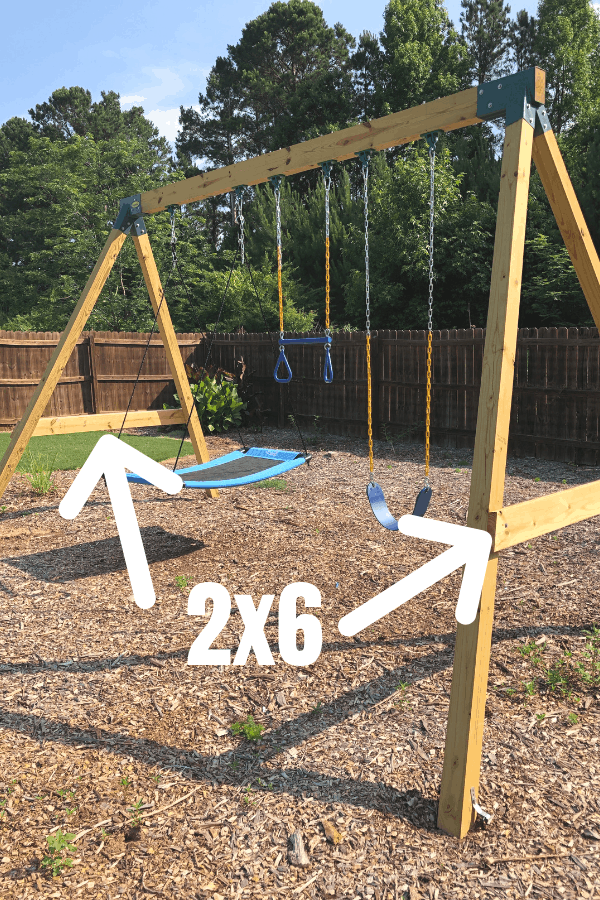
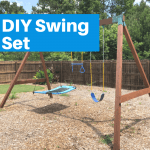
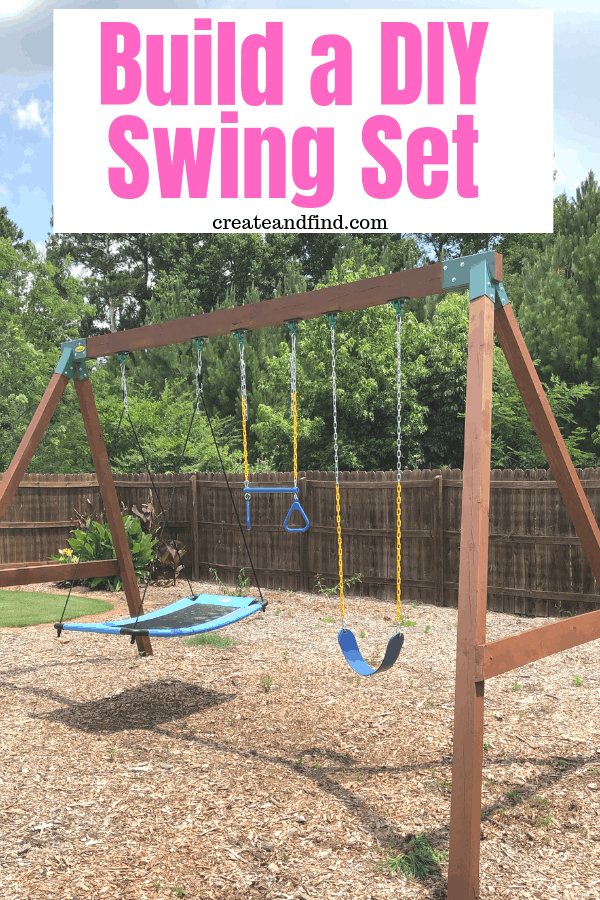
- Add the anchors to each leg and secure it in the ground. This set is 12 feet wide and the legs are 10 feet high so it needs to be stabilized. The swings go pretty high and so far there’s no swaying or unsteadiness.
- Our set ended up being 15 and 1/2 feet wide measured at the bottom of the legs.
- Add your swings and enjoy it!
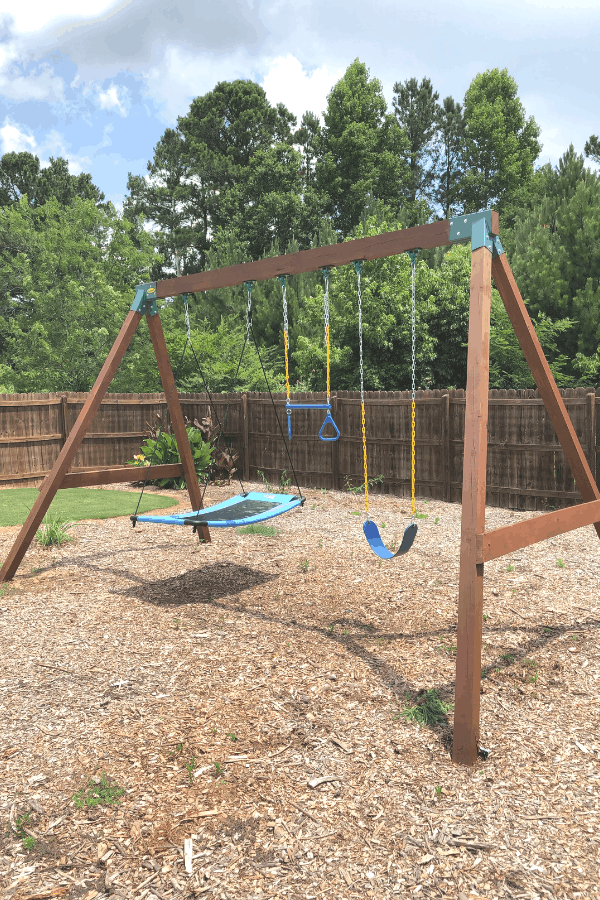
- Wait for the wood to dry out – I let ours sit for two weeks, and then stained it using an exterior grade stain like this one. I’ve used Cabot brand before and love it. The swings attach to the hangers with carabiners so I just quickly removed them when I stained them so they didn’t get messy.
Choosing Swings
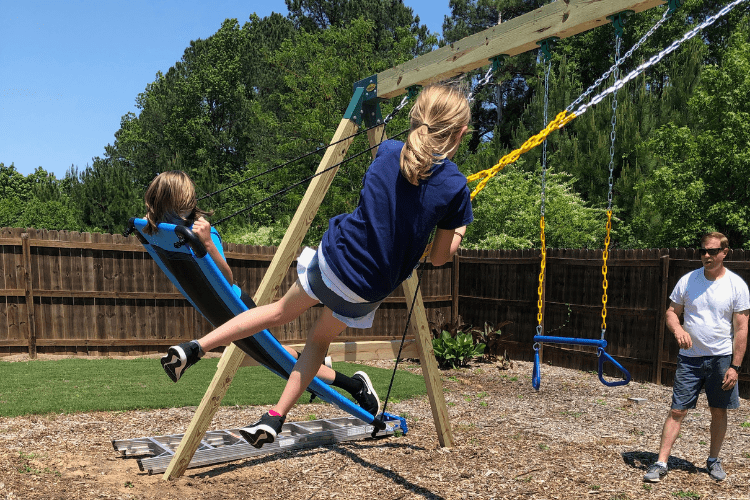
For our DIY Swing Set, we let the kids choose what they wanted. It works perfectly because more than one person can use the platform swing.
- Platform Swing – the exact one we got is out of stock, but this one is very similar. It holds up to 600 pounds! There’s plenty of room for adults and children and it goes high! I’d say this one gets the most use so far. It comes with everything you need to assemble and hang.
- Swing – This is rated up to 300 pounds and has a soft plastic coating on the chains so it won’t pinch fingers. We chose swings with long 66″ chains, but if yours aren’t long enough, you can add chain with carabiners.
- Trapeze Swing Bar/Rings – This was a request from my 8-year-old daughter who loves flipping over this thing and hanging upside down. It also has the same plastic-coated chains. They don’t get hot in the blazing sun and won’t pinch fingers.
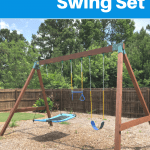
My kids love this DIY Swing Set and so do we! It’s only been up for a few weeks and it gets daily use. I compared what we could’ve bought for the same money and it wasn’t much.
The swing sets I found online in that price range were not as tall or sturdy as this one and were intended more for smaller children. My 11-year-old son is nearly as big as me already so I wanted something we could all feel secure on. This is perfect!
Update One Year Later – Everything about this DIY Swing Set is still perfect! They love it – we love it and it still gets used all the time. It’s one of our best projects to date!
DIY Swing Set
How to Build A DIY Swing Set
Materials
Lumber Materials
- 4x6x12 pressure treated lumber (1) - this is the top beam
- 4x4x10 (4) - these are the legs
- 2x6x8 (2) - these are the side braces and will be cut to fit
- Bolts/Screws
Swing Materials
- Swing Set Brackets
- Heavy Duty Swing Hangers
- Playset Anchors
- Swings of your Choice
Tools
- Drill and Long Drill Bit
- Mallet
- Tape Measure
Instructions
- Start by deciding how far apart to space your hangers. This will depend on the types of swings you purchased. (our swing and trapeze bar are 18" center to center of each hanger and the mat swing is 32" center to center)
- Drill holes using a long drill bit into the top beam for your hangers. You may need to use something to stabilize the drill (we used a board fastened to another board and steadied the drill on the right angle of the boards) - you can see in the video)
- Attach the hangers - we used a 5/16" bit for the 3/8" bolts. Drill through the bottom of the beam and attach the bolt to the top
- Attach the swing set brackets - position a board against the edge of the bracket and use a rubber mallet to tap the board instead of the actual bracket so you don't damage them
- When you have your beam and legs in the location it will stay in, it's time to attach the legs to the brackets. This step requires help because it gets very heavy when trying to stand it upright.
- Insert the legs into the brackets and screw them in using the supplied hardware - don't tighten completely until you get it standing upright and level.
- Using help, stand the swing set on it's legs and tighten everything.
- Cut the supporting 2x6x8 boards to fit in between each side and use 3" screws to secure them.
- Attach the swings
- Let the wood dry for at least 2 weeks and then stain using an outdoor grade stain.
- Enjoy!!
Notes
The brackets and hangers we chose came with the recommended hardware to install them. If yours do not, you'll need to plan to purchase those as well.
Recommended Products
As an Amazon Associate and member of other affiliate programs, I earn from qualifying purchases.
-
 Giant 700lb 60 inch Saucer Tree Swing for Kids Adults - Green Weight Capacity Durable Steel Frame Waterproof Adjustable Ropes Easy to Install Fun
 -
 Eastern Jungle Gym Easy 1-2-3 A-Frame 2 Brackets for Swing Set with All Mounting Hardware, Green
 -
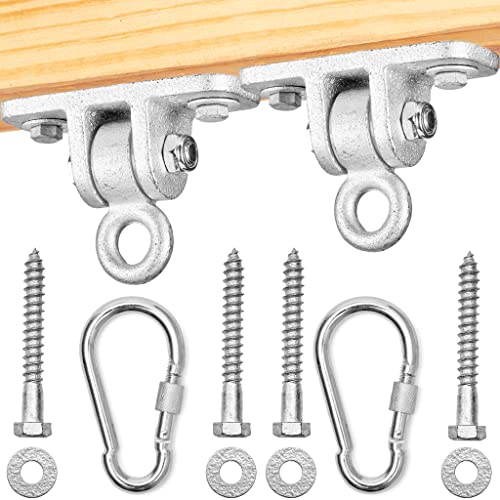 Jungle Gym Kingdom Heavy Duty Swing Hangers| 2400 lb Capacity | Locking Snap Hooks (1 Set of 2)
 -
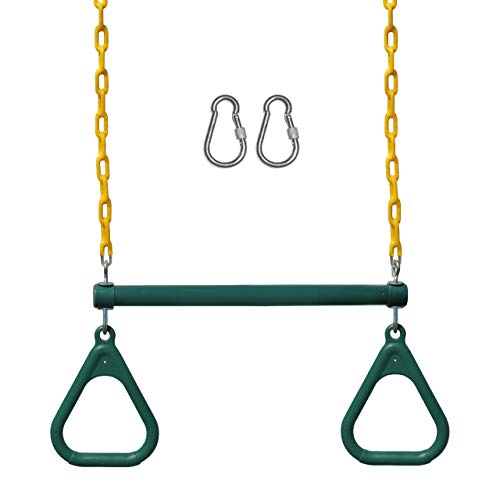 Jungle Gym Kingdom 18" Trapeze Swing Bar Rings 48" Heavy Duty Chain Swing Set Accessories & Locking Carabiners (Green)
 -
 Jungle Gym Kingdom Swing Seat Heavy Duty 66" Chain Plastic Coated - Playground Swing Set Accessories Replacement (Blue)
 -
 Cabot 140.0003471.005 Gold Finish Stain, Quart, Sunlit Walnut
 -
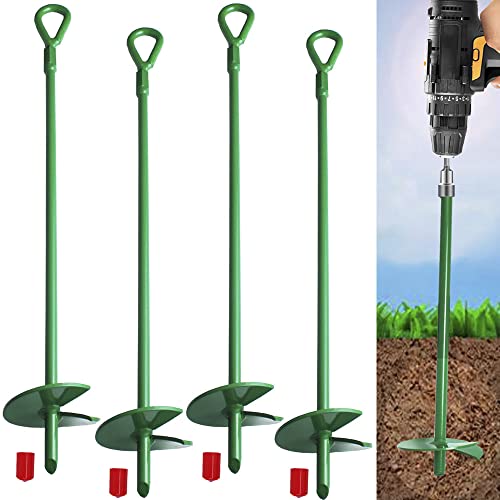 Cyleodo 18" Long Green Ground Anchor Kit(4 Pcs/Set), 3" Wide Helix,Heavy Duty Anchor Hook with Solid Steel Shaft,Best Choice for Swing Sets, Securing Animals,Camping Tent, Canopies, Car Ports, Sheds …
And if you’re looking for an outdoor project idea to build a playset, don’t miss this incredible tutorial from Erin at The DIY Nuts. She has start-to-finish instructions and materials needed for creating a children’s playset – Check it out here!
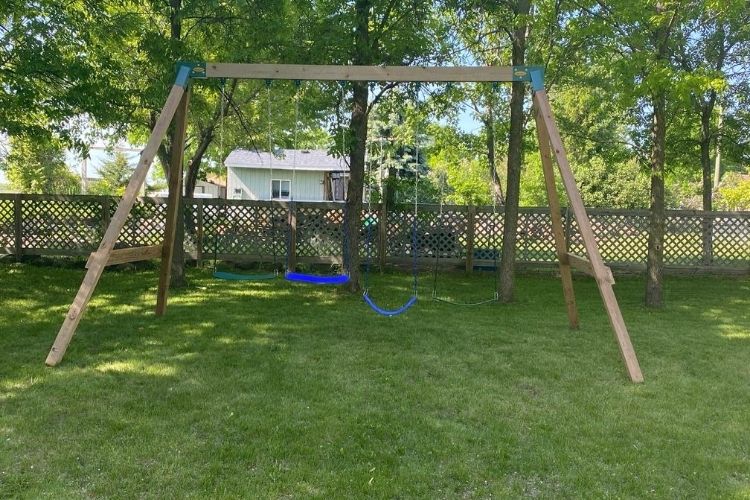
And here’s a finished swing set from one of our readers, Heather, who built theirs using the tutorial with a few modifications – they did an amazing job!
More DIY Projects:
A Beginner’s Guide for Painting Wood Furniture
Build a Farmhouse Dining Table
DIY Baby Gate
Pin For Later!
Traci Davis
Sunday 25th of August 2024
My husband and dad built this today for my grandson. It worked out great! We used different hangers that my husband found on Amazon. We also added leveling boots on the bottom. My grandson loves it already!!
Megan Lyons
Saturday 20th of July 2024
We are building the swing set this weekend. Thank you so much for the posting! So helpful for these beginner DIYers!
Megan
Josh Joel
Tuesday 15th of August 2023
With the angled vertical beams, what does the true height of the swings end up being? About 9'? Thanks!
Andy
Thursday 22nd of June 2023
What is the height of this set? You mention it is taller, but how tall? Is it comprable to a swing at a park? We too want to avoid something that is too small and the kids grow out of right away.
Michelle Nedeau
Sunday 11th of June 2023
Thank you so much for posting this swing set. Your directions are easy to follow. We are going to switch the large swing to a regular one. Do you have any directions to add on a slide?