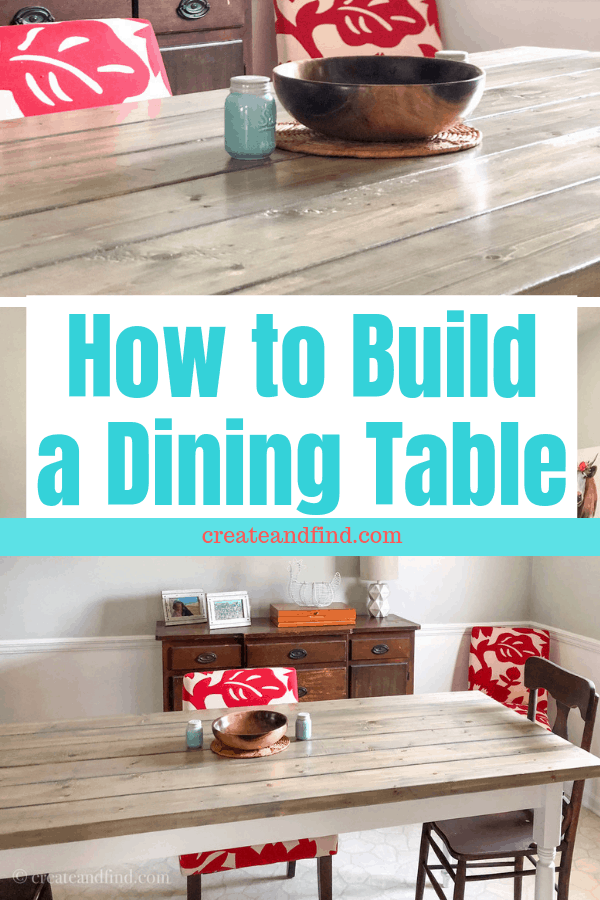
I did something new and built my first piece of furniture from start to finish! I’ve been promising my sis a new table for several months now and finally made it happen. Even if you don’t have a clue (which I didn’t), you can do this too! Check out this easy DIY Farmhouse Table and get inspired to build your own!
Tables are expensive! So much that if you have the means to build your own, you can save hundreds or even thousands of dollars. We built this one for $135. This DIY Farmhouse table is simple – nothing ornate or crazy going on here. Plank top, store-bought legs, a few tools, and some DIY skills.

Measurements of this farmhouse table:
72″ long, 33″ wide, and 30.5″ tall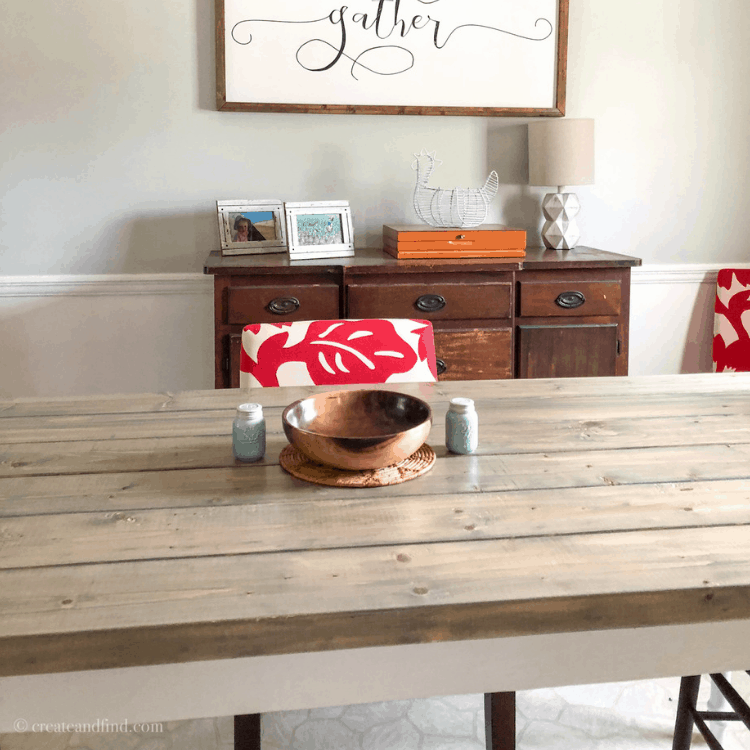


Let me start with this: Some DIY projects are easier with two people. This is one of those. Not to say that you can’t do it alone, but it was much easier to have my husband help with the cuts and measuring. Not to mention choosing and loading the wood.
We got lots of inspiration for making a farmhouse table from various projects we found on Pinterest including this one from Ana White. There are detailed instructions, but we modified the plans and measurements a bit, and also left out a few things, so I’ll tell you exactly what we did and how we did it. Or if you prefer a larger top and legs, follow right along with the plans from Ana White – either way, you’ll get a table that looks similar, just different measurements.
Easy DIY Farmhouse Table
Making a Farmhouse Table – Supplies Needed:
- 4 table legs
- 7 – 2×6 pine boards that are 8 feet long (Buy one extra in case you mess up on the cuts – it’s better to have one extra and return it than being in the middle of the project and ending up short a board)
- 2 – 2x4s – 8 feet long
- Kreg Jig
- 2&1/2 inch pocket hole screws (use these for all pocket holes except attaching the top)
- 1&1/2 inch pocket hole screws (these are what you use to attach the top to the base)
- Miter Saw
- Wood Glue
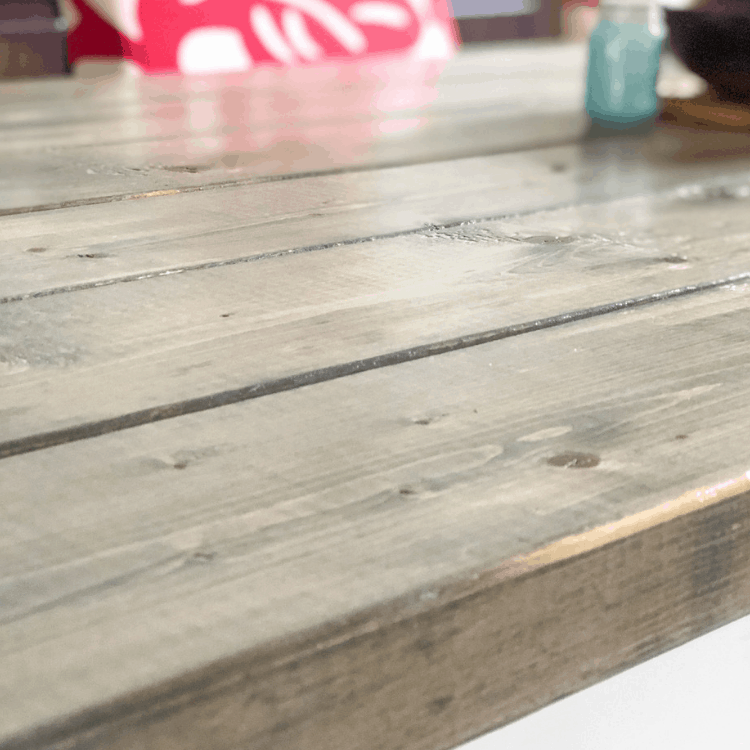
- Stain (I used Classic Grey from Minwax)
- Speed Square
- Urethane
Build your DIY Table
Step One – The Base
- Using one of your 2×4’s, cut at 58″ and then 26″. Repeat this with the other 2×4. You’ll have two 58″ boards for the sides and two 26″ boards for the ends.
- Sand the edges if necessary
- Set your Kreg Jig depth collar at 1&1/2 and drill two pocket holes on each end of all 4 boards. This helps to have two people if you don’t have an actual workbench. We stood the boards up vertically in the Kreg jig – one person held it and the other drilled the pocket holes using the A and C guides on the Kreg jig
[one_half] [/one_half][one_half_last]
 [/one_half_last]
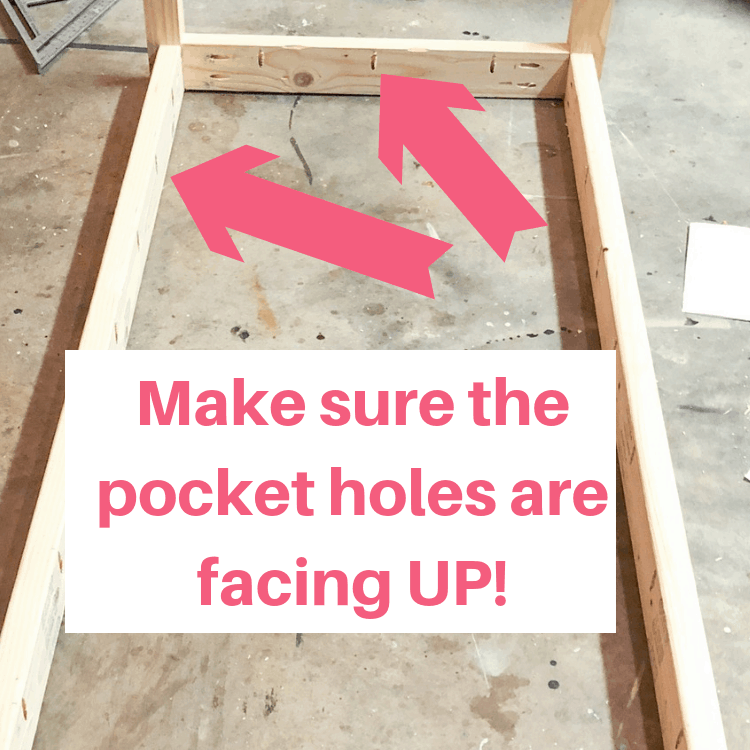
- Now turn the board horizontally, mark about every 6-8 inches, and drill more pocket holes. This is how you’ll attach the top. Do this on each long side and each short side. So you’ll end up with two 26″ boards and two 58″ boards that have two pocket holes facing out on each end and then a pocket hole every 6-8 inches facing up. Like this:

Step Two – Attach the Legs
- Start by turning the first leg upside down on the floor. Fit one long piece and one short piece of your 2x4s on either side of the leg. We positioned ours on the inside of the leg. No measuring necessary. Just line up the 2x4s with the inner edges of the leg. Also, each leg has a curved edge – make sure this is the outermost edge on all four corners.
- Make sure your vertical pocket holes are facing up!! See pic below
- Check to make sure it’s lined up properly by using a speed square. Add a small amount of wood glue to the end before you screw them in.
- Using 2&1/2 inch pocket hole screws, attach the short side and long side to the leg. This will be super helpful to have two people also. One person can hold the leg steady while the other one drills.
- Repeat on the other three legs. Now you have four legs and the base! And please don’t judge my disgusting garage!
[one_half] [/one_half][one_half_last]
 [/one_half_last]

When you flip it over, your pocket holes should be facing down – make sense?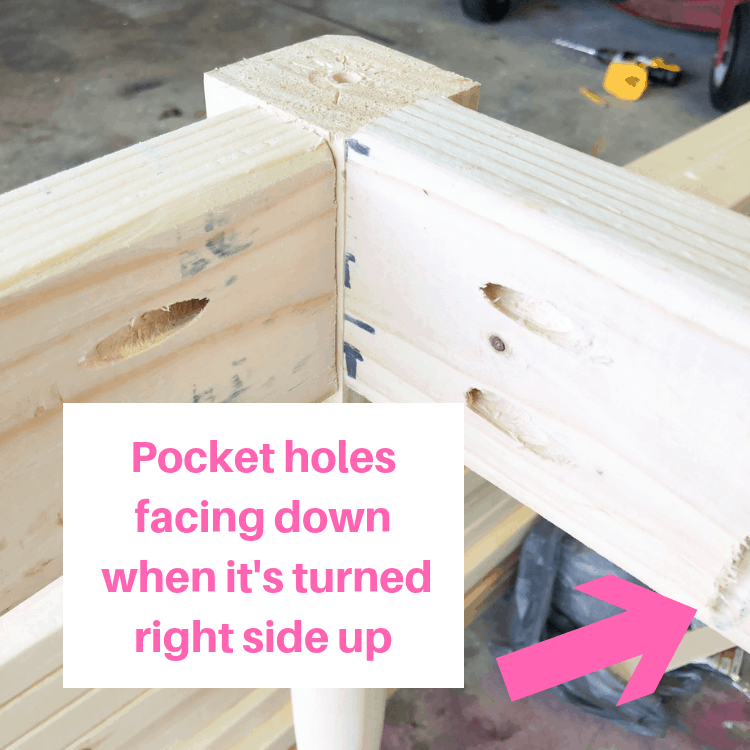
Step Three – Build the Top
- Our tabletop is 33″ wide using six 2×6 boards. 6″ wide boards aren’t exactly 6″ wide -why? I have no clue. We initially had seven boards across the top, but it was much too wide for the legs we chose and for my sister’s dining room. So six was perfect for us. If you want a wider tabletop, I’d suggest getting fatter table legs so it’ll look more balanced.
- Cut six 2×6 boards to 72″ long. Measure twice, cut once. And inspect every board carefully before you buy it to get the straightest ones possible. If one is warped, it’ll be tough to get them to all fit together nicely.
- Mark five of the boards about every 6-8 inches and drill 1&1/2 inch pocket holes the same way you did above. Since we don’t have a workbench, we just set them on the floor, turn each board horizontally and have the other person hold the end steady.
- You don’t need pocket holes in the last one because you aren’t attaching that one to anything.
- Lay them out to make sure they look good and even.
- Add a strip of wood glue all the way down the length of the first board and then use 2&1/2 pocket screws and start attaching the boards. Make sure to add wood glue to each board before you add the screws.
- Use clamps if you can to secure it. We didn’t have a clamp large enough once we got to the last two boards and it turned out just fine.


Step Four – Stain and Seal the Top, and Paint the Base
- I used Minwax Classic Gray stain for the top of our farmhouse table. One coat and it was perfect. Stain the back of the top first. You can also fill all the pocket holes if you want to, but we didn’t. Not many people are going to crawl under the table and check it out.
- Use a lint-free rag and wipe one light coat of stain on the wood. My sister wanted it on the lighter side with some of the natural wood showing through, so I did a light coat, and immediately wiped it with another rag.

- When the top was completely dry (which took a solid day), I added a urethane topcoat. I ended up doing three coats of clear satin urethane. Just know that if you are painting the top a light color instead of staining, don’t use polyurethane. Get a water-based polycrylic or else it’ll turn yellow.
- Paint the base whichever color you are using, or stain if you prefer.
- Let it dry completely
Step Five – Attach the Top
- We set the top upside down on saw horses first – this made it easier to screw the base on.
- Turn the base upside down and line it up on the top. Measure all the sides to ensure they are equal.
- Use 1&1/2 inch pocket screws and attach using all the extra holes you made on the first long 2×4. **Tip – My Kreg Jig came with an assortment of screws. One of which was not 1&1/2 inch (naturally, the one I needed). So we tried to use 1&1/4″ inch screws first. It didn’t work at all. We flipped it over thinking it was all screwed together and the top slid right off the base. You’ll need 1&1/2 inch screws to secure it.

- Flip it over and you’re done!
Congratulations! You’ve made an easy DIY Farmhouse Table and saved yourself hundreds of dollars. Of course, if you don’t have the tools, it can add up. Even if you don’t have a miter saw, you can usually pay the people at the hardware to make all the cuts for you. And if you plan to do any kind of woodworking, get yourself a Kreg Jig! It’s an amazing tool!
We spent a grand total of $135 on this table – wood, screws, glue, stain – everything. And this table is solid. Absolutely no wobbling. The wood glue and the screws ensure everything is staying together for good.
Making a farmhouse table is not the quickest project, but this one, in particular, is easier than some of the others I’ve seen. Mainly because we chose a simple design for our DIY dining table with store-bought legs.
What would I have done differently?
- One thing I should have done in hindsight is sand the edges of my top planks. It’s a bit rough, but nothing crazy. It would have been a bit better to smooth it out a bit. But again, it’s nothing that would make me not use the table. Just a personal preference.
And finally – check out my easy DIY Farmhouse Table!!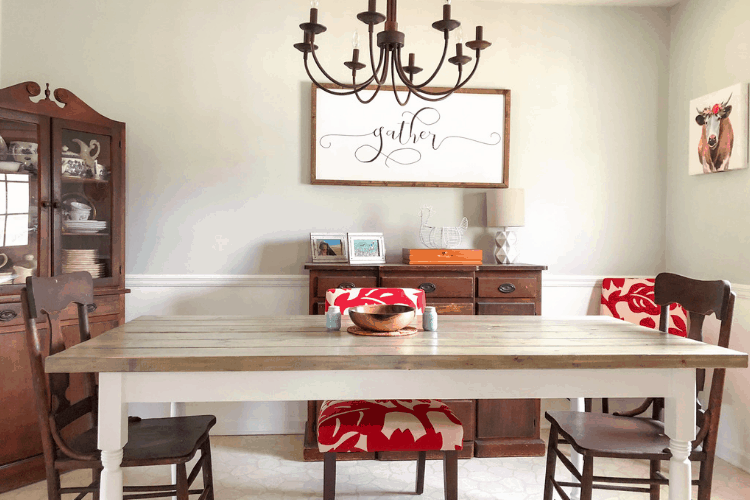
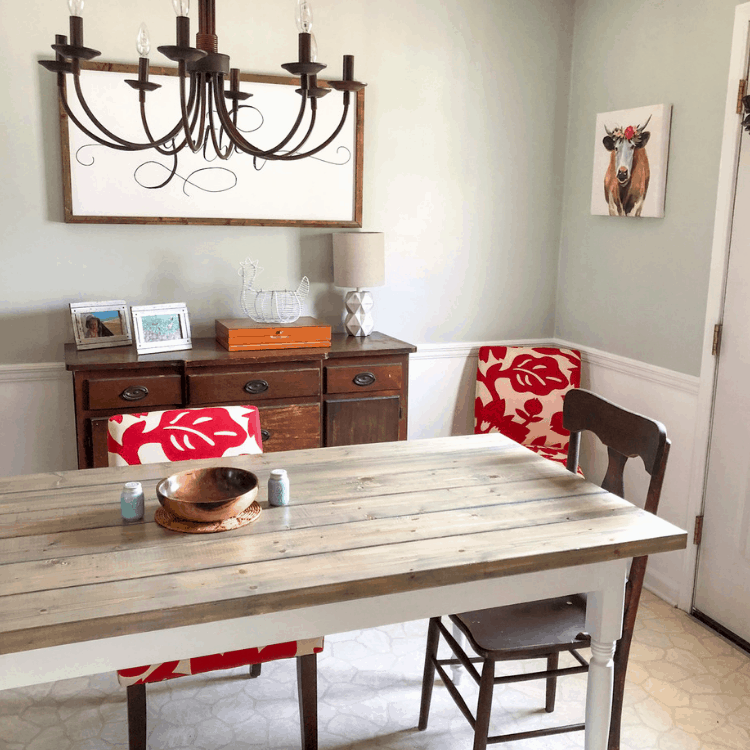
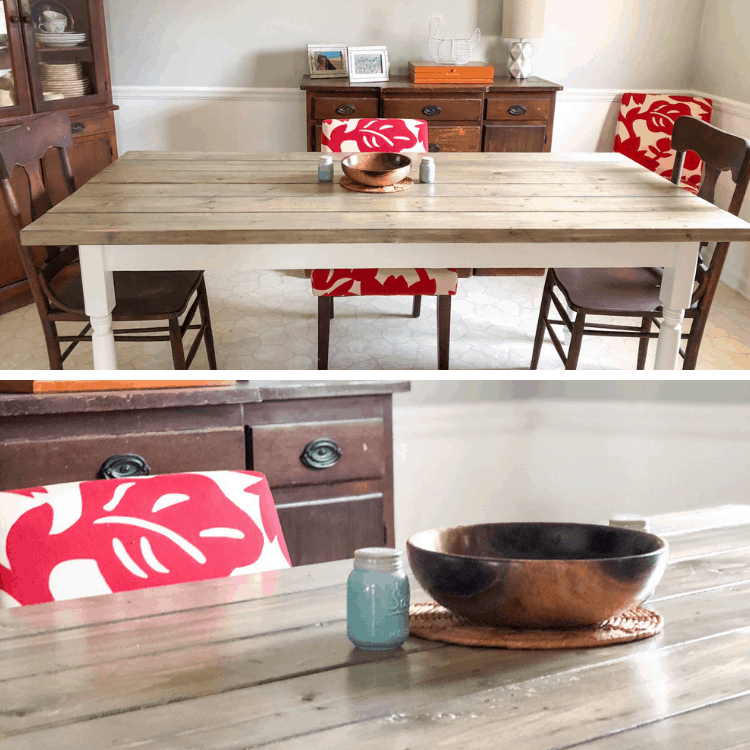
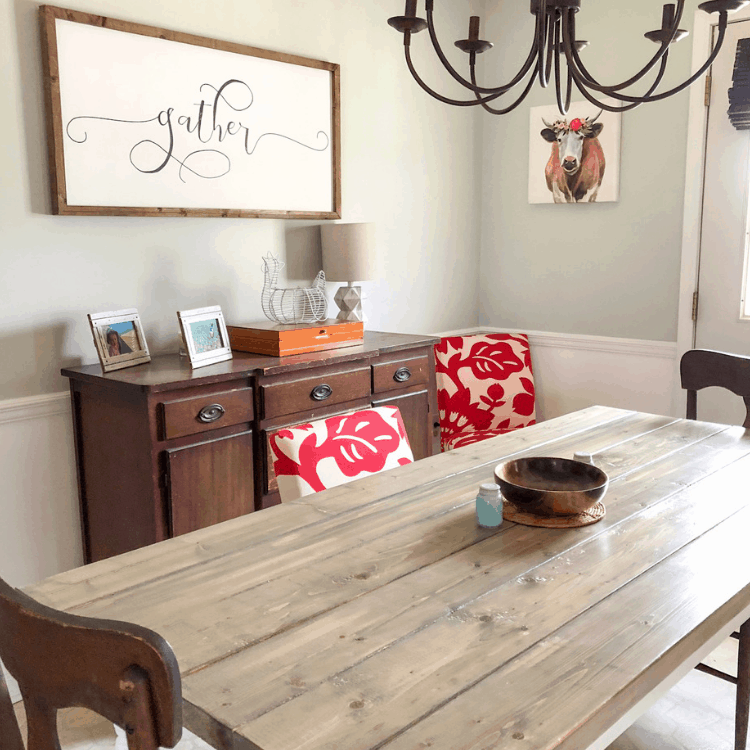
I hope this inspires you to get those DIY skills on and make your own farmhouse table! It turned out perfect for my sister’s dining room – you can see how we transformed the walls in the room from a dated 1980’s duck filled wallpaper room to this simple farmhouse style dining room – click here to learn about painting wallpaper!
And for more DIY Inspiration – check out these posts:
How to Paint Wallpaper the Right Way
DIY Farmhouse Lighting
DIY Shiplap
Pin for Later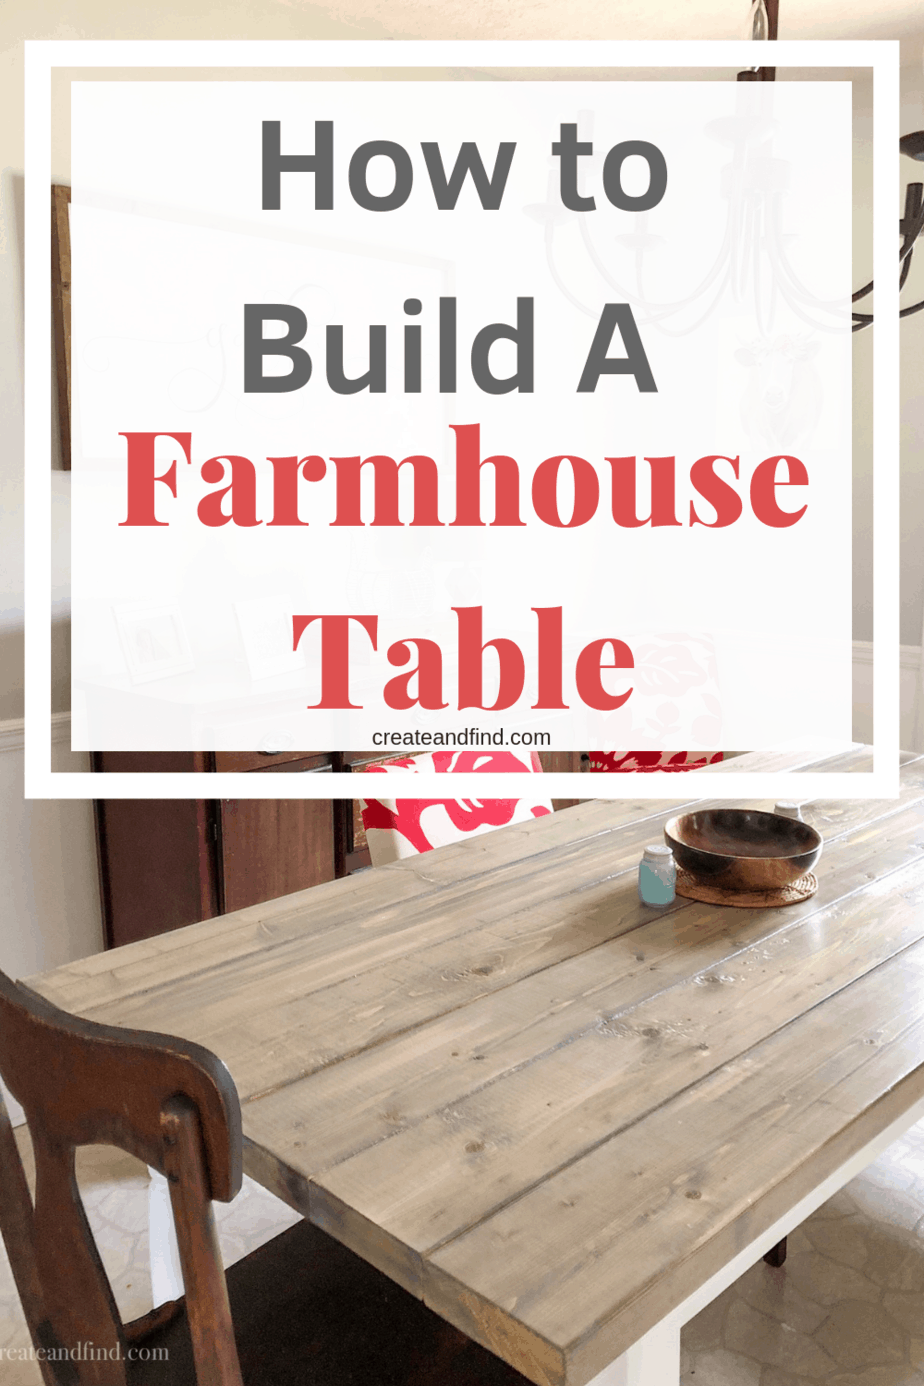

Mariah
Sunday 21st of July 2019
This is a really simple and elegant designed table anyone would like to have. The wooden color makes it look so classy. The white color below is so gorgeous. Overall this is an elegant table we can have for a farm house look.
Luis
Tuesday 19th of March 2019
¡Espectacular mesa, gracias por compartir!
Beth
Monday 5th of November 2018
Great project, and it turned out fantastic! Now I really want to try this.
Melissa
Tuesday 6th of November 2018
Thank you Beth! I know you've got the skills to do this! Definitely let me know when you do!
Wendy
Sunday 4th of November 2018
Melissa the table looks amazing! What great instructions too. You make it sound easy and I am sure it wasn't. Fabulous job!
Melissa
Sunday 4th of November 2018
Thank you Wendy! I had a lot of help from my husband for sure! He wonders why my projects always turn into "his projects"! Ha! You should try making one!