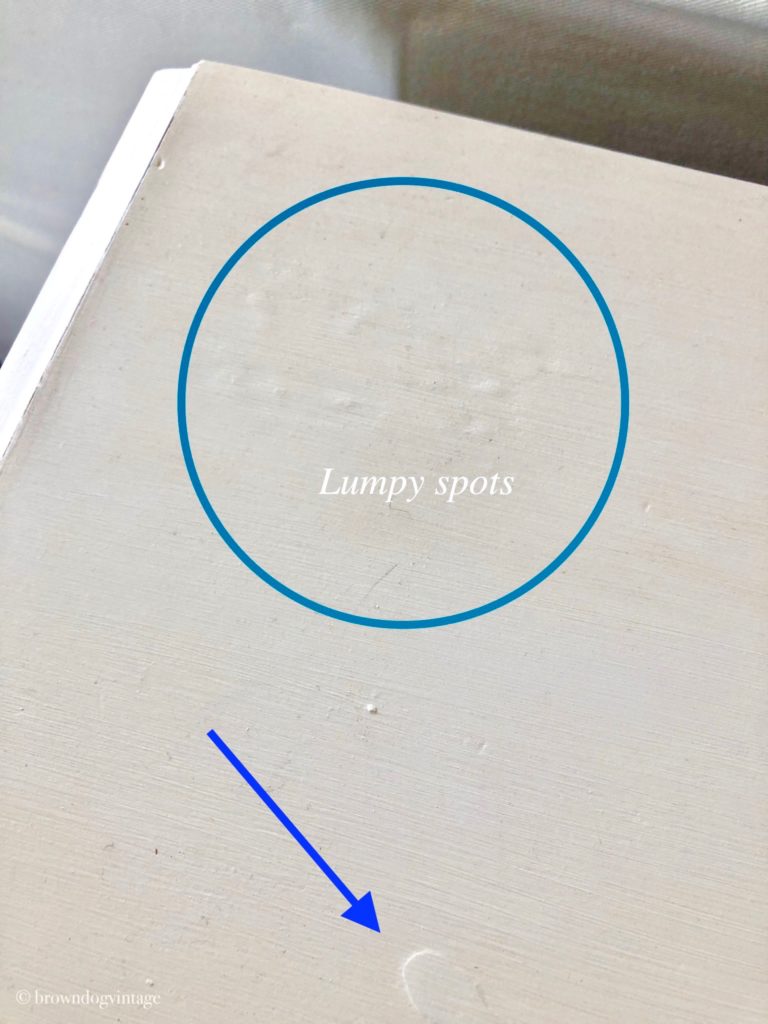
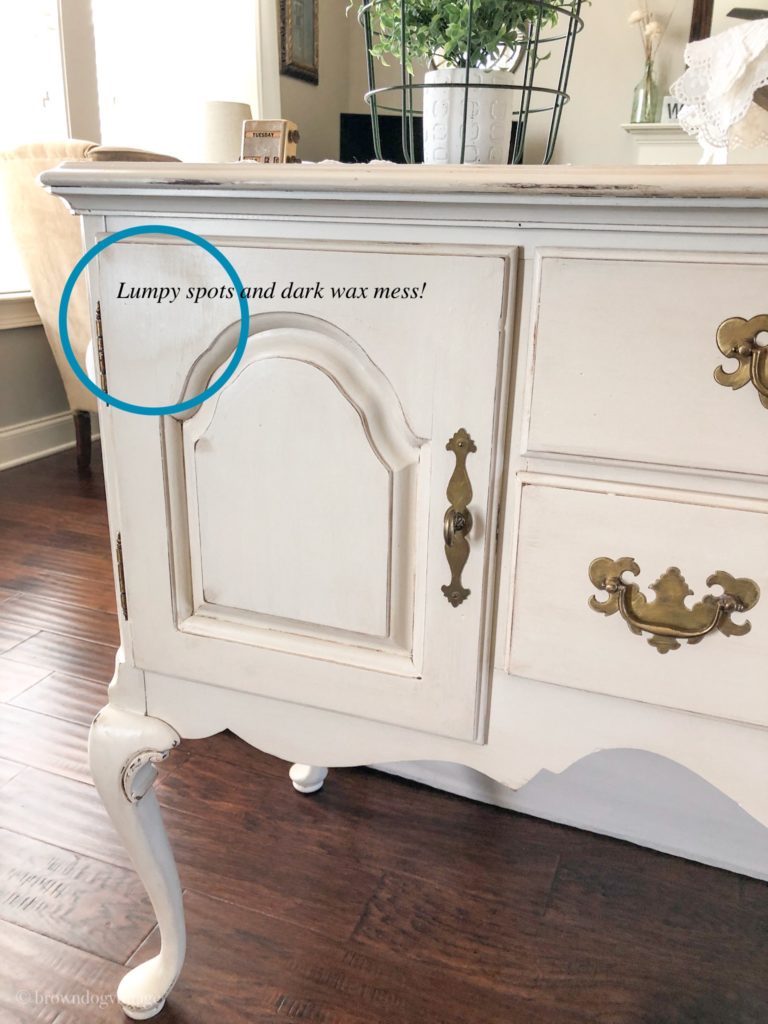
I’ve been debating on painting a buffet that’s been in my house for a few years now. And all that time, I’ve never really liked it. I painted it at least 4 times, never quite got it right, and it had some lumps and weird spots. And to top it off, I added dark wax to it over white paint which I’ve discovered I don’t like at all because I’m just terrible with wax! It looks like someone tried to wipe it down with their dirty hands. Needless to say, it was time. Time to fix this eyesore that drove me nuts. Time for a buffet makeover.
A huge thank you to D. Lawless Hardware. They are generously providing the hardware for this buffet makeover! If you haven’t checked out their site yet, jump on it. They’ve got a large selection of pretty much any kind of hardware you can think of and it’s super affordable. It was perfect timing for my buffet makeover, because while I’m happy with the style, I wasn’t crazy about the hardware.
RELATED POST: Easy Cabinet Makeover Without Sanding
Antique Buffet Makeover
This buffet was a Craigslist score for $50 and it was in perfect shape except it smelled like an ashtray. If you’ve ever tried to get smoke smells out, you know how difficult it can be. I used a few of my tried and true methods (see how to get smells out of furniture) and it was good as new.

Before:

I’m kind of embarrassed to even post these pics – it was a mess! It was one of those projects you intend to come back to and just never find the time!
Since this one had several layers of paint, simply repainting it wasn’t going to cut it for this one. It had several spots that were lumpy and uneven and those needed to be fixed. Here’s a little tip when you’re using an electric sander. Check your sand paper regularly for clumps and don’t leave it on one spot too long. This heats up the paint (if you’re sanding over paint) and can cause it to become gummy, sticky dots on your finish. If you don’t go back and get those off before you paint, it’ll be noticeable. This is what happened here and I didn’t get the sticky clumps off before I painted:
RELATED POST: Modern Sideboard Makeover
Supplies Used
- sanding blocks
- electric sander
- Citristrip
- plastic scraper
- mineral spirits
- paint pail
- paint/stain
- plastic tarp
- rags
- cheap brush for applying Citristrip
- New hardware from D. Lawless Hardware
RELATED POST: Old Table Makeover Without Sanding
The process
Initially I was going to sand the top a bit, get the lumpy spots off, and repaint. But the top was a hot mess so I used the Citristrip to remove the layers of paint. I’ve used it several times and it works like a charm, plus it smells good. The directions say it’s safe for indoor use, but I wouldn’t advise it if you can help it. It makes a mess. Make sure you cover underneath your project with plastic because you’re going to have lots of slimy paint coming off. And be patient. Apply it liberally with a cheapo brush that you can trash afterwards and then wait. You’ll be very tempted to start scraping away but don’t. Go find something else to do, take a nap, watch some tube, but don’t touch it for at least an hour. I waited almost two hours on this one and it was completely ready to scrape by then.
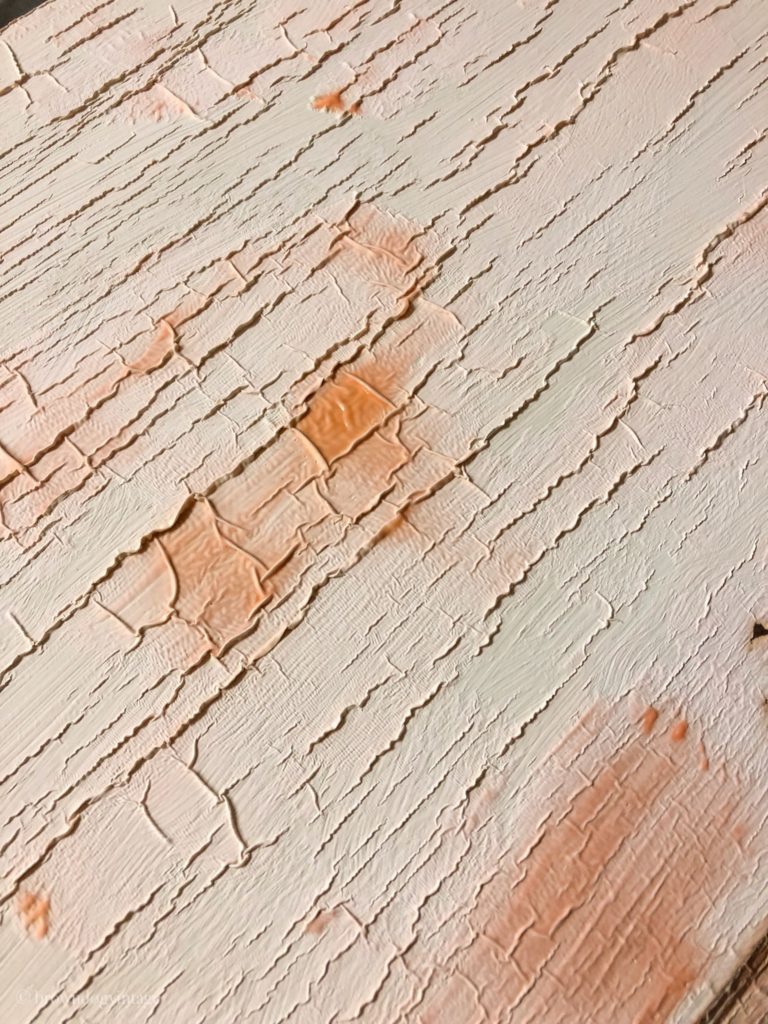
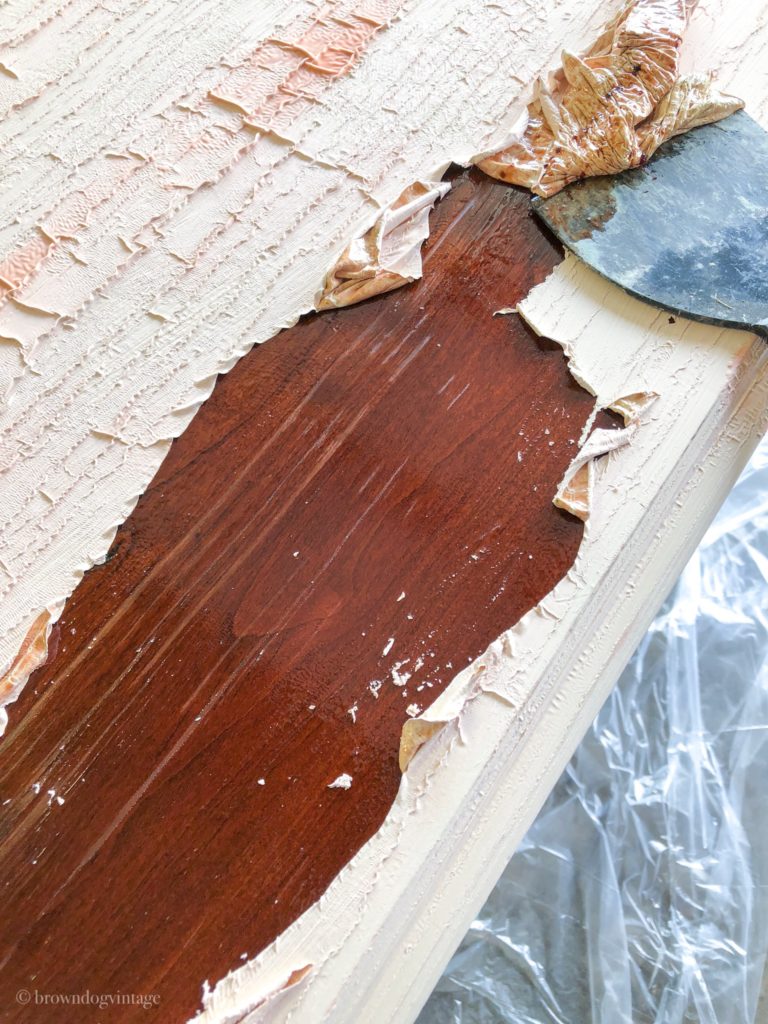
Use a plastic scraper (don’t use metal or you’ll gouge the wood) and keep scraping until there’s nothing else coming up. Use a lint free rag and mineral spirits to clean up the residue left behind. You’ll be able to feel it and tell you’ve got it all. The stripper is pretty sticky so you’ll need to get all of that off before painting. And be sure to follow the disposal directions for your mineral spirit soaked rag. They are flammable so don’t pile them in an enclosed space!

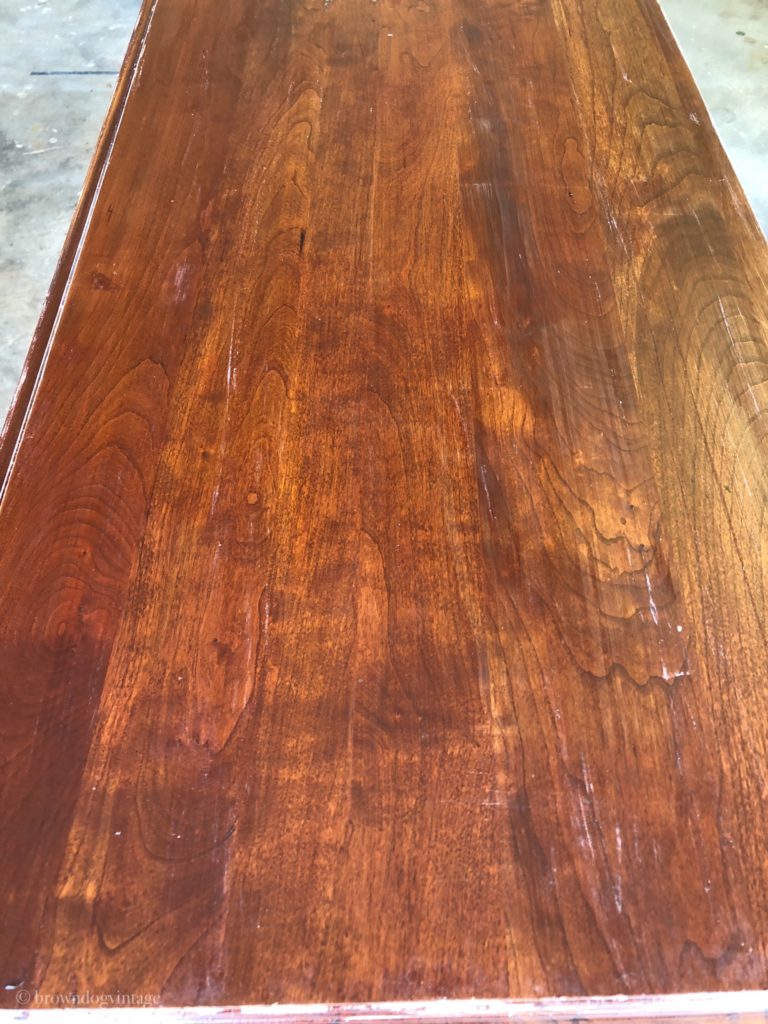
After it’s dry, you can go over it again with your sander or a sanding block. Make sure it’s nice and smooth and then you’re ready to paint.
RELATED POST: Vintage Dresser Makeover
New Paint
Here’s where I got stuck. I couldn’t figure out the color I wanted to paint. My house is mostly neutral and frankly, I’m a little bored with it. But I also didn’t want to repeat this process in three months when I decided I didn’t like the color.
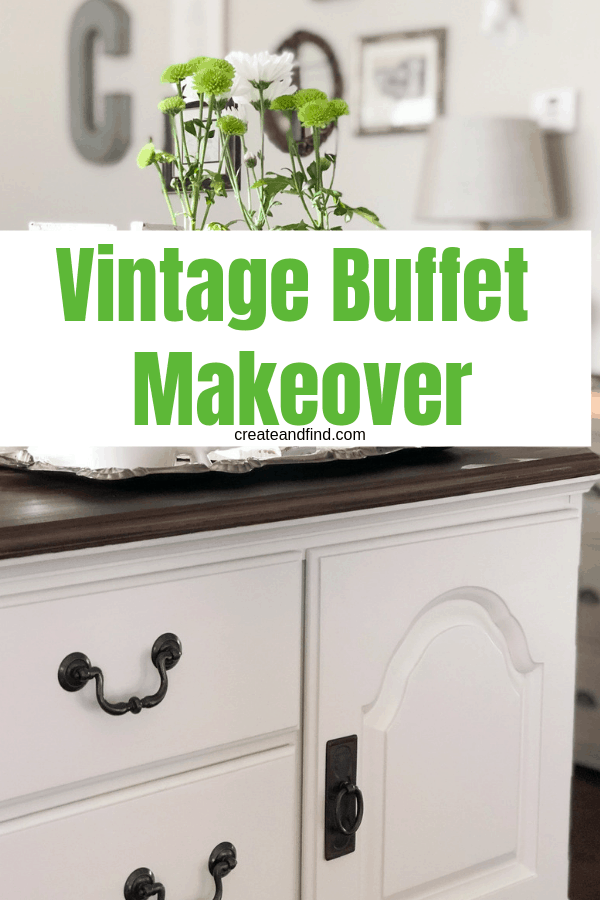
In all honesty – I tried a few things before I settled on the finished color. My first choice was a dark gray – hated it. Then black – hated it too. Then a light gray – nope. The top was down to raw wood which just wasn’t going along with the dark paint colors for this one. Which is unusual because I generally love that look. So I went back to white. And I know – why not branch out? Because after seeing it with darker colors, I realized I wanted a classic and simple look. So back to white it is! No dark wax to make it look dirty, no distressing. Just clean lines and fresh paint. I added some ebony stain in a thin layer to the top and finished it off with my new hardware. One thing I actually forgot about when ordering the hardware is the hinges! No worries though. They got a quick coat of black spray paint and they match perfectly.
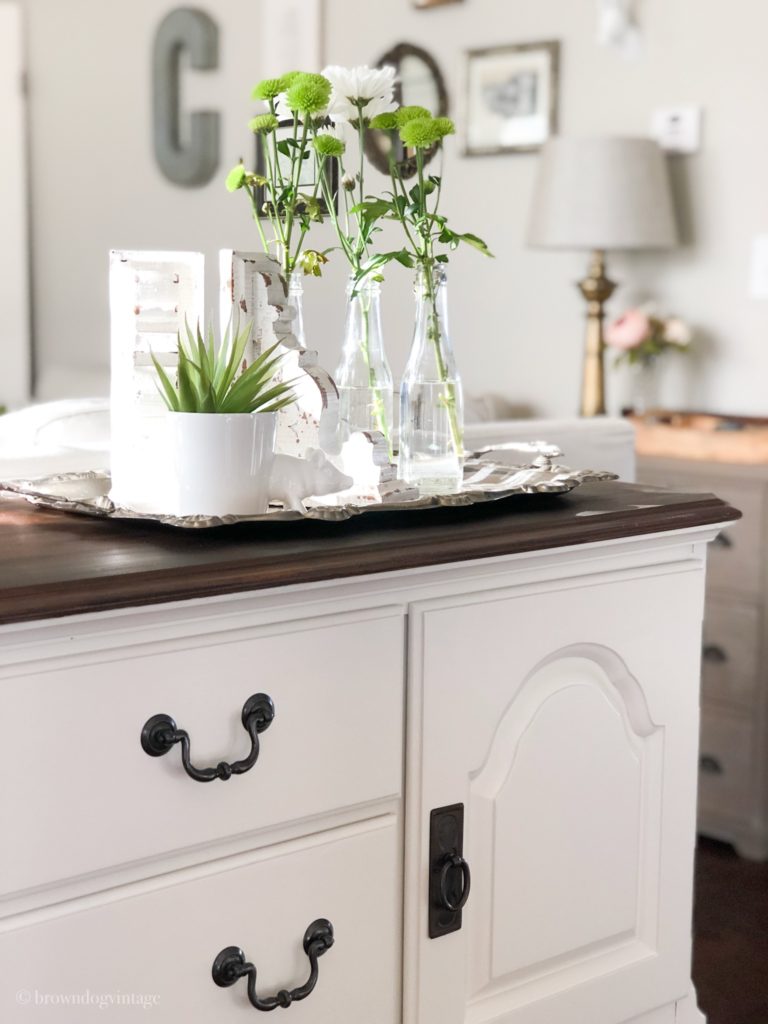
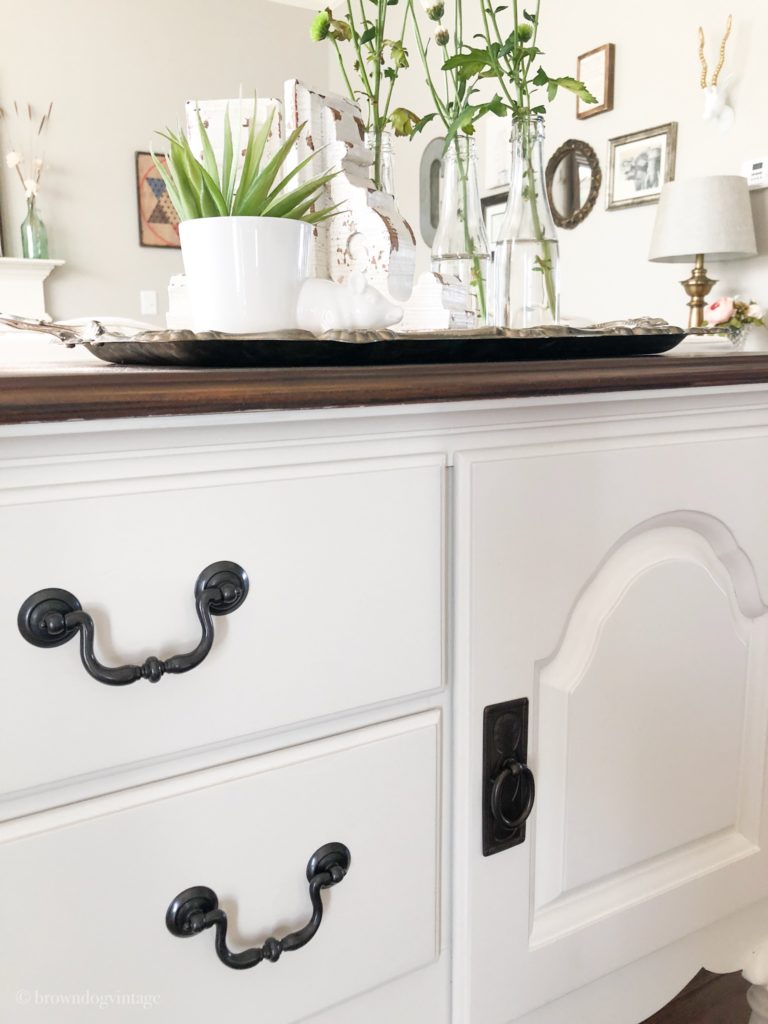

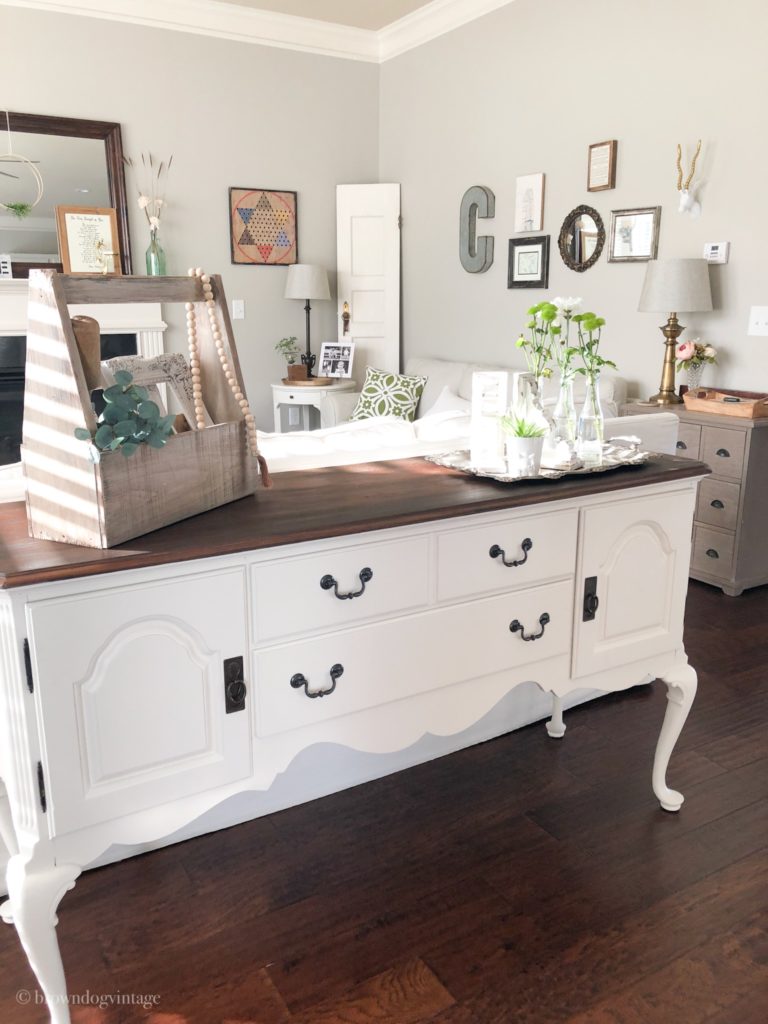
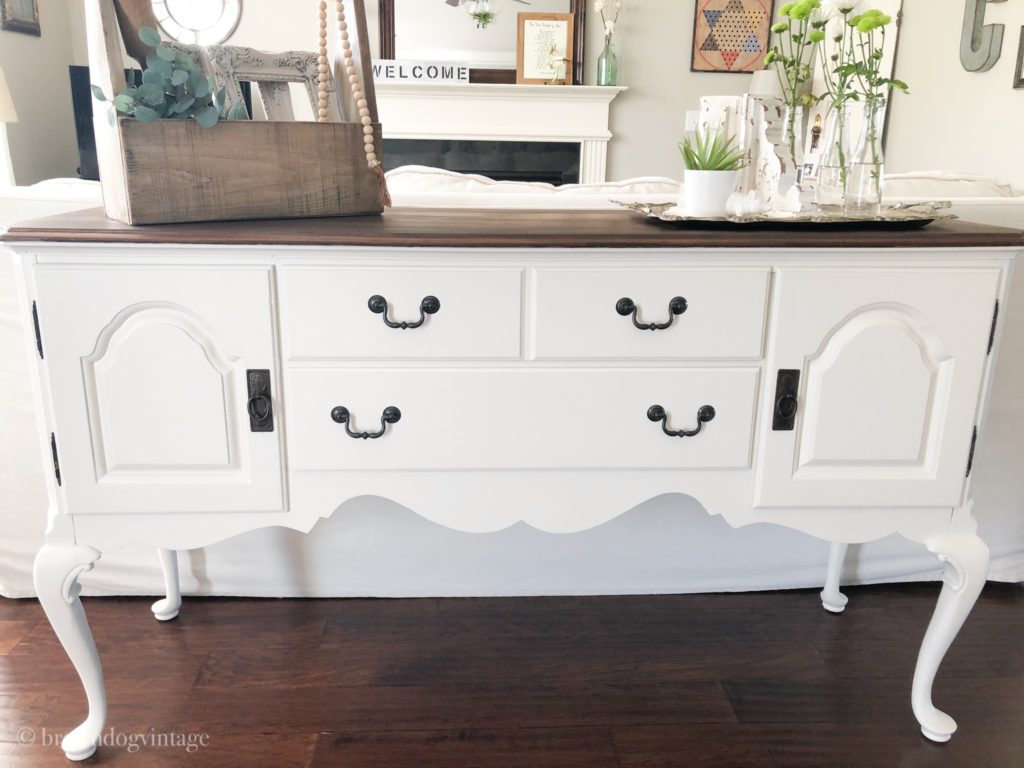
It’s clean and crisp now. The new hardware is amazing and updated it in just the right way to make it pretty!
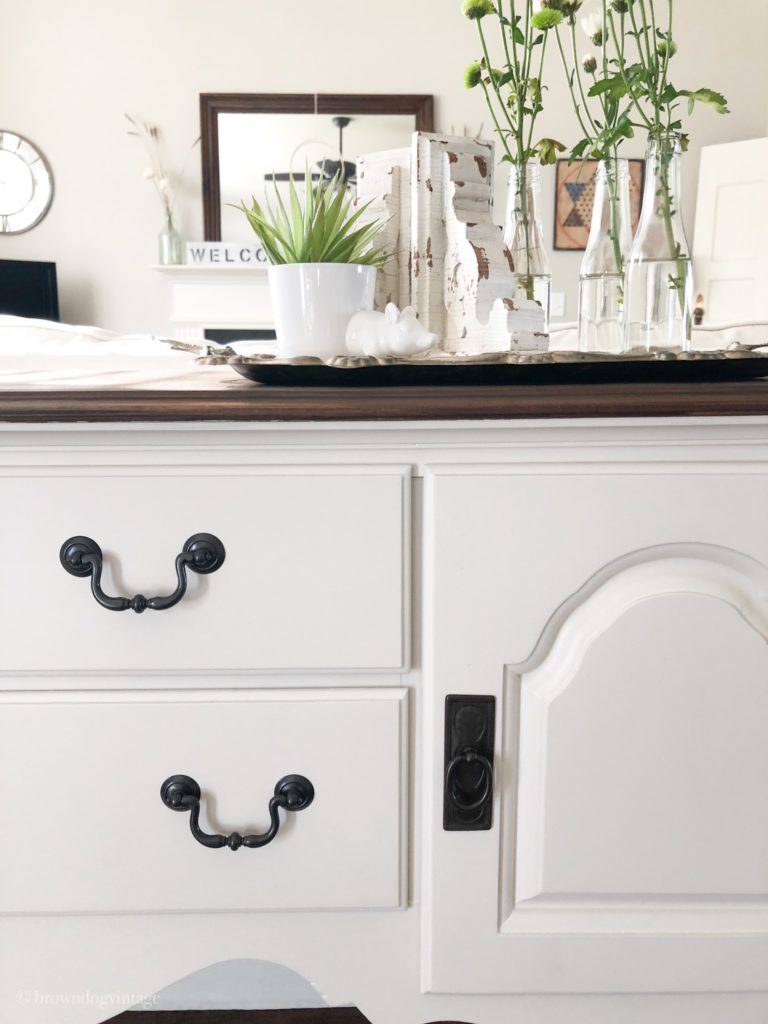
Thanks to D Lawless Hardware! The new hardware is perfect!
Pin for Later!

Hasan
Tuesday 20th of April 2021
Great job Melissa it looks classic.
Himalayan PinkSalt
Sunday 1st of November 2020
I knew the moment that I seen this beautiful vintage antique buffet, that I could give it the makeover that it needed. Thanks for such an amazing ideas.
saltean.com/
Monday 13th of August 2018
The buffet looks really classic. Thanks for the inspiration.
melissa
Monday 13th of August 2018
Thanks so much!
Kathleen mark
Wednesday 18th of July 2018
The buffet looks so beautiful. You have done an amazing makeover of the buffet.
Melissa
Friday 27th of July 2018
Thank you Kathleen!
Lori
Thursday 19th of April 2018
Love what you did with this piece!
Melissa
Friday 20th of April 2018
Thanks so much Lori. It was overdue for a makeover and I'm so happy it's fresh and bright again!