


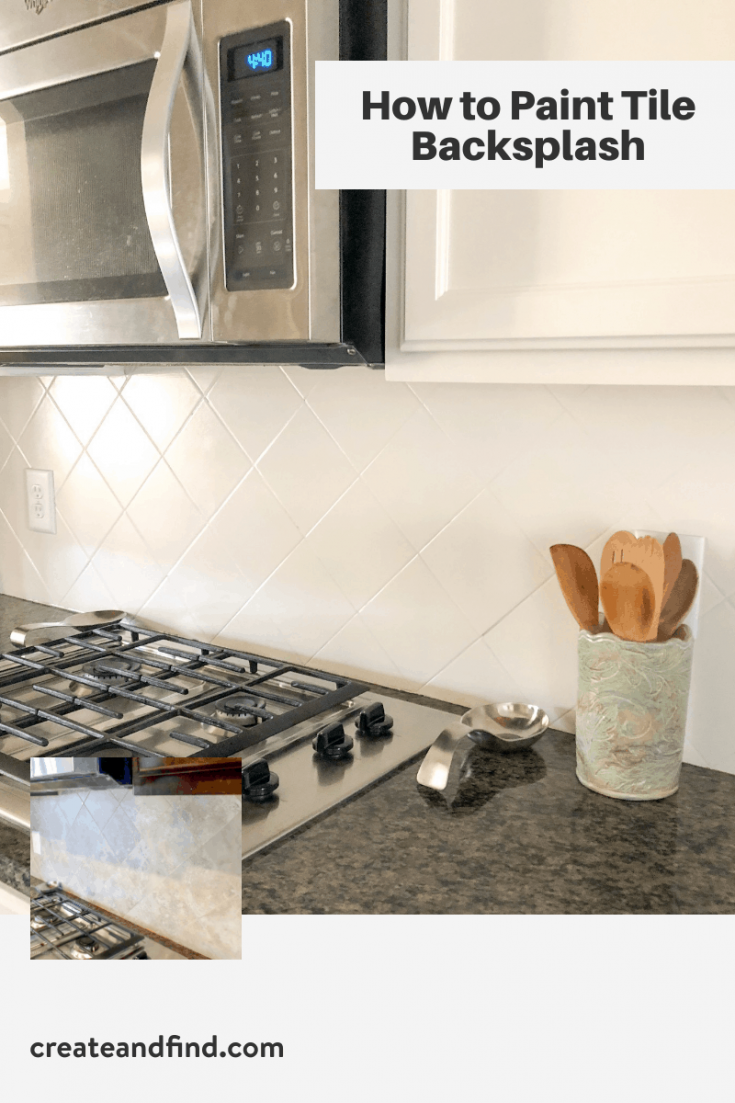
If you’ve ever thought about painting tiled kitchen backsplash, this is the post for you! I finally said enough of the brown tile that just didn’t fit my style and painted it! And I’m so glad I did! Follow along to see what I used and how I did it. And if you’re considering it, this is one of those projects that I wish I had done years ago. It makes such a difference and you can get it done in a few days.
This is a relatively easy DIY project that you can complete in a few days – mainly to account for proper drying times. I’ve found that oil-based paints take a bit longer to dry than others and you want to give yourself plenty of time. But, it has a big impact for very little money so it’s definitely worth it.
Painting Tiled Kitchen Backsplash
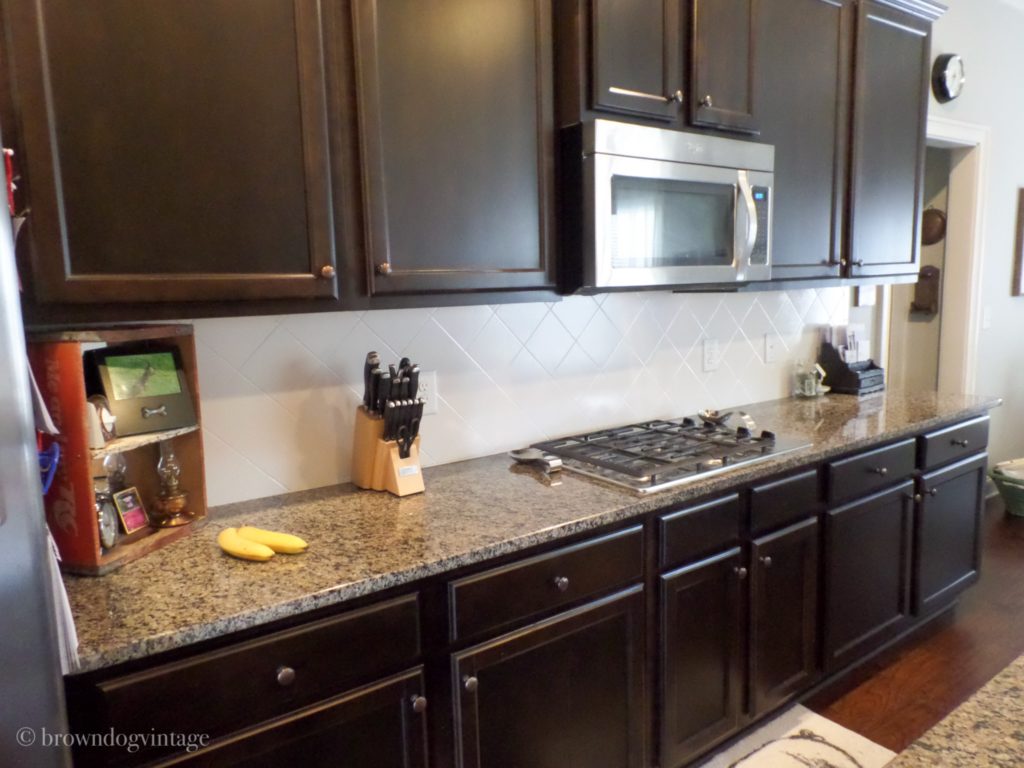
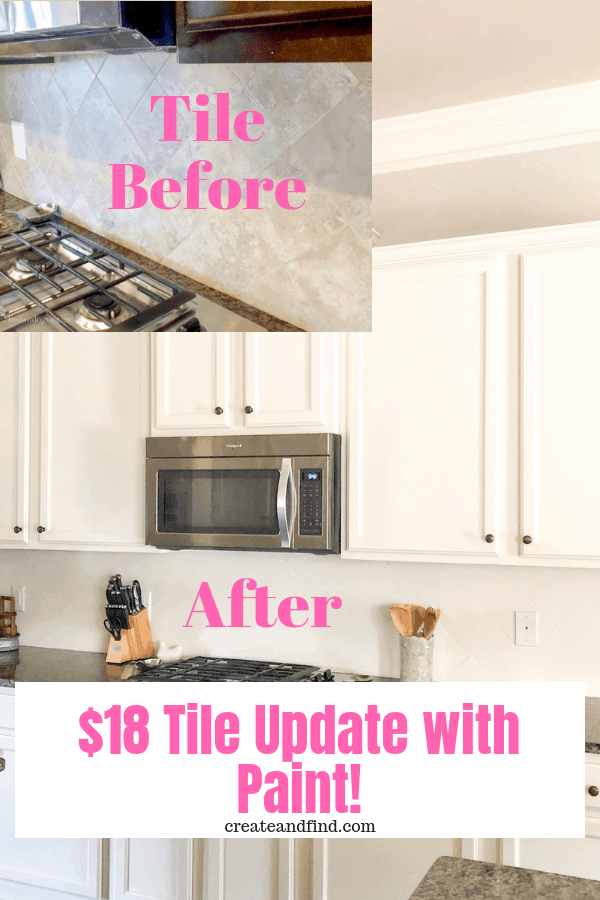
We bought our house in 2013. Everything was pretty much picked out but we got to choose a few things. We were able to pick the color of the backsplash and the countertops. Here’s a before shot from before we moved in (sorry for the terrible quality).
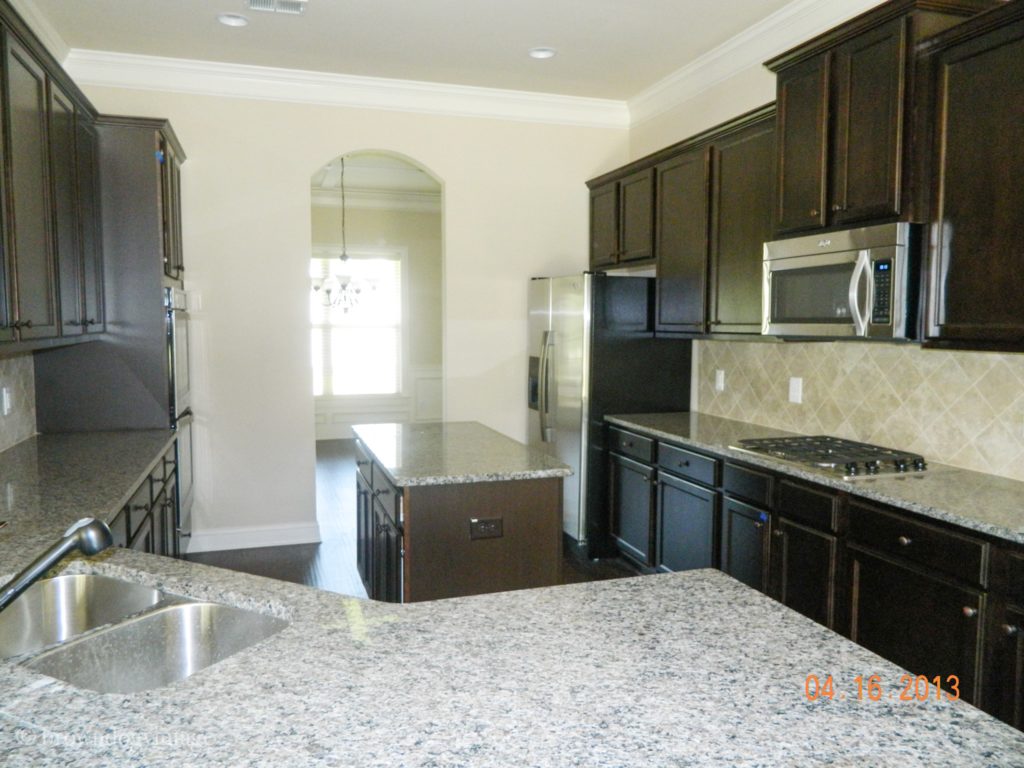
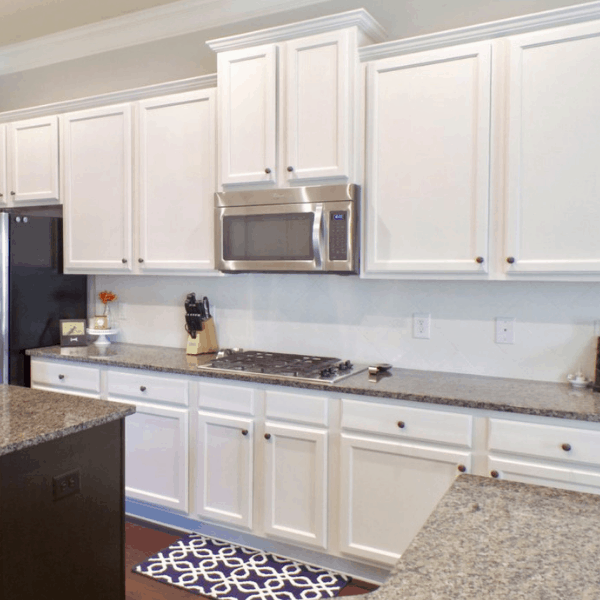
It’s good. The cabinets are beautiful and so is the granite. But I never liked the backsplash. It just didn’t go. Fast forward almost four years. I did a lot of Pinterest and google searching and came to the conclusion that I could change them.
We don’t have the budget right now to rip it out and add the dreamy subway tile that I want, so the next best thing (and easier on my wallet) is painting.
Painting Tile
Tile Painting Supplies
- TSP for cleaning
- Kilz Oil Based Primer
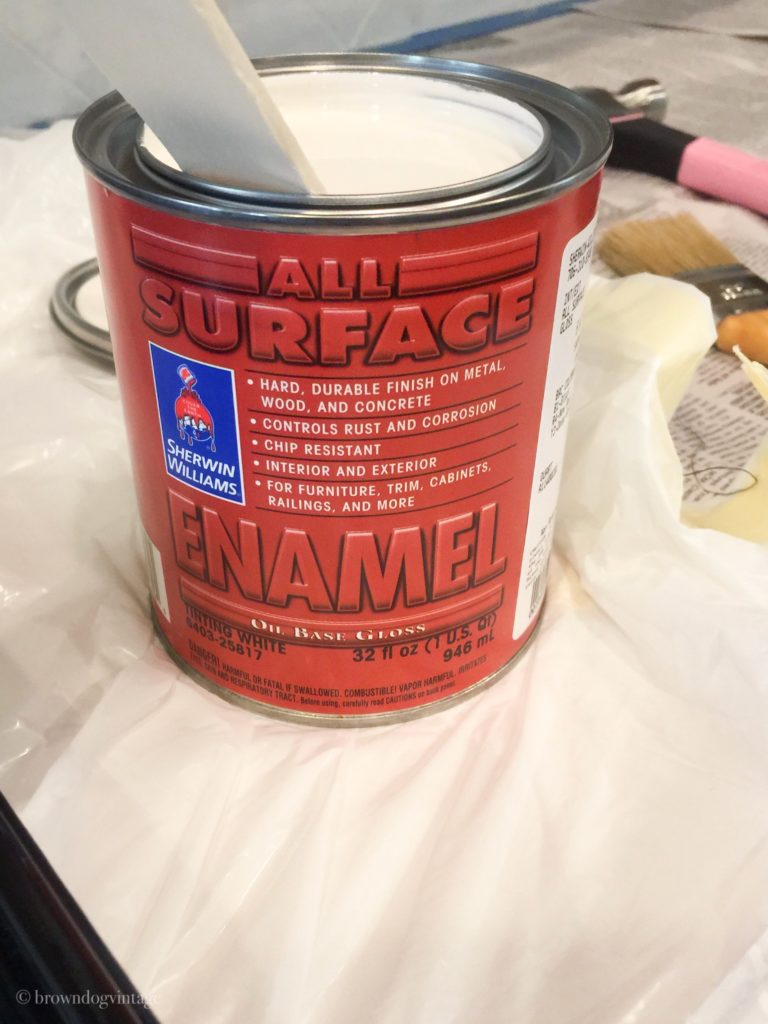
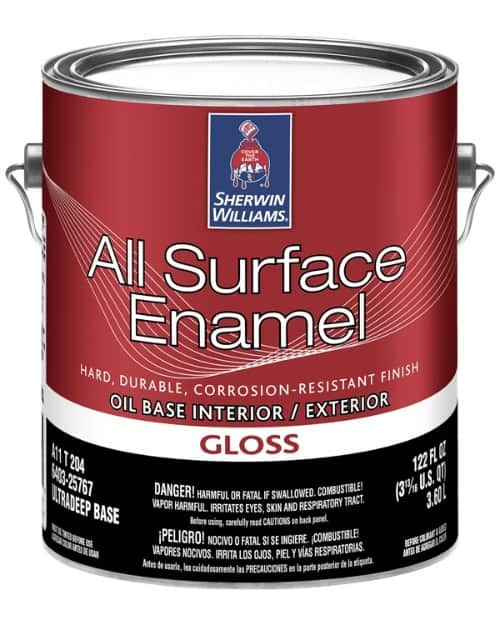
- Oil Based Enamel Paint– We used Sherwin Williams All Surface Enamel Oil Based Gloss Paint – The color is Panda White
- Old Rags
- Mop Bucket
- Newspaper or Trashbags (for covering the counters)
- Paint Brushes specifically for oil-based paints
- Small Paint Rollers (I used 4-inch foam rollers)
- Painter’s Tape
Prep
First, remove all the outlet covers and store them safely so you can find them.
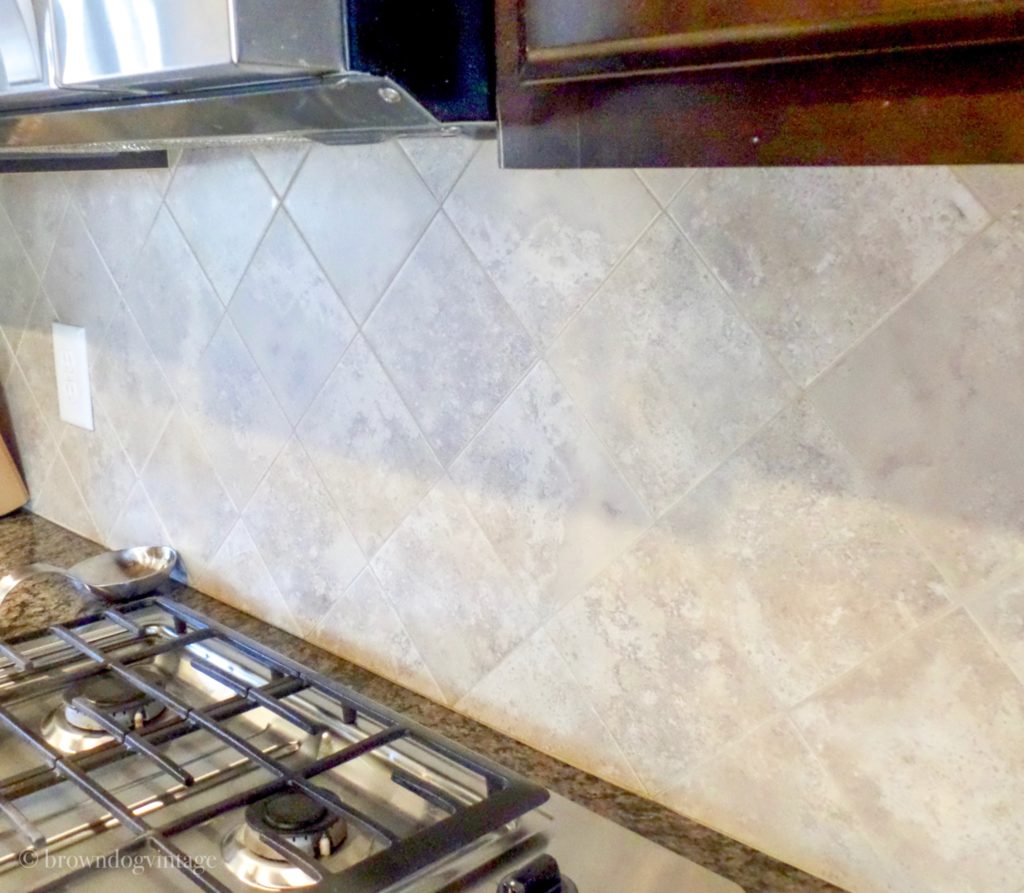
Then, you need to clean, clean, clean. I used TSP powder that you mix with water. Wear gloves and follow the directions on the box. I used our mop bucket to mix and old rags to clean. Clean the surfaces like your life depends on it because you want the paint to adhere. Especially behind cooktops (grease tends to collect here and paint does not adhere to grease).
I went over the area behind our cooktop two times. Let it dry completely. After you clean, tape off all the areas you don’t want paint on. Lay newspaper or trash bags on the rest of the counters to avoid splatter. Trust me on this. I didn’t lay newspaper at first and now I have little paint flecks on the backsides of my cooktop.
Another optional step is to use a liquid deglosser after you clean. This will help to make your tile more likely to hold the paint.
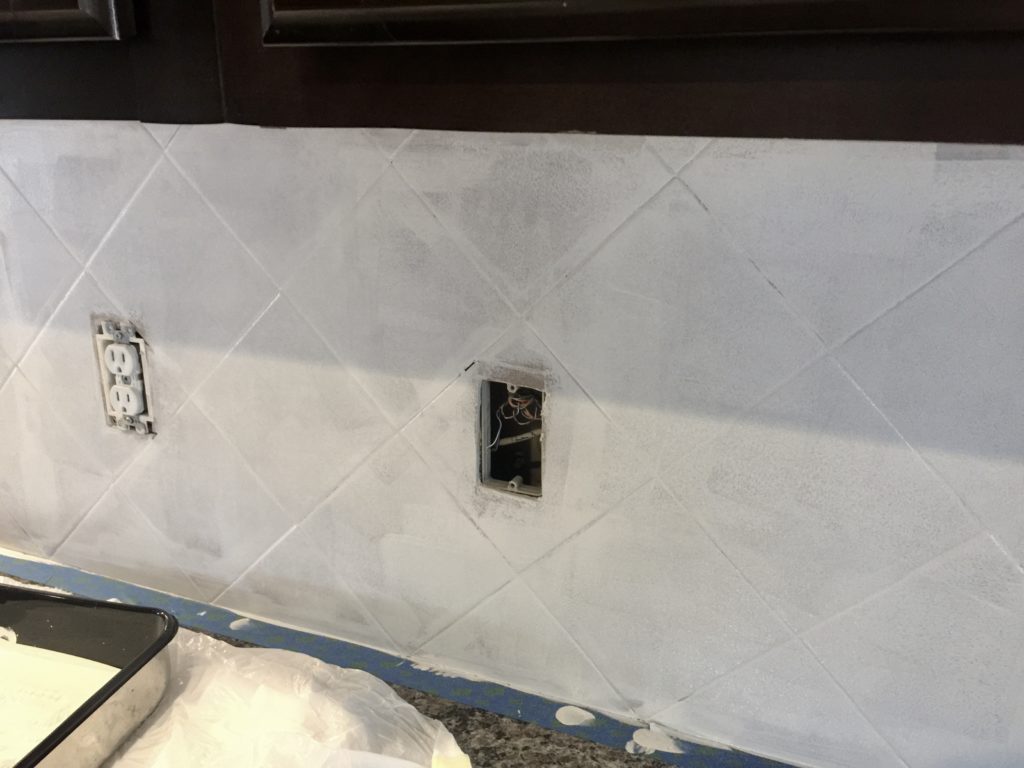
Prime
I would not recommend painting ceramic tile without priming first. I read a bajillion (not a word) tutorials, and nearly every single one says to prime. Kilz oil-based primer is my standard go-to. Make sure the kids are at school and you can open a few windows/doors.
Luckily we had one of those Georgia January days when it’s 70 degrees, so I lucked out. It’s still pretty rough though. Oil-based paint is smelly stuff. Let the primer dry completely before moving on. It takes several hours.

Paint
I bought oil-based paint in Panda White from Sherwin Williams (I chose this color because all of our trim is already this color). The problem is, I tend to stick with their Pro Classic paint, but I only needed a quart. The Pro Classic only comes in high gloss in a quart. Didn’t want high gloss. So the next best thing was this:
I followed the directions on the can and didn’t let my impatience get the best of me. It’s tricky to paint with oil-based gloss. It takes forever to dry and you don’t have a lot of leeway. You can’t go over the same area more than a few times.
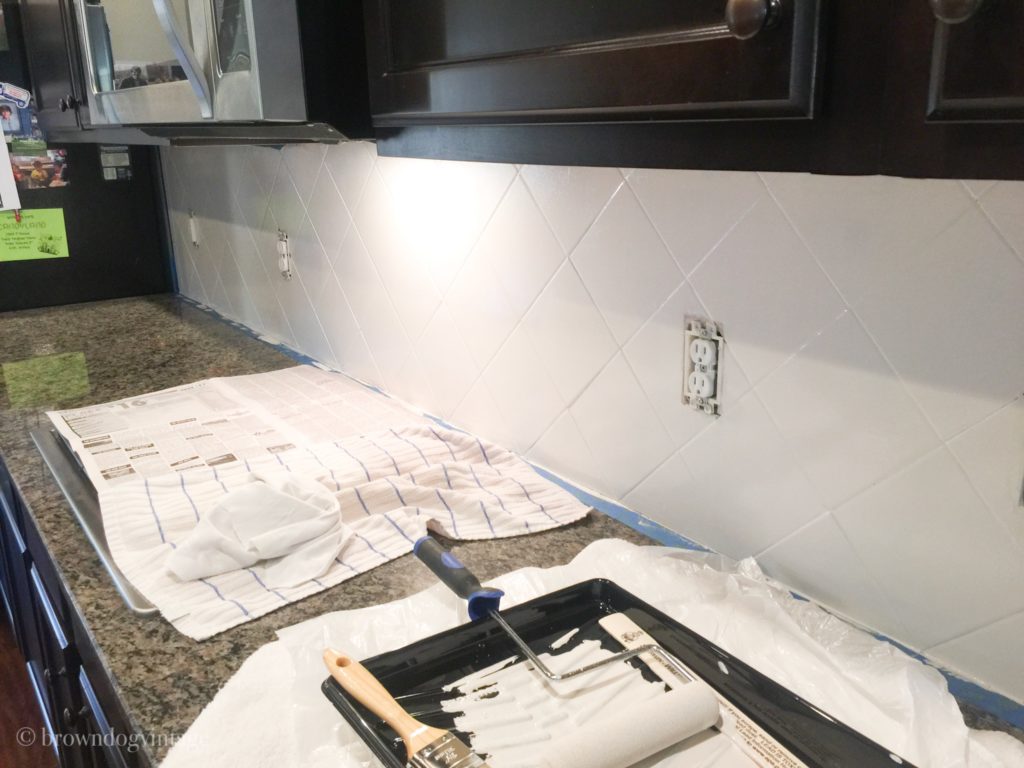
I taped off all the areas that didn’t need paint, worked in sections and brushed the top and bottom with paint and used a small roller for the rest. Work in sections because once it gets tacky, you don’t want to touch your brush or roller to that area again.
If you have a large area I wouldn’t cut in all the tops/bottoms with a brush and then roll.

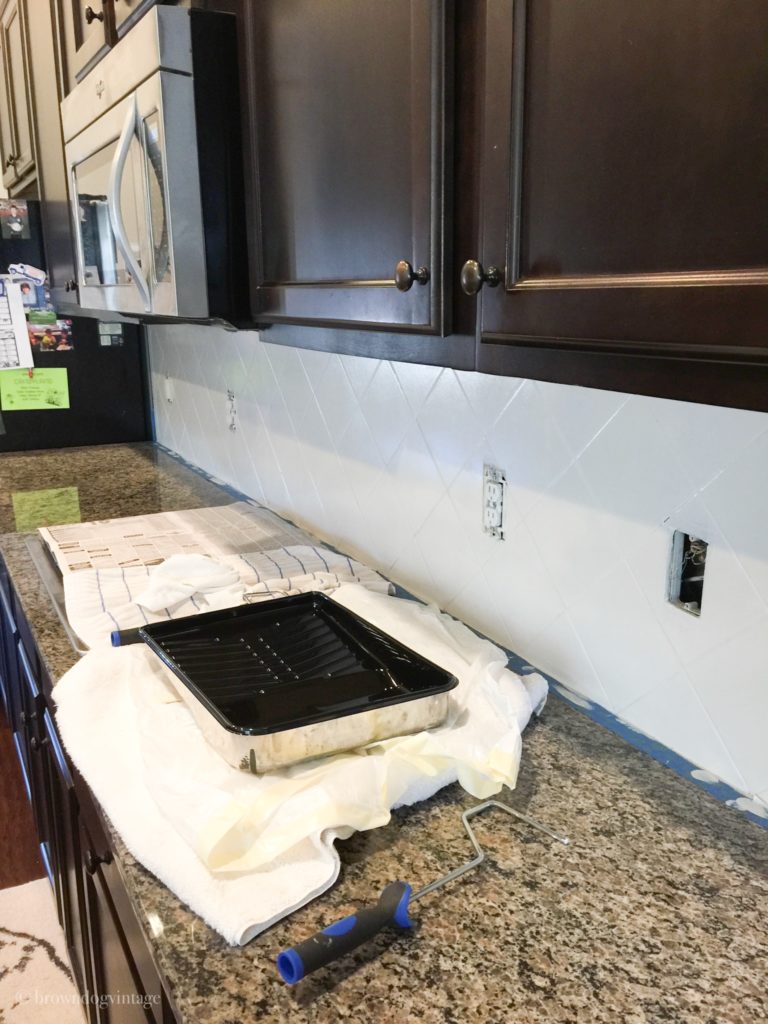
Then I waited a full day to do the second coat. Do the same process of working in sections by cutting in and then rolling. There are a few places that aren’t perfect, but probably I’m the only one that notices.
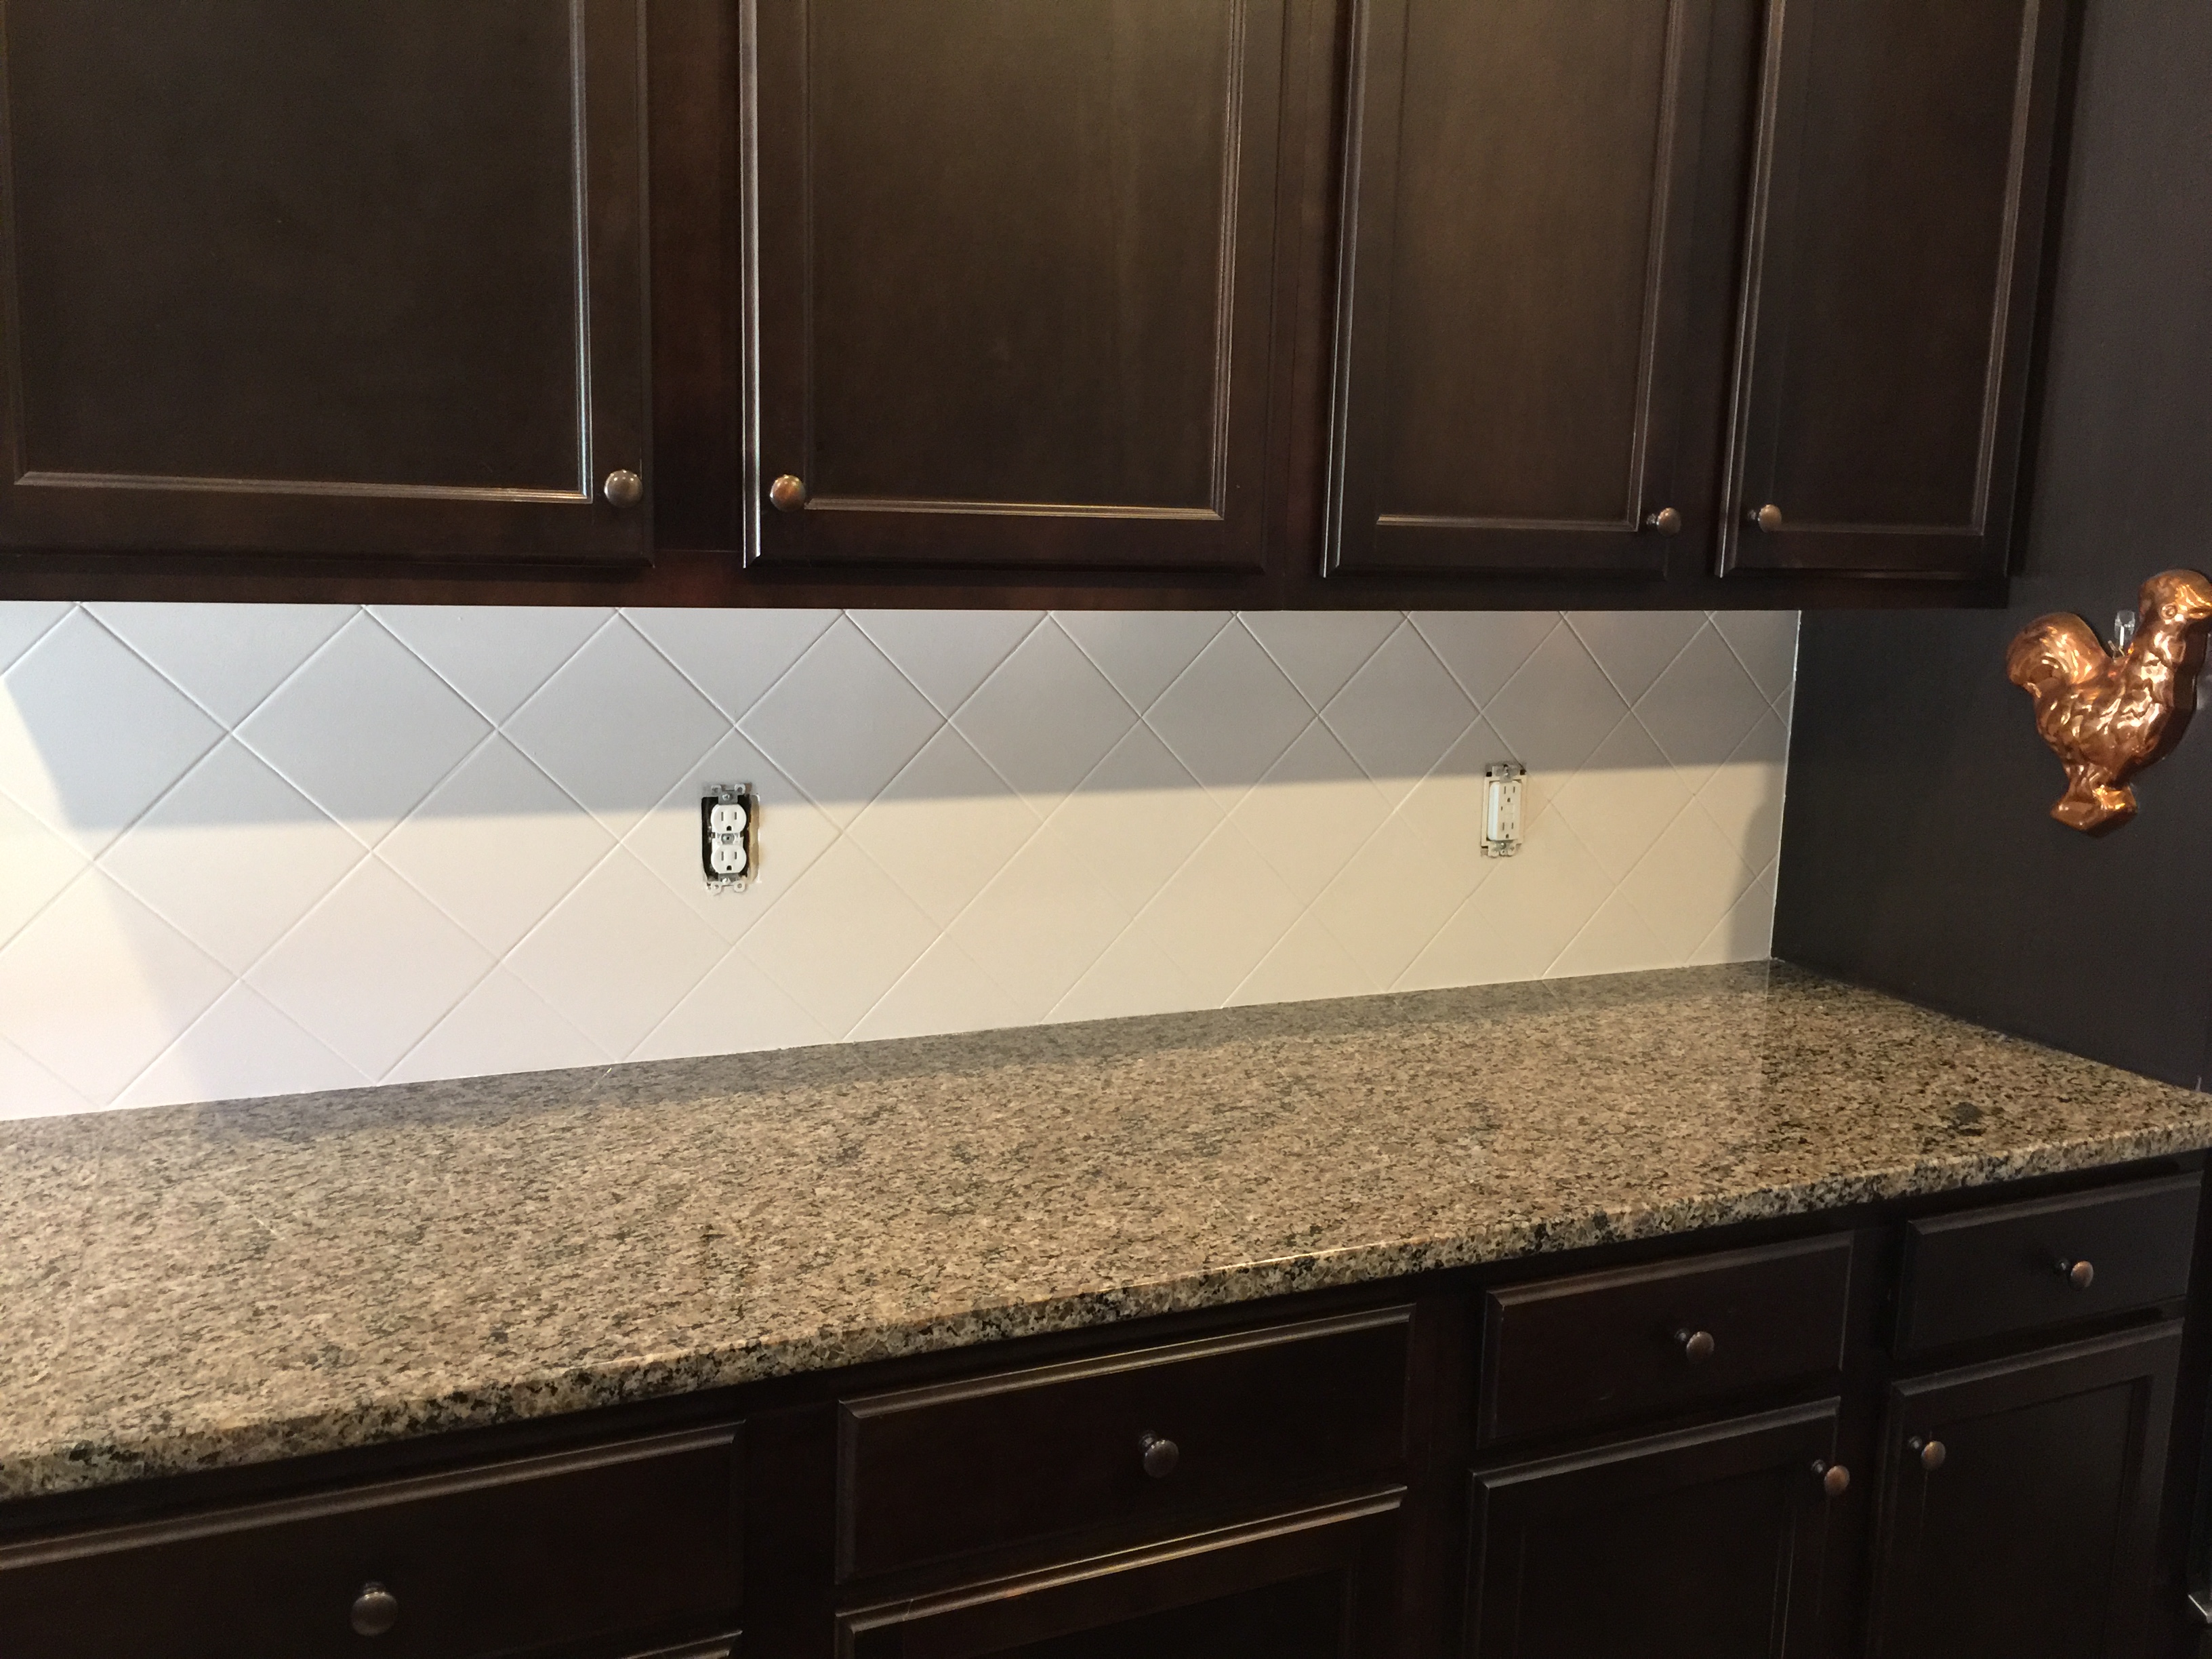
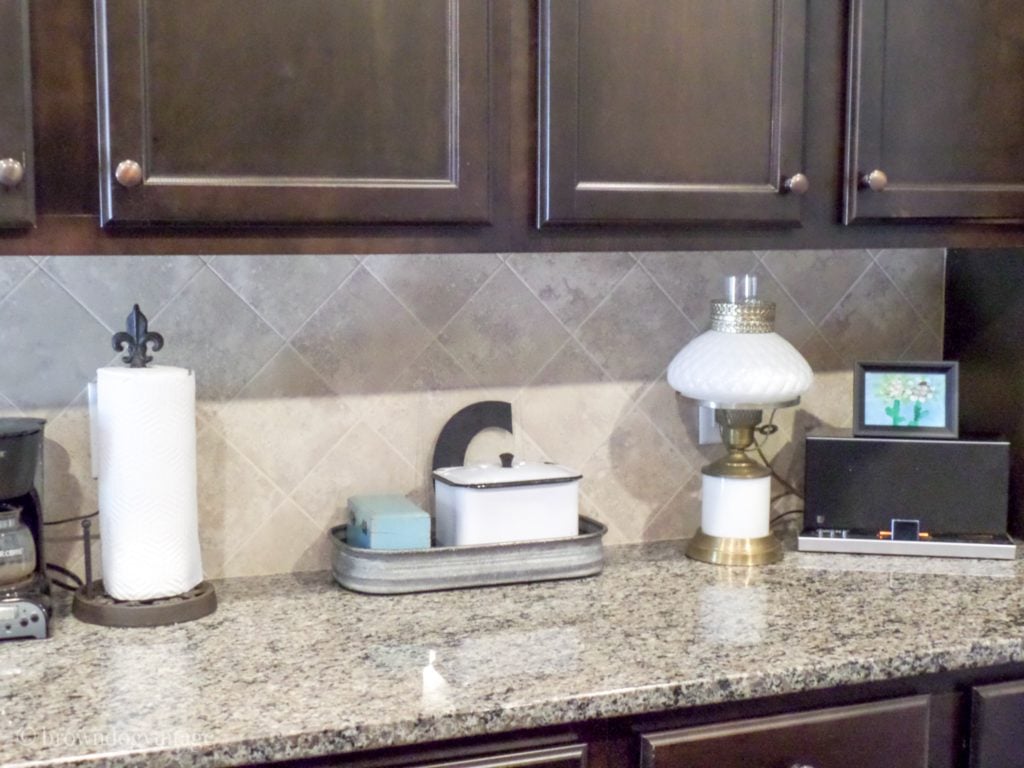
However, it’s a huge change for very little money. I already had the primer on hand and spent $18 on the paint during the 30% off sale at Sherwin Williams. I didn’t use a sealer on this paint and it’s worked out perfectly.
Just jump in and do it if you’re considering it. Sometimes our budget doesn’t allow for major changes and that’s ok. It took me a full five minutes to actually put the paintbrush to the tile, but once I started, I knew it would be fine. It makes a dramatic difference in the look of our kitchen!
How To Paint Tile Backsplash
A tutorial for how to paint tiled backsplash in the kitchen and also an update to show how it holds up to use and time.
Materials
- PAINT
- PRIMER
- BRUSHES
- PAINT TRAY, PAILS, AND LINERS
- DROPCLOTH OR NEWSPAPERS
- PAINTER'S TAPE
- BUCKET/RAGS
- GLOVES
- MINERAL SPIRITS
Tools
- PAINT BRUSH
Instructions
- Remove all outlet covers and switch covers
- Tape any area that you don't want to get paint/primer
- Protect counters with drop cloths or newspapers
- Clean tile thoroughly with TSP - make sure there is no residue or grease
- After the tile is clean and dry, apply a thin coat of oil-based primer
- Let dry completely
- Paint with oil-based paint in the color and sheen of your choice
- Let dry and paint a second coat if necessary
- Clean brushes with mineral spirits and dispose properly
Notes
Don't use soap and water to clean brushes after using oil-based paint. Use mineral spirits and be sure to dispose of them according to your county guidelines. They cannot be flushed or put down your sink.
Work quickly to avoid dragging the brush in the primer or paint. If you miss an area, get it on the second coat rather than risking messing up.
Cost varies depending on what supplies you already have on hand but a good guess is between $30 and $60
Recommended Products
As an Amazon Associate and member of other affiliate programs, I earn from qualifying purchases.
-
 All Surface Enamel Oil Base - Sherwin-Williams
 -
 Pro Grade - Paint Roller Tool Kit - 10 Piece Painting Set
 -
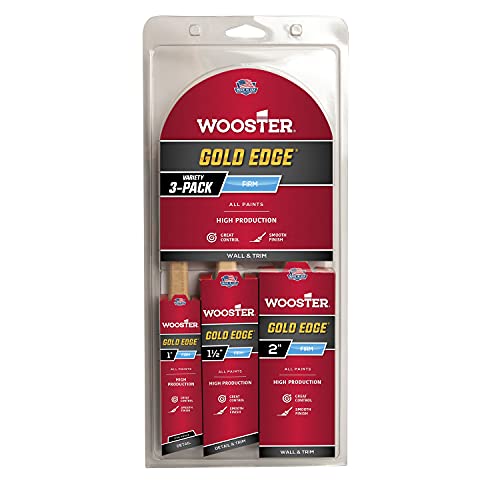 Wooster Series 5239 Gold Edge Wall Brush 3 Pack, 1 Inches
 -
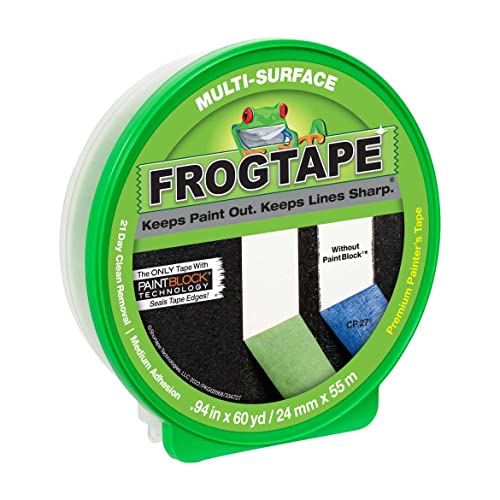 FROGTAPE Multi-Surface Painter's Tape with PAINTBLOCK,
 -
 Sunnyside Corporation 80332 Low Odor Mineral Spirits
 -
 KILZ Original Multi-Surface Stain Blocking Interior Oil-Based Primer
 -
 Savogran 10621 Trisodium Phosphate (TSP) 1LB (16oz) - 2 Pack

Get ready cabinets, you’re next.
UPDATE! Cabinets are painted now!! Check out how I did it for $100! Click here!
And you can check out the one year update of the tile paint and see how it’s holding up! Click here
For more painted tile backsplash ideas, check out these for inspiration.
Don’t forget to pin it for later:
More Budget Friendly DIY Projects:
Build Your Own Swing Set
Build A Baby/Dog Gate
Building a Farmhouse Table

Michelle
Wednesday 15th of March 2023
Hello, wow this is fantastic! We painted our cabinets white also, and I've been trying to figure out what to do with the backsplash that covers a large space around my kitchen without breaking bank. So glad to know it has lasted and hasnt chipped. Question for you, does it have the shine like a tile? Im concerned even with a gloss paint, it will still look painted. Also wondering if high gloss is too much and what made you not want to choose it? Thank you so much for sharing
create and find
Thursday 16th of March 2023
Thanks so much for the compliments! This was one of my favorite projects ever and held up beautifully. And it definitely had a shine with just the gloss compared to the high gloss. I didn't choose high gloss because it's less forgiving to paint with. It tends to show brush strokes easier. The gloss can too, but I was trying not to make it too hard on myself.
Meli
Sunday 1st of May 2022
Finally I found a good guide to do this. I applied a primer I had to my back splash but it fell with one touch. I can't wait to start doing this. Thank you
create and find
Monday 2nd of May 2022
Thank you for the compliment! I hope it works for you and I’d love to know how it turns out!
Iliana
Tuesday 28th of January 2020
Wow great job!!! I definitely going to try it!. Thank you for all instructions and pictures:)
create and find
Wednesday 29th of January 2020
Thanks for the compliments! Please email me and let me know when you get done - I'd love to see it and share it!
Morgan
Wednesday 31st of July 2019
Looks awesome! When I was at home depot looking for the stuff to do this they told me to sand the backsplash first. Would you recommend that?/why didnt you chose to sand
create and find
Wednesday 31st of July 2019
Thanks Morgan! I didn't sand first. I used TSP cleaner and then an oil based primer and it worked perfectly. My tile wasn't glossy though to start with. It almost had a rough texture to begin with so I wasn't too worried about the paint adhering properly. What kind of tile are you starting with?
Leighna
Wednesday 20th of March 2019
Looks amazing! I really want to try mine. However, mine look more glossy than yours and I’m not sure the paint would stick. Any ideas or suggestions?
Melissa
Wednesday 20th of March 2019
Thanks so much! I think if you clean it with TSP and then prime with oil based primer, it should work just fine. Let me know how it goes!