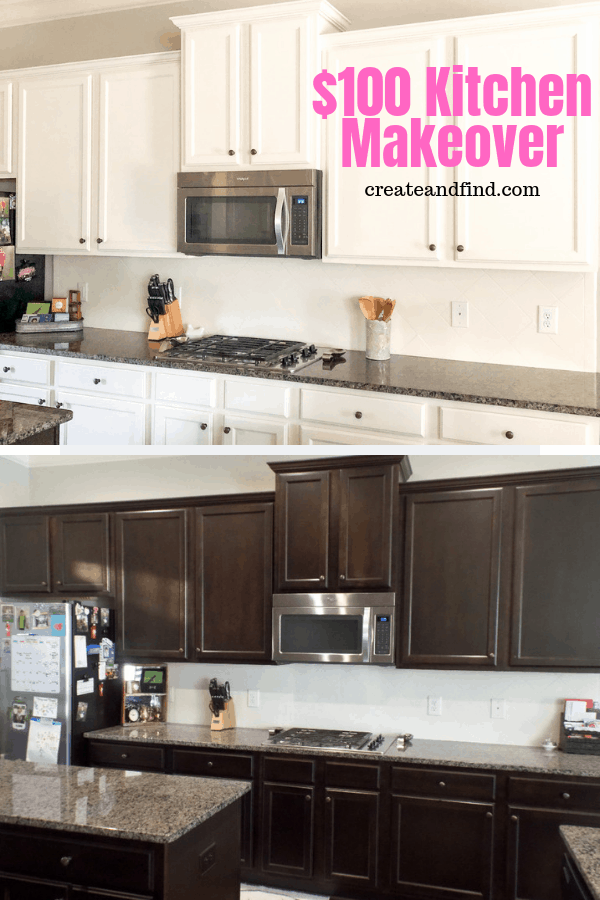
If you think $100 won’t go far in changing the look of your kitchen cabinets, check out this reveal. I took on a big task of a DIY kitchen makeover while sticking to a strict $100 budget. Come see what my kitchen looked like at the beginning of the challenge and what it looks like after several weeks of DIY efforts!
If your kitchen is in need of a makeover but you don’t have lots of room in the budget, this is for you! I completely updated my kitchen cabinets for $100. I’ll show you what supplies to use and how it looks now after a few weeks of work.
Thrifty DIY Kitchen Makeover Reveal!
Welcome to the final week of the $100 Room Challenge Makeover! I’m participating in an amazing challenge started by Erin from Lemons, Lavender, & Laundry and we are in the final week!!
If you want to catch up, here are the links to the other weeks of the challenge:
Week 1, Week 2, and Week 3
I actually completed most of the painting in 2 weeks, but I had several touch-ups to do this past week. One big tip I shared during Week 3 is to sand between coats of primer/paint. I skipped this step on the lower cabinet doors when spraying, and after seeing the difference it makes, I decided to redo those.
So I’m glad I was ahead of schedule because this would’ve put me behind.
And if you’re looking for the condensed version without going through all four weeks of my ordeal – check out this post on How to Paint Kitchen Cabinets – it’s an easy, step by step tutorial of what you need to do to paint your cabinets!
RELATED POST: DIY Boardgame Cabinet Makeover Without Sanding
Week 4 of Painting Kitchen Cabinets
Day 1: I spent most of this day re-hanging the upper cabinet doors. This is more challenging than the lowers. For starters, you are either standing on the counters or using a ladder – there’s not a whole lot to balance the doors on while trying to get them attached. It probably took me twice as long to hang the upper doors.
Day 2: I did all the touch-up painting inside today. One thing I learned from using a paint sprayer is it’s a little difficult to get the edges of the doors. Or maybe it was just my technique. So I used a small one-inch brush and touched up the edges of each door and drawer.
Another big task for today is re-spraying the lower doors. There was such a noticeable difference in the finish of the paint between the uppers and lowers. This was totally due to not sanding between coats of primer and paint. I’ll say it again – Do not skip this step. You’ll be so much more pleased with the outcome if you take the extra time to sand. So off with the lower doors, out into the garage, sand them, wipe them down, and spray with a coat of paint.
Day 3: Nothing – work and early birthday celebrations for my sweet boy are taking a fun priority today!
Day 4: Rehang the lower cabinet doors. Give your paint at least 24-48 hours to cure before you start handling them much. I also touched up the edges that didn’t get enough paint when spraying.
Day 5: Nothing – my house was mad chaos with my son’s birthday party! Thankfully my cabinets held up with the madness!
Day 6: Cleaning
Day 7: Final decorating touches
Budget Breakdown
Something I forgot to include in week 3 was another bottle of mineral spirits! I ran out of primer, and that’s one thing about a paint sprayer. If you aren’t using it for about 30 minutes, it needs to be cleaned thoroughly. I used the last of my mineral spirits and had to get a whole new bottle.
So that’s the end of my budget! I thought I had $12 left, but nope! $0.00 left!
Here’s a final breakdown:
- $40 – Paint
- $12 – Mineral Spirits
- $10 – Brush
- $12 – 4″ Foam Rollers
- $6 – Paint Trays
- $8 – Primer
- $2 – Outlet/Outlet Cover
- $10 – Chemical Odor Respirator Masks
TOTAL $100!
Since I’m out of money, I shopped my house for the rest. I had some clearance Target rugs that I was planning to use in the guest bathroom, but I stole those for the kitchen when I realized I was out of money!
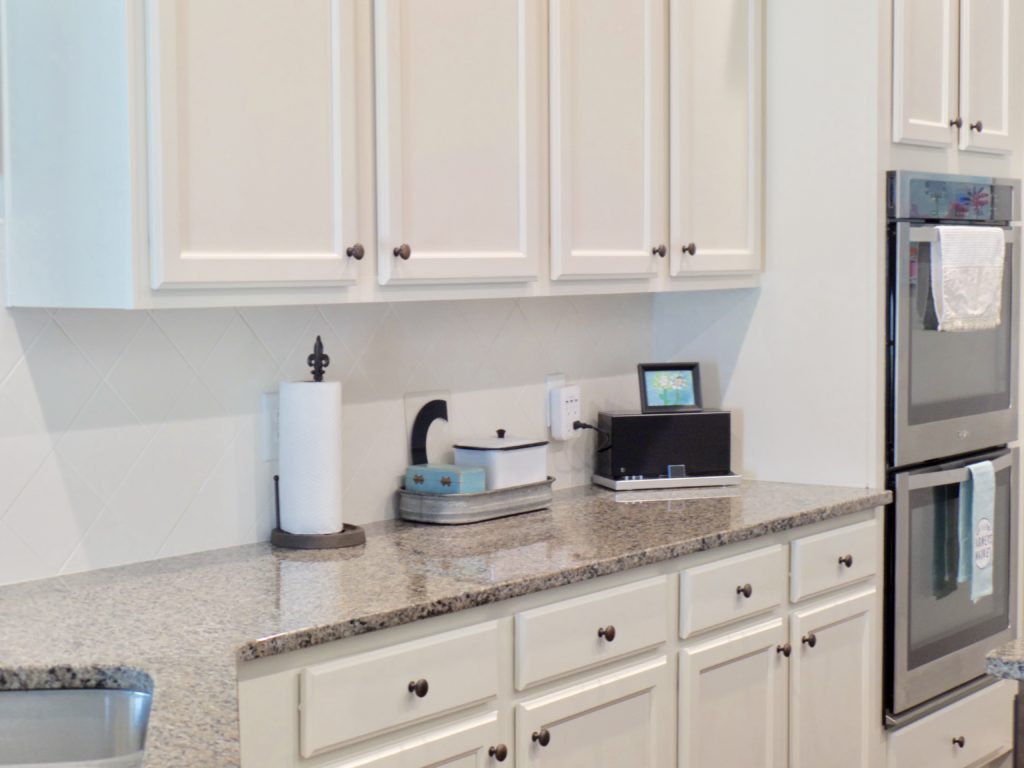
I moved around some decor and did some major cleaning of the appliances (which will get a post of its own since it made such a big difference). So on with the reveal!
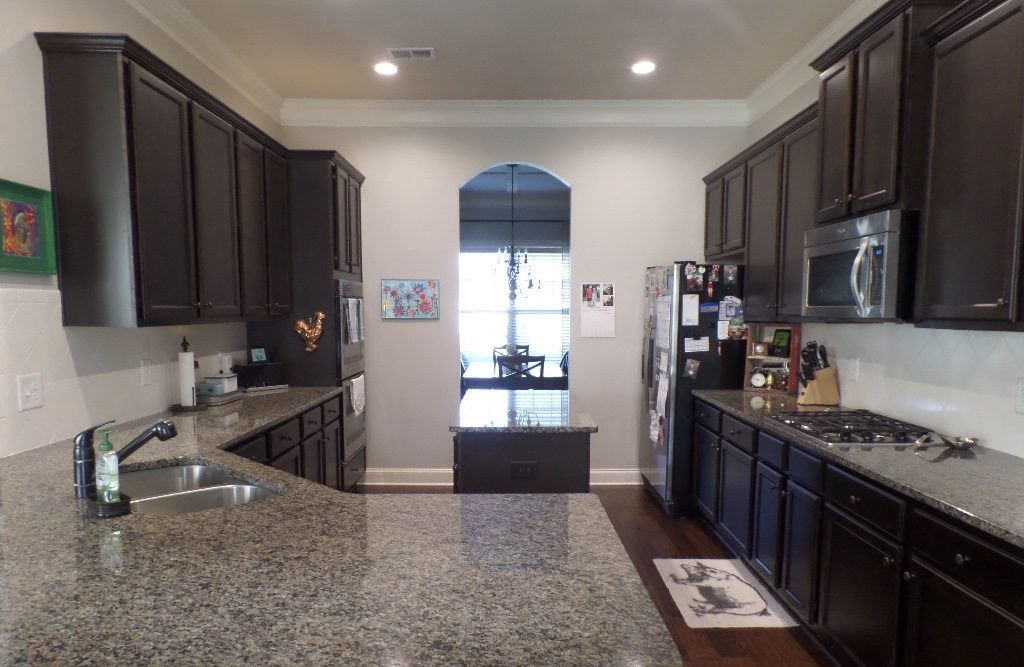
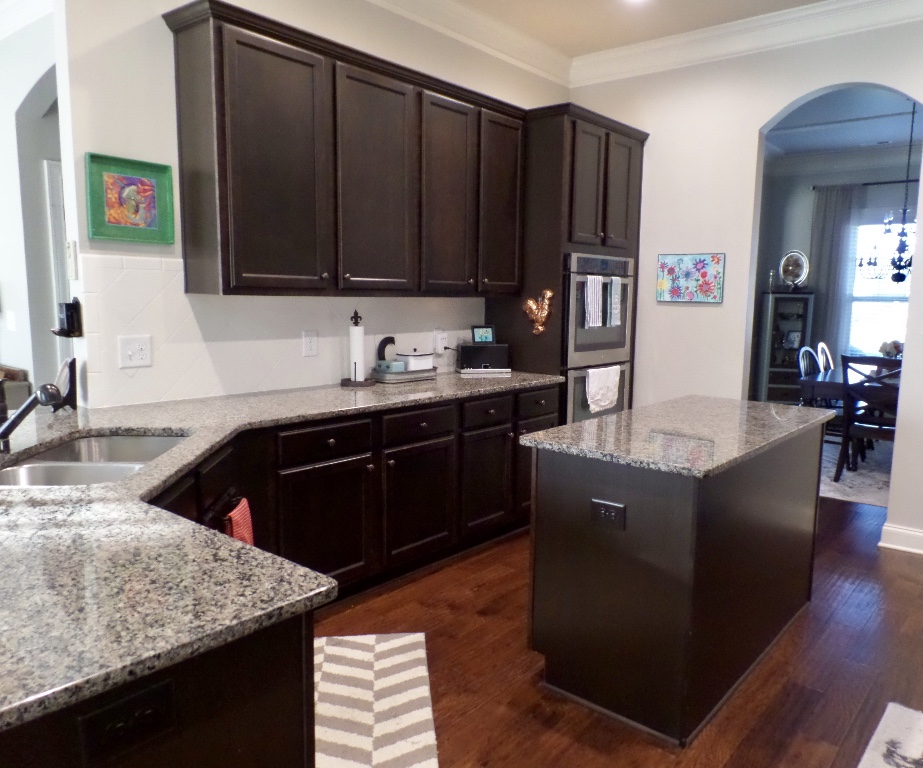
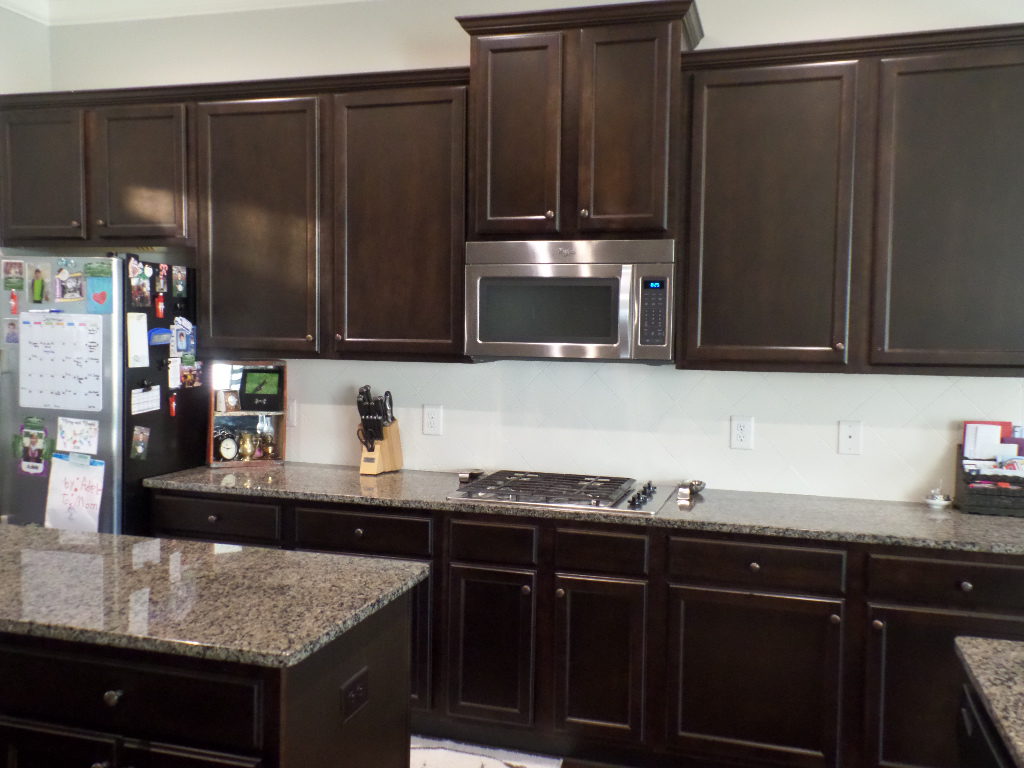
Before My Cabinet Makeover:

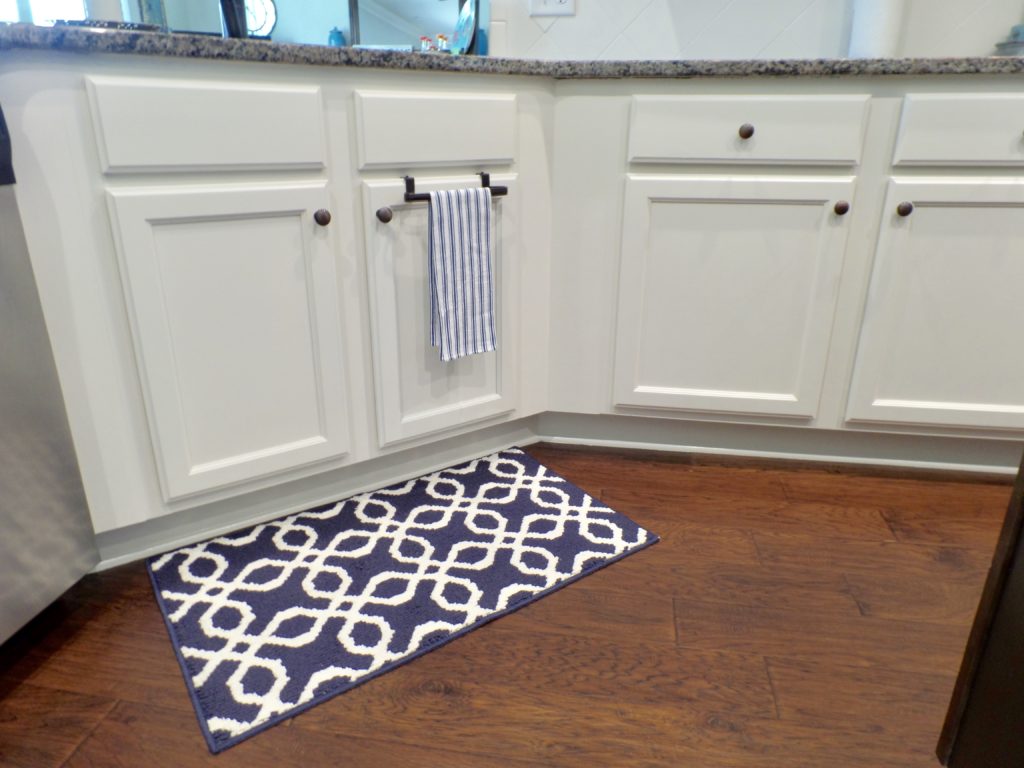
And see the cabinets after the makeover:


What a change for $100 and some major DIY effort! However, if you consider the cost comparison of hiring a professional to complete this project, it’s overwhelming savings and well worth the effort.
Thanks so much for joining my DIY kitchen makeover in the $100 Room Challenge. It’s been so much fun checking out all the other talented bloggers and some serious DIY skills! Definitely check out the links below for some major inspiration!
Don’t forget to pin for later!
Be sure to check out my list of Top 10 favorite painting supplies for kitchen cabinets!
Jackie
Monday 12th of August 2024
These cabinets turned out so great! I love it. We are having to redo ours after some water damage & I would love to do something like this. We just have to get the damage restoration done first! Thanks for sharing!!!
Deann
Friday 19th of July 2019
Do you remember the name of the white color you used on the cabinets?
Linda
Thursday 7th of March 2019
For paint I use paint & primer mixed as one will I still have to prime 1st??? Love the way your kitchen came out.
Melissa
Friday 8th of March 2019
Thank you Linda! I'd recommend priming first. Mainly because kitchen cabinets take a beating around here and I wanted to make sure my paint adhered like glue!
Lisa
Tuesday 6th of February 2018
Wow! This is an incredible transformation! So light and bright after, great job!
Melissa
Friday 9th of February 2018
Thank you Lisa! It was a labor intensive job for sure, but definitely worth it!
Beth
Friday 13th of October 2017
Wow! What a huge difference- it looks amazing! I've painted cabinets a few times and always skip the sanding step (I'm impatient sometimes) ;-) but you've convinced me. Awesome job!
Melissa
Friday 13th of October 2017
Thanks so much! I get in such a hurry too to get done, but I learned a lesson on sanding for sure!