It’s October and that means Halloween! I’ve decided to DIY quite a few of our Halloween decorations this year. Gotta save money for all the candy! Since it can get quite expensive to buy all new decorations, DIY is the way to go. And this year we are going with a creepy theme. Come see the spooky DIY Halloween wall art I made and follow along in an amazing blog hop for tons of other ideas! Now that my kiddos are a bit older, we don’t have to stick with the happy pumpkins and friendly ghosts. And what better way to save money on decor than to hit up the dollar stores! This year, I found so many things to use in my decor from The Dollar Tree!
Please join Barb Garrett of The Everyday Home and all of these other fabulous bloggers participating in this Dollar Store Halloween Crafts Blog Hop.
DIY Halloween Wall Art
If you aren’t familiar, everything is literally $1 at The Dollar Tree. Everything. This can be an issue sometimes because you don’t realize how quickly all those $1 items add up! I let the kiddos guide the direction of this DIY and for this project, we decided on some spooky DIY wall art.
DIY Halloween Wall Art Supplies
- 2 silver trays
- 2 skulls
- Hot glue gun/glue (already owned)
- Black Satin Spray Paint
- Command Strips
- I bought one of the black drapes, but didn’t end up using it for this project (which is why you see it in the pic below)

Paint
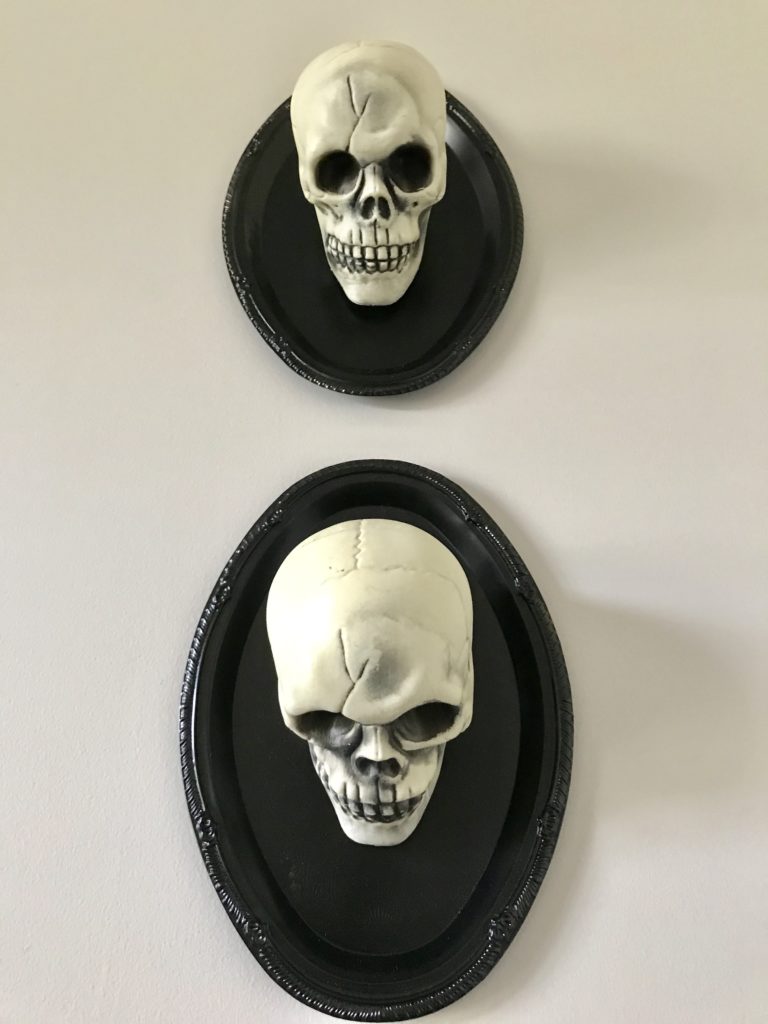
My original plan was to spray the skulls black and “antique” the trays. However, since I was letting the kiddos guide this project, they wanted the skulls natural and the trays black. Find a cardboard box or something else to set the trays on. Spray the back first, then flip when dry and spray the fronts. I didn’t get too picky with my sprays. It’s not meant to be a perfect project. I let my 10 year old help me with the spraying – I showed him how and he took off. I love when they actually want to help with DIY projects!
Put it Together!
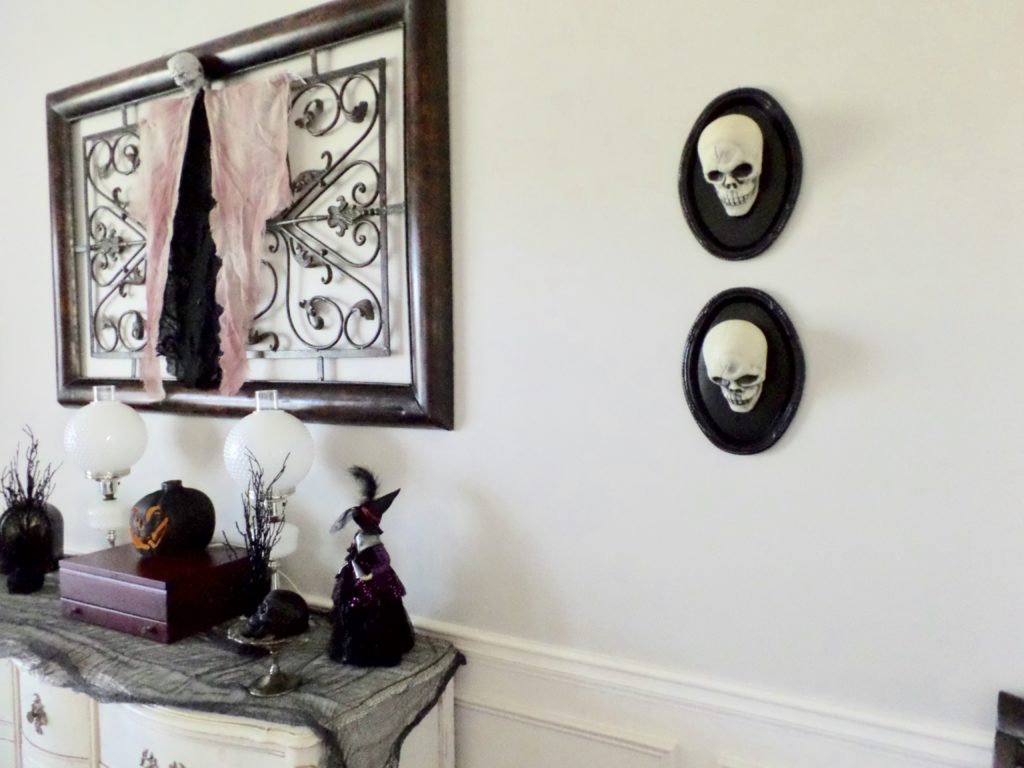
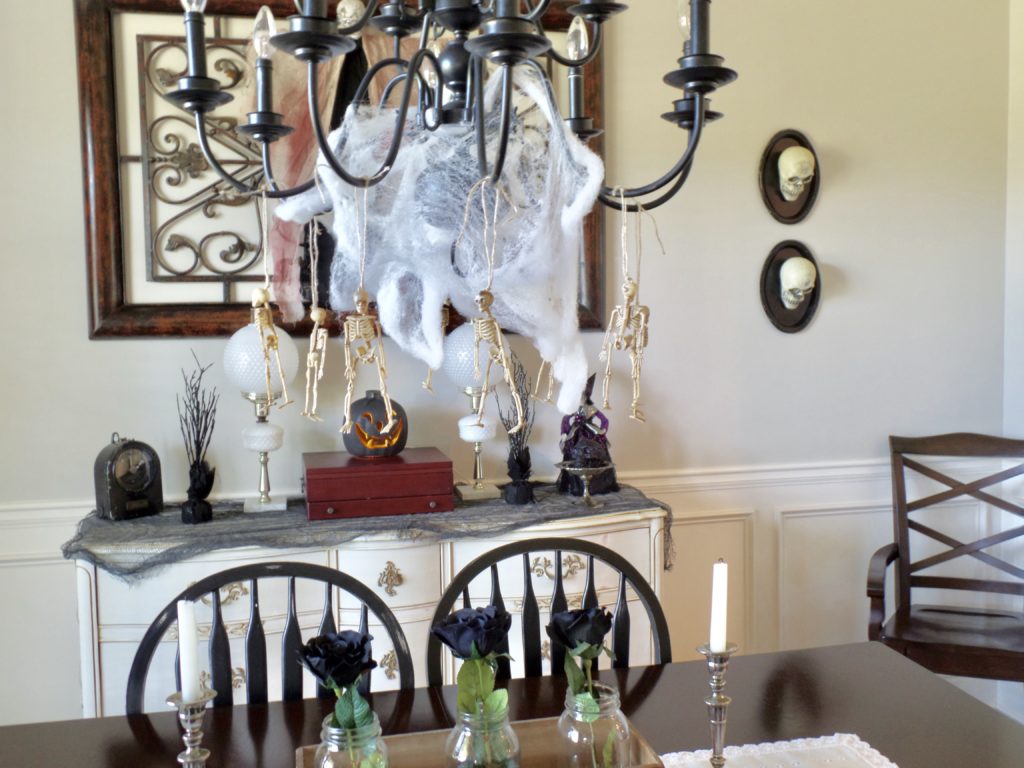
I used a hot glue gun and added some dots to any place of the skull that would touch the tray. This lasted all of about 15 minutes and then 2 skulls came crashing down on the floor. So I added command strips to the back of the skull and a dot of hot glue to the top portion of the skull and so far so good! I took down some dining room decor and added my skulls. I didn’t measure or make sure it was centered. Just eyeball it and it’ll be just fine! Simple and quick.
Please welcome Mr and Mrs Creepy Heads:

I know the creepy style isn’t for everyone, but we love to play around this time of year. And why not when you can spend a grand total of less than $10 for some spooky new DIY Halloween wall art? Be sure to check out all the other amazing link ups and some fabulous dollar store crafts!
Pin it for later!


Wendy
Monday 9th of October 2017
This is so great Melissa! I love it! Storing these ideas away for next year....might just have to do the spooky thing!
Melissa
Monday 9th of October 2017
Thanks Wendy! I definitely love the spooky look this time of year!
Debrashoppeno5
Saturday 7th of October 2017
This is a great idea. I really like Mr. and Mrs. Spooky. They remind me of family portraits of the creepy kind.
Melissa
Saturday 7th of October 2017
Thanks so much! And yes - they kinda do look like a creepy little family on the wall!
Valerie@Occasionally Crafty
Friday 6th of October 2017
Ooh, these are spooky! Turned out great! Visiting from the blog hop!
Melissa
Friday 6th of October 2017
Thanks Valerie! I can't wait to check out all the others!