This month is all about the creepies, the skeletons, and the scary around here. My kids love to decorate for Halloween and this year we are going all spooky! We’ve collected a few things over the years, but I was hoping to add a few more Halloween yard decorations to the mix. I had a fabulous opportunity to try out something new to me! Come along and see what we did to “spooky” up our yard this year! And check out some other fabulous Halloween Decor from some talented peeps at the end of the post!
In full disclosure, I was provided the vinyl graphic for this project, but all opinions are my own and I would never promote something I don’t love!
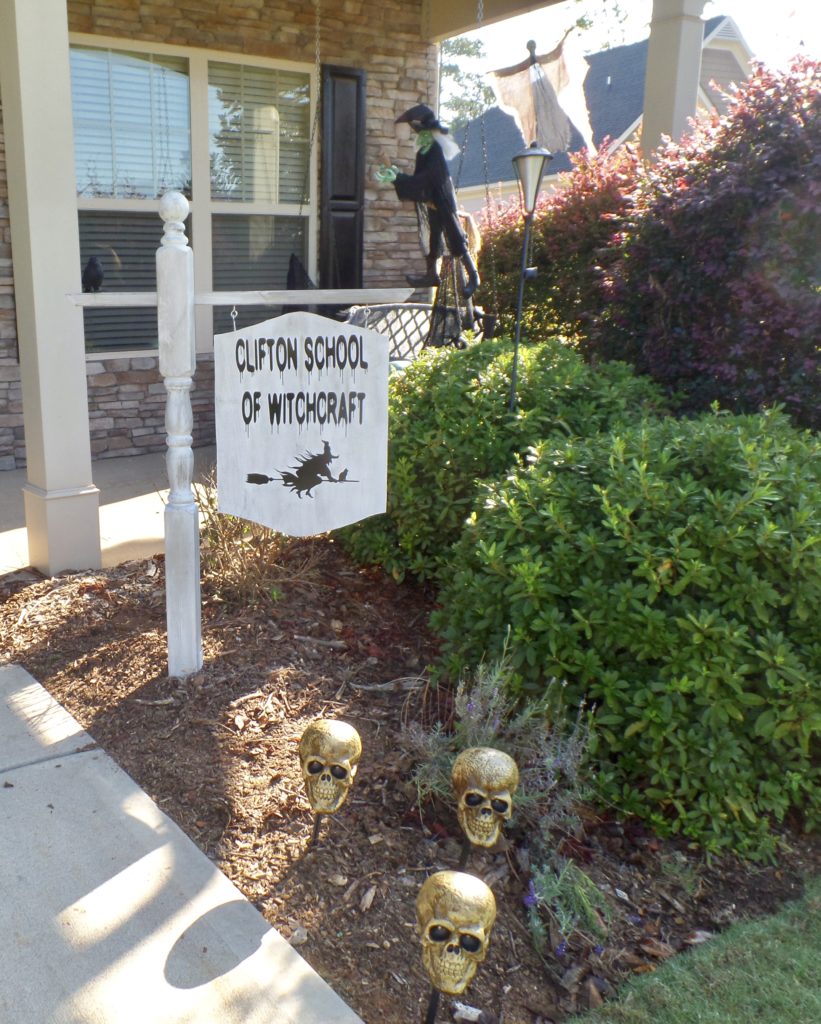
DIY Halloween Yard Decorations!
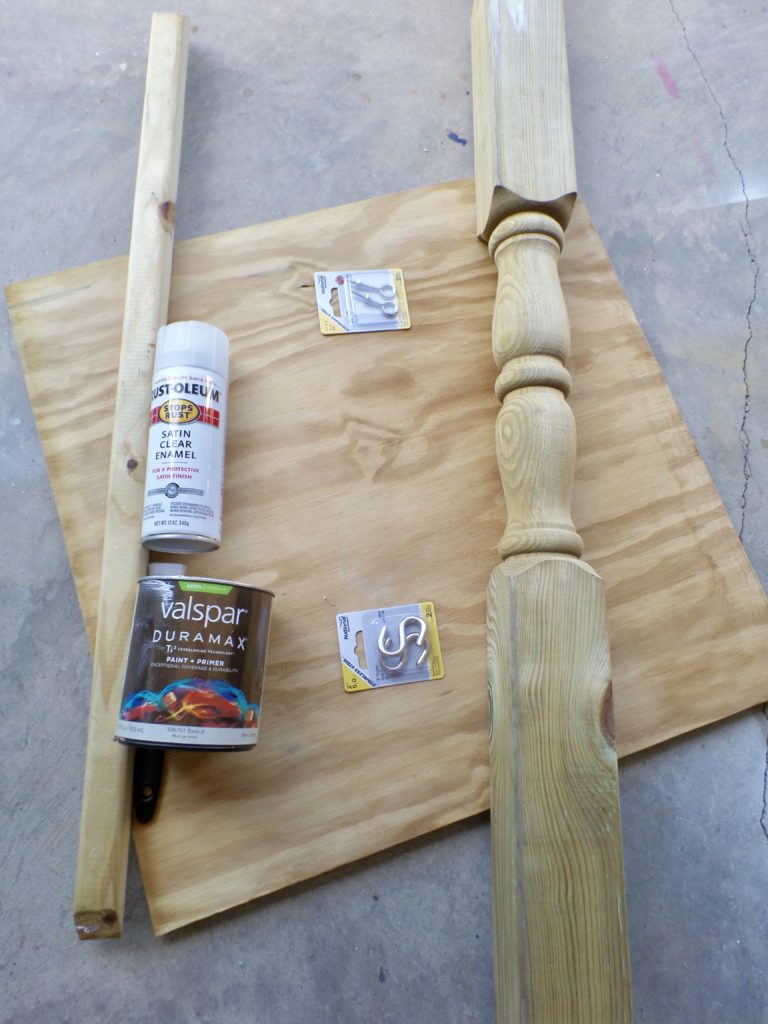
Mandy from Lettering On The Cheap reached out about their amazing company that designs and makes any kind of vinyl graphics you can imagine. I knew immediately that I wanted something for Halloween! I had the idea to make some sort of DIY post/sign and I am so thrilled with how it turned out! Here’s how to make it:
Exterior paint (any kind is fine and any color you want. I chose a light color I had on hand because I was using black vinyl and I wanted it to stand out against the paint)
Antiquing glaze, dark stain, dark paint – anything you want to use to give your sign a more weathered look. Completely optional.
I didn’t end up using the “S” hooks you see in the pic
Paint/Cut
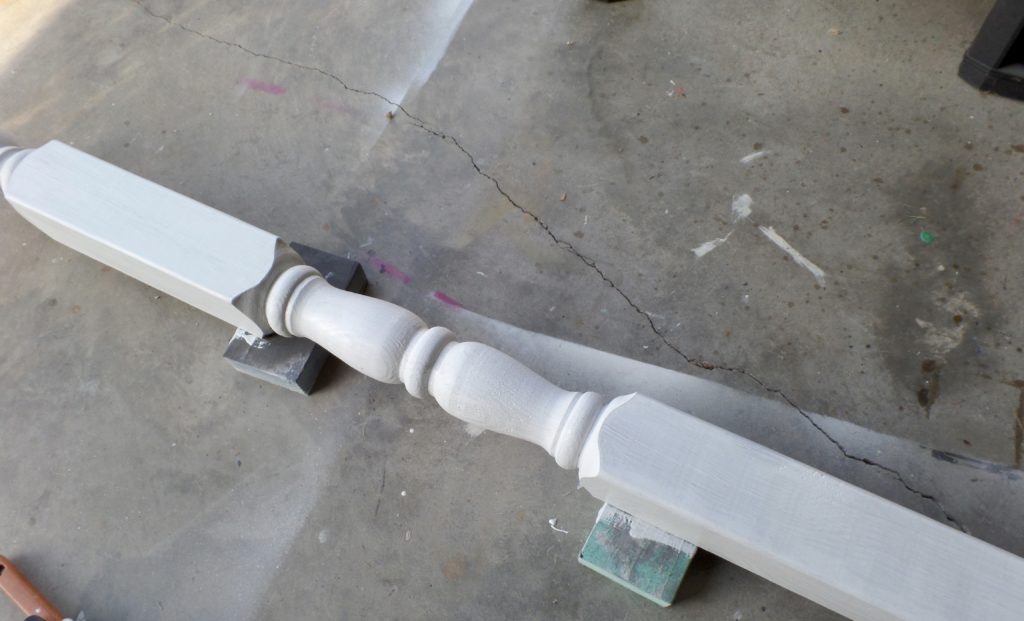
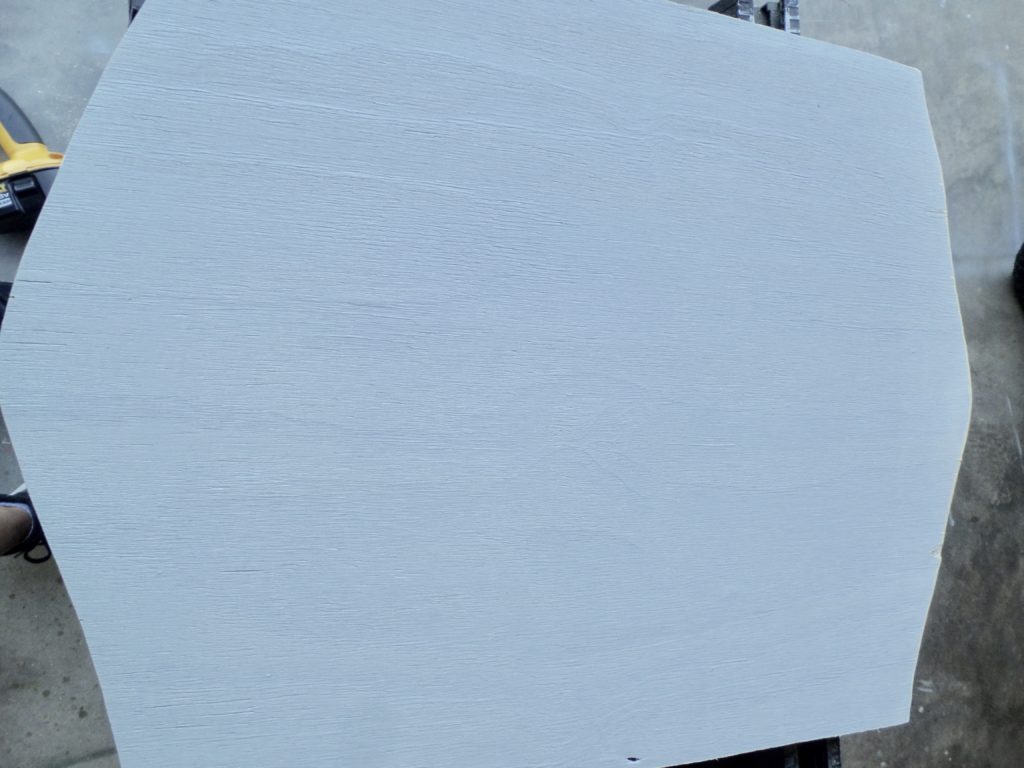
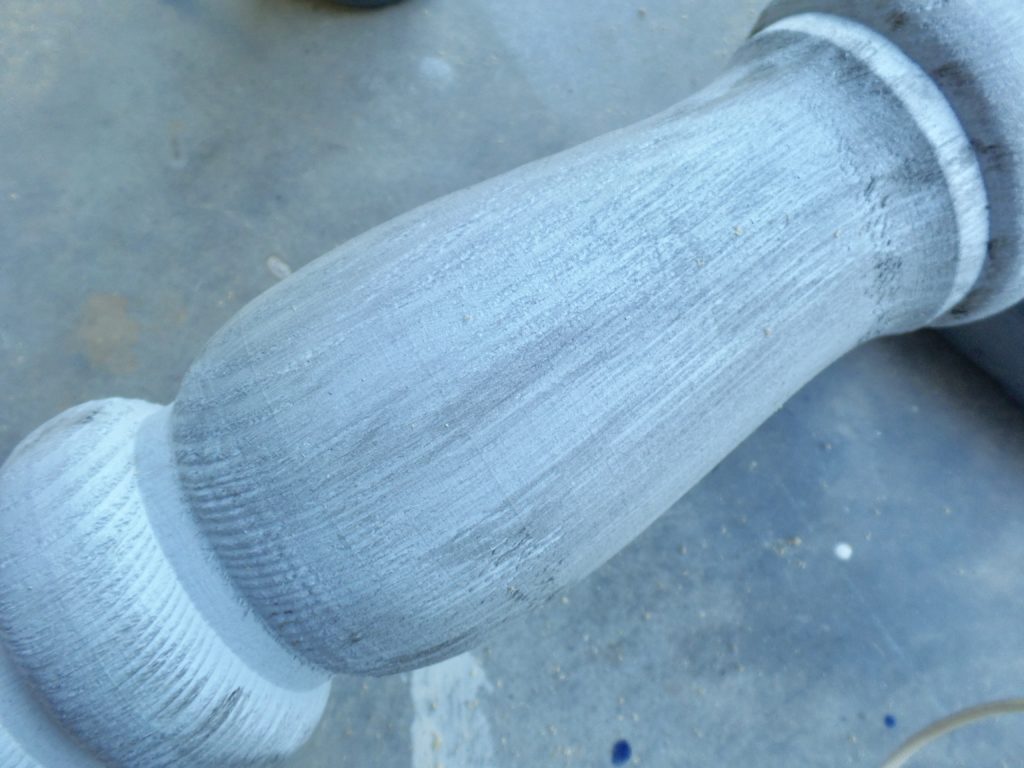
Paint the post, baluster, and plywood whatever color you want for the background and the post. I chose this white/gray shade that I got from the “oops” section of the paint department. I check this section every time I go because you never know what kind of deals you can find. Several months ago I got a quart of exterior paint for 5 bucks! If your sign is going outdoors, definitely get exterior paint. If you don’t – feast your eyes on the mess I made when I ignored that advice (see my disaster – click here). Lightly sand or distress for a more weathered look.
Cut your sign if you want – You don’t have to do this step, but I wanted a little more personality for mine. I traced a simple arch with a pencil and then cut with a jigsaw. No need for precision or measuring here. It’s meant to look like it’s been sitting outside a haunted house for years.
Cloudy day garage pics aren’t blog friendly!
When I finished cutting, it looked a little too clean and neat so I quickly wiped some antiquing glaze in no uniform order to give it a more weathered look.
Make the Post
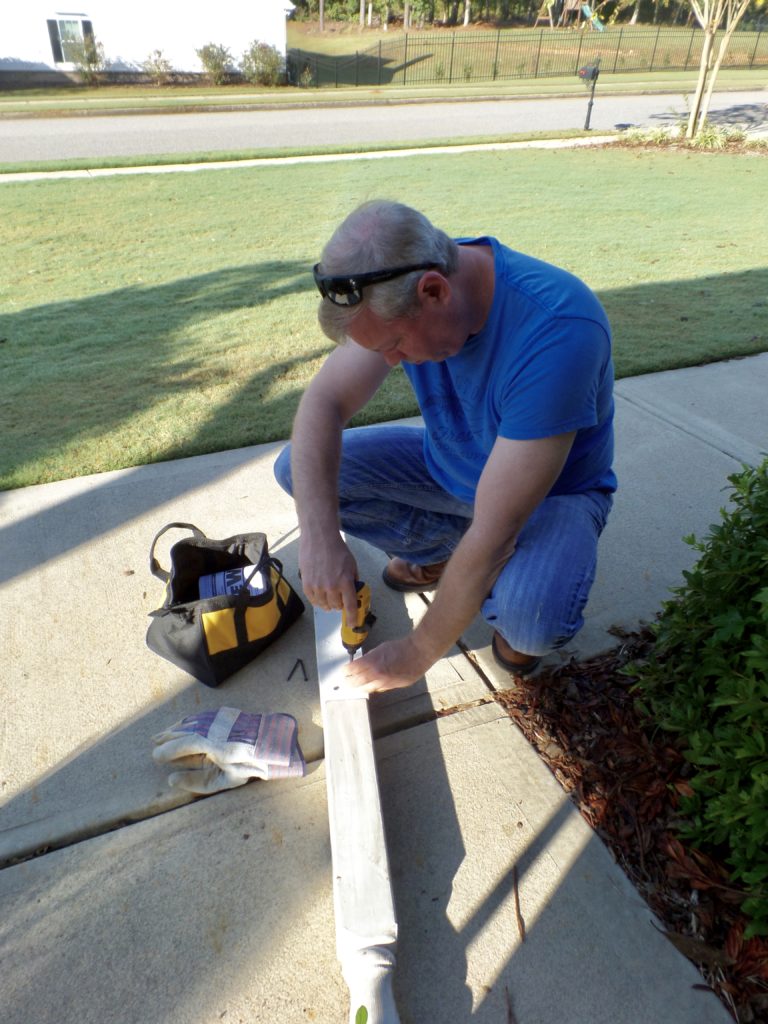
I specifically bought outdoor decking pieces so I could use this sign outside – and they were cheap considering some of the other options. All I did is screw the baluster piece to the upper part of the post. I didn’t notch it out so it would sit flush against the back. I just turned the post over, eyeballed where I wanted the sign arm to be, and screwed it in. To make it easier to get the screws in, I drilled two small pilot holes with a tiny drill bit. Attach the eye hooks to the top portion of the sign and line it up with the baluster piece that is now your arm. Screw the cup hooks into the underside of the baluster piece. I eyeballed this too. Again, not going for perfect. You could definitely use all cup hooks or all eye hooks. I just used what I had.
Apply the Vinyl Graphic
Apply the vinyl graphic. This was new to me. I had a little help from a friend that is experienced with vinyl and here’s what we did:
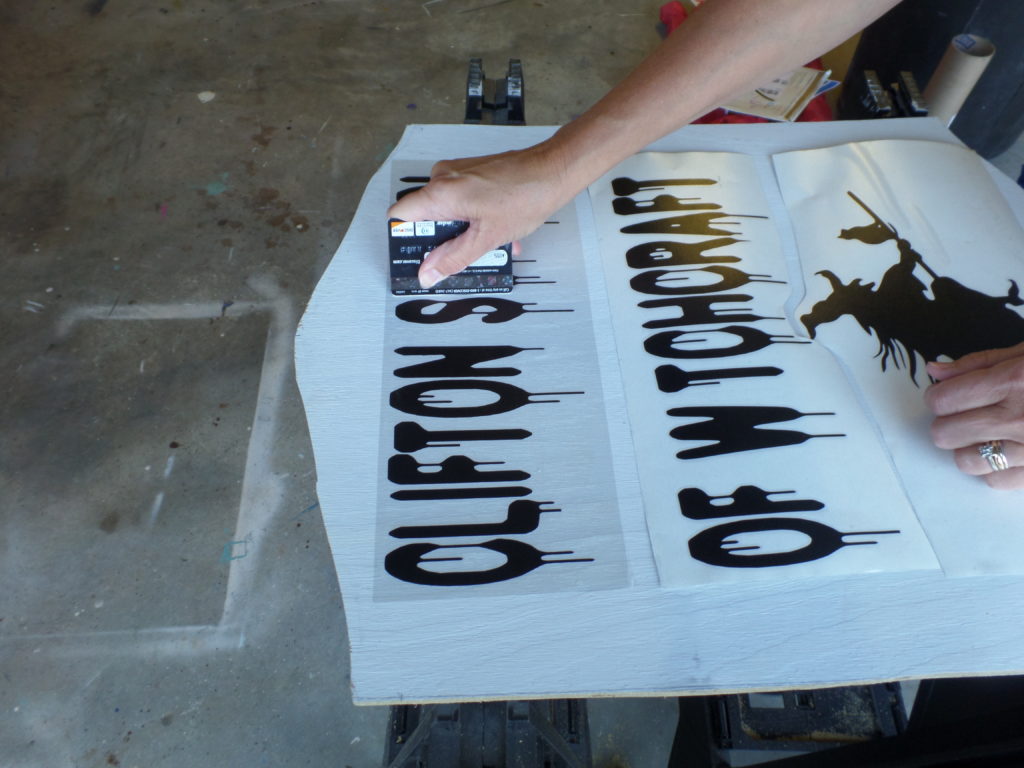
The vinyl has transfer paper already attached to it. We cut the vinyl into three pieces to make it easier to attach. Peel the backing away and gently place it on your wood to get an idea where you want it. When you have it right, press down firmly and go over the vinyl with a credit card or something else with an edge to smooth out all the lumps or wrinkles. Then carefully peel the transfer paper away smoothing out any edges that try to lift up.
Attach your New Creepy Sign!
Screw the eye hooks into the top of the 2×2 wood that your vinyl is on and then attach to the cup hooks of the baluster. We added a piece of a scrap 2×4 to the bottom of the post to make it stick out of the ground farther. Dig a hole (we used post hole diggers) and bury the post enough so it doesn’t wobble.
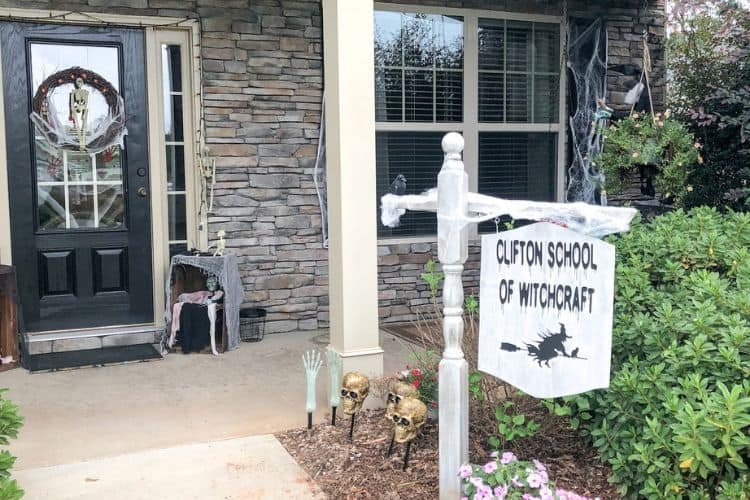
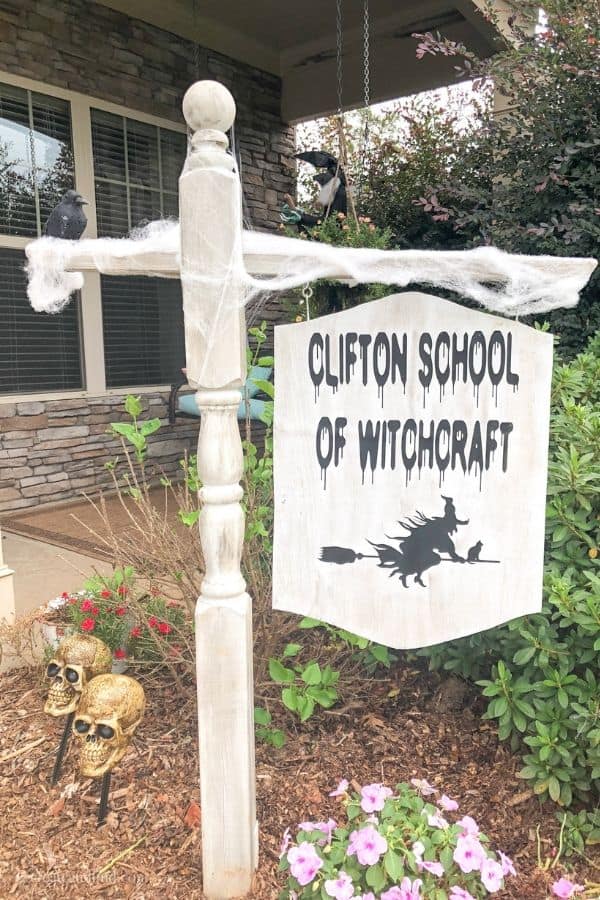
Once it’s all together, spray the entire piece with the clear enamel sealer. Now it’s ready to spookify your yard! Your very own personalized Halloween yard decorations! I added a dollar store crow to the top for extra creepy vibes. Since it was only a buck, I won’t mind if it doesn’t make it through until next season.
And here’s the final result for my new Halloween Yard decorations!!
One tip – Since I didn’t use galvanized screws (hubs informed me of this after the fact), I will likely unscrew the post and the baluster for storage after Halloween. Galvanized screws are coated with zinc to help prevent rusting. So, note to self – when using outdoor decor and you need screws, it’s best to use galvanized screws.


STEPHANIE ABBOTT
Sunday 22nd of October 2017
Clever sign! I would love one of those. Pinned. Thanks for sharing at our link party.
Melissa
Sunday 22nd of October 2017
Thanks Stephanie!
Wendy
Tuesday 17th of October 2017
This is so cute Melissa! And what's great is all the other decor ideas you can do with this post for other times of the year!
Melissa
Wednesday 18th of October 2017
Thanks Wendy! And I agree with you!! Great idea!
domesticcharms
Tuesday 17th of October 2017
Very cute, Melissa! Great sign!
Melissa
Wednesday 18th of October 2017
Thanks Brenna! Such a fun time of year to decorate!
charlestoncrafted
Tuesday 17th of October 2017
that is such a spooooky font. Love the sign!!!!
Melissa
Wednesday 18th of October 2017
Thanks! It is spooky and fun!