The theme for my dining room this Christmas is neutral. My family gets the run of the living room with traditional colors and homemade ornaments. And I love those. I really, really do. Every ornament that goes on our big tree is sentimental. The kids have so much fun helping decorate and they remember so many of our ornaments from year to year. But I wanted a simple, neutral look in my dining room and I found just the way to do it! Come see my Christmas dining room along with some simple DIY ornaments!
Our house is pretty neutral in general (sometimes too neutral I think!). When I started decorating this year, I knew the kids and the hubs would want to keep our traditional tree with all the other 3 million storage totes of sentimental decor.
And trust me – I love the sentimental feelings that come along with pulling out those handmade creations and ornaments we’ve had for years. But I’ll admit, part of me wishes for one of those fancy adult trees. You know the kind. The ones you see with a color scheme or a particular style.

However, since that’s not happening this year and to be honest, my kids love to help with the decorating and I love that they want to. They get so much enjoyment out of bringing out all their special ornaments. There will come a day way too soon that I’m decorating alone wishing they were here to help me.
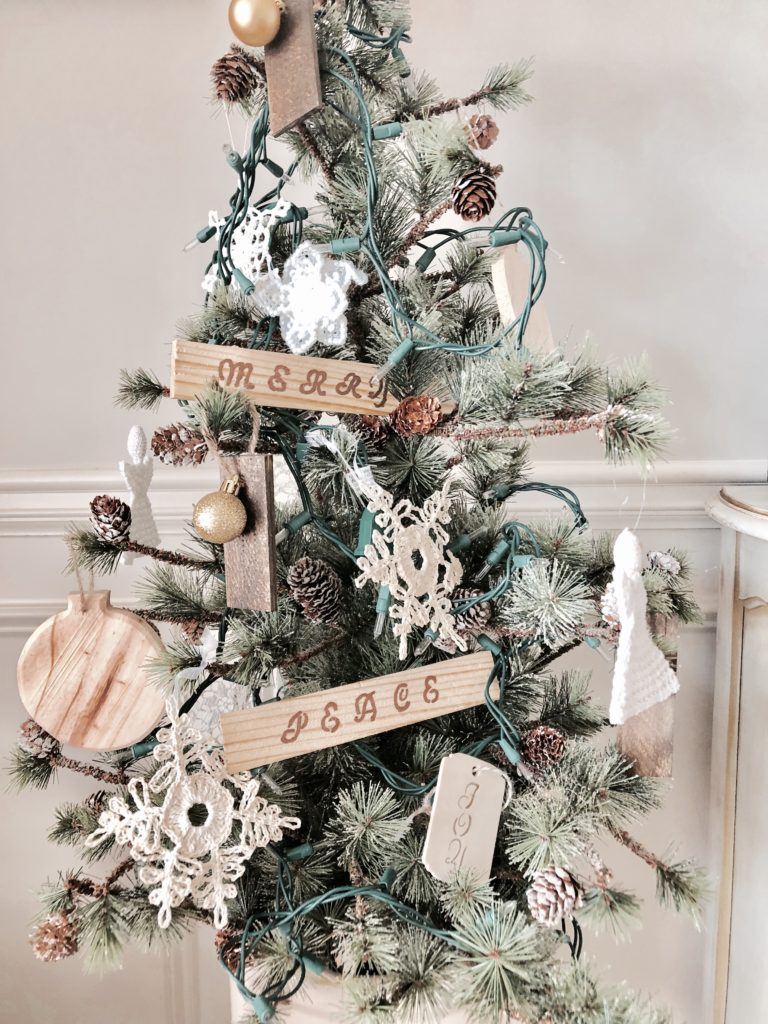
So since the living room and the main tree stay the same this year, I decided to go for a neutral theme with simple green, gold, silver, and rustic vibes in the dining room. We actually eat in our dining room a lot so I have to keep the table pretty simple too. I have a $10 tree that I found at an estate sale a few years ago and it’s small enough to fit into my vintage crock, so it was perfect for the space. And I’ll show you how I made some super simple DIY ornaments from wooden tags, wood shims, and twine.
Simple and Neutral Christmas Dining Room
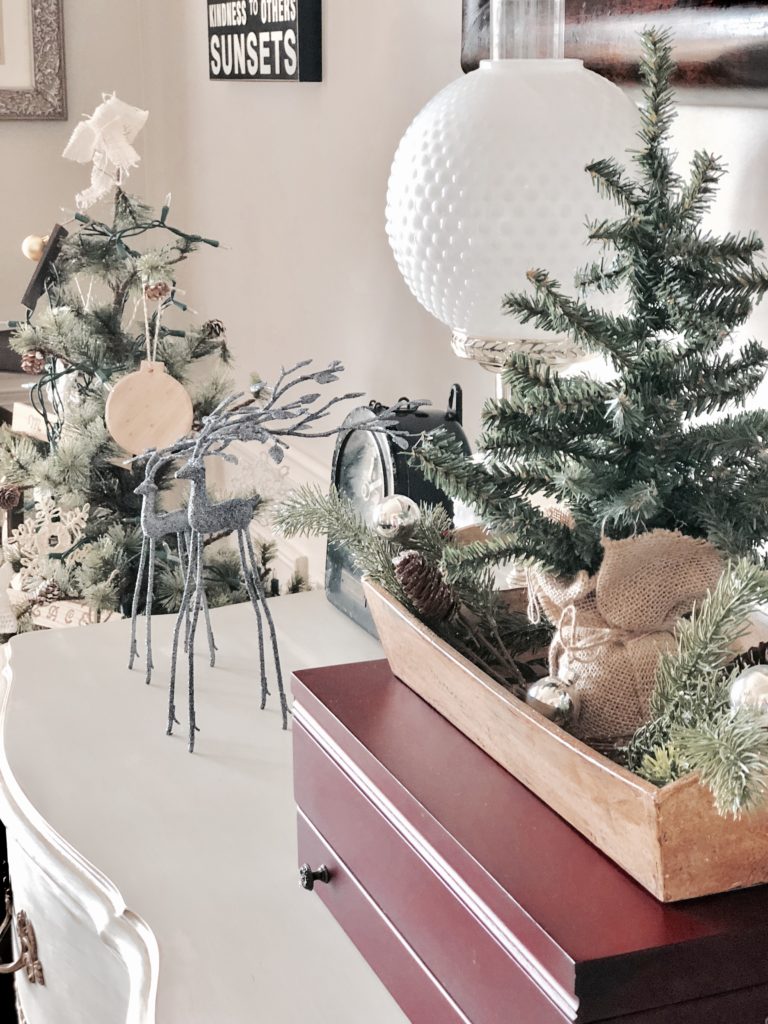
We have touches of black throughout our house including a massive 16 light chandelier that I scored for less than a nice dinner out! I found several tiny fake trees over the years from the Target Dollar Spot so those found a place here. My centerpiece is a wood box from a barn sale and my table runner is a $2 vintage linen from a junk store. My most favorite lamps ever in the history of lamps have a permanent place on my buffet (aka a dresser I use as a buffet). The dresser is a hand me down from my grandma. It was pretty gross from being stored for years and I think we sanded it for about a million hours.

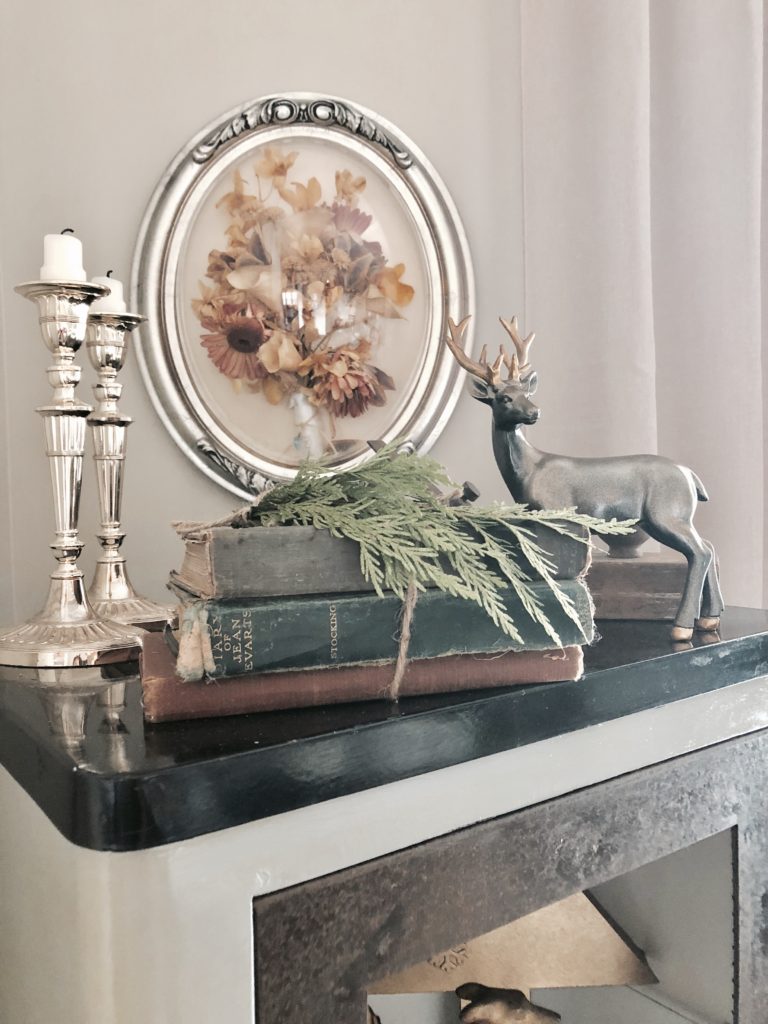
An antique door stands in the corner and opposite from that is my antique medical cabinet that my husband thought I was completely crazy for buying. Most of my simple gold decor found its way to the medical cabinet. And a hand me down antique from my husband’s aunt’s mother (kinda hard to follow that gene trail huh?) sits in the other corner. It stores my cookbooks, which let’s get real – they don’t come out much. Taco Tuesday and breakfast for dinner don’t exactly require a cookbook.
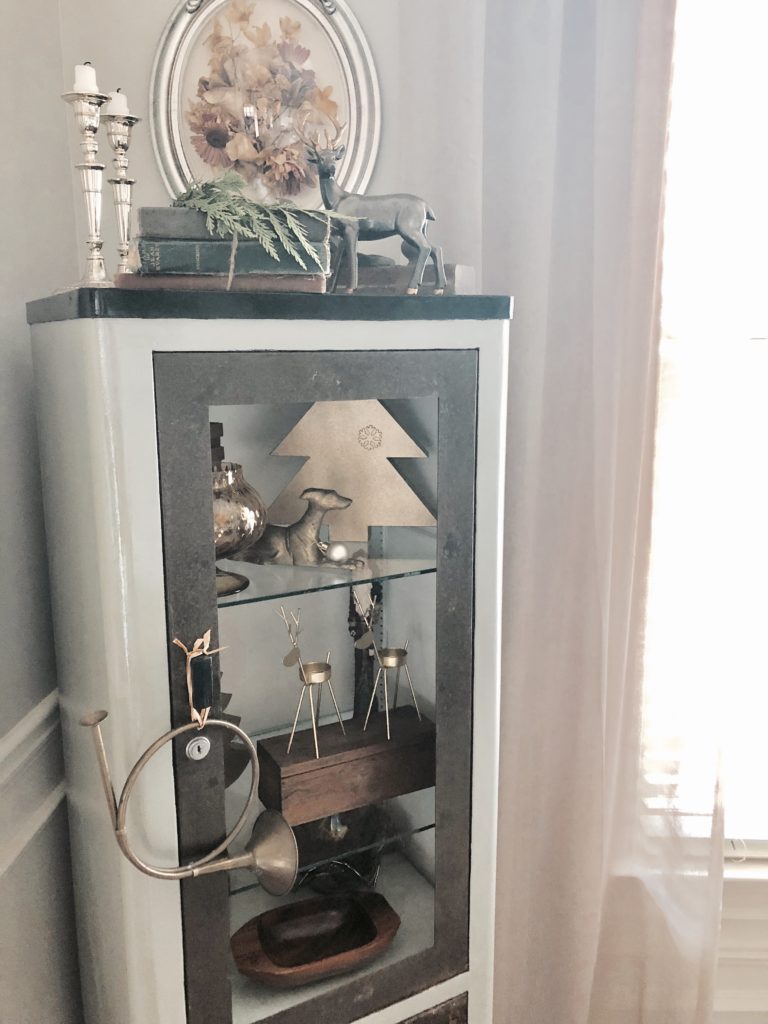

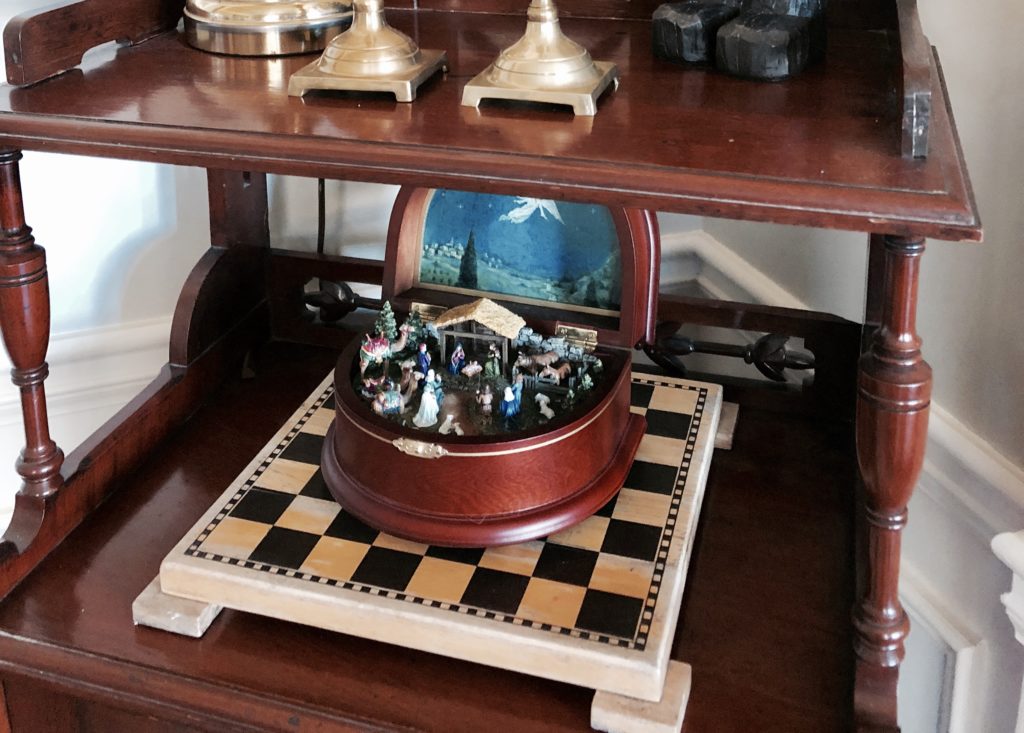
I have one of my most favorite Christmas decorations on this cabinet too – it’s a music box with a nativity scene. It was the gift that my father in law was going to give to my mother in law the year he died. He had already purchased it, but sadly he passed away before Thanksgiving in 2005 before he could give it to her. And she generously gifted it to us recently. My kids love this one. They know they story and they love to play it.

I made some DIY garland for the iron piece on the wall and the antique door. Use twine and string some inexpensive ornaments for a garland. For the door, I used an embroidery hoop. Add a few ornaments to some twine and then loop the twine through the two hoops and then tighten the hoop.


$10 Estate Sale Tree and DIY Ornaments
And then there’s my neutral little tree tucked into my vintage crock. I added lights and my special snowflake and angel ornaments. My great-aunt made me my own snowflake when I was a kid and I’ve kept the box ever since. I always smile when I pull this one out. My mom gave me some similar white ornaments so I added them all to this tree. But it needed a little something more. I found two wooden jingle bell ornaments from a craft store and tied them with twine to the tree. I had some leftover wooden tags from my DIY Christmas crates – so why not use those? Along with some wood shims, I DIY’ed a few more rustic ornaments to go with my neutral theme.
Super easy!
- wood shims
- paint or stain
- wooden tags
- twine
- drill
- ornaments
- sharpies/stencils – or you can freehand the words
I cut down the shims to about 4 inches in length. Stain or paint them whatever you want. Drill a hole for your twine and then feed it through and tie off. It helps to add a piece of tape around the end of your twine when feeding through a hole so it doesn’t fray. Add an inexpensive ornament and that’s it!
For the rest, I used a stencil and a metallic sharpie to write JOY, PEACE, and MERRY on a wooden tag or shim. I left these natural with no paint or stain. And that’s it my friends. Add it to a simple little tree and you have a neutral and rustic tree for Christmas.

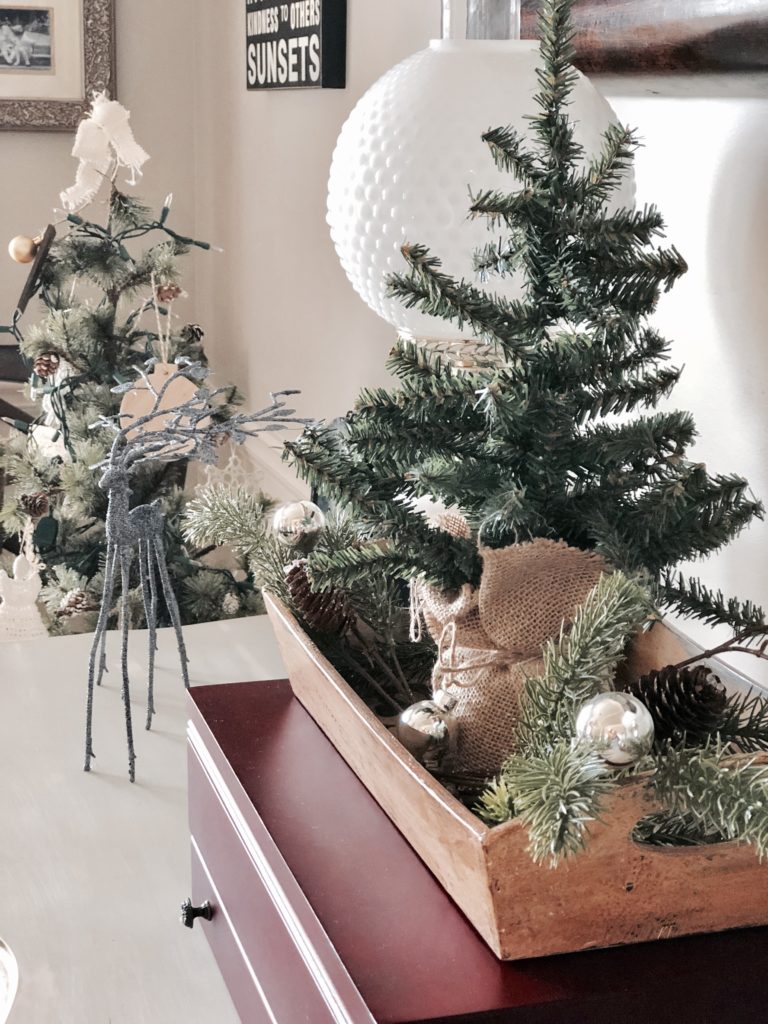
Add some greenery and call it done! And now I can sit back and enjoy the rest of the season since I’m officially calling it done with the decorating! Thanks for checking out my simple and rustic Christmas dining room!
Pin for later!


Natalie
Sunday 3rd of December 2017
You have beautiful ornaments in your dining room. It looks awesome!
Melissa
Monday 4th of December 2017
Thanks Natalie! I'm happy with the rustic vibe it has going on now!
Amy Odom
Friday 1st of December 2017
So simple but so pretty! Love it!
Melissa
Friday 1st of December 2017
Awww - thank you!
Holly Alzitoon
Friday 1st of December 2017
Adorable- great job!
Melissa
Friday 1st of December 2017
Thanks so much Holly!