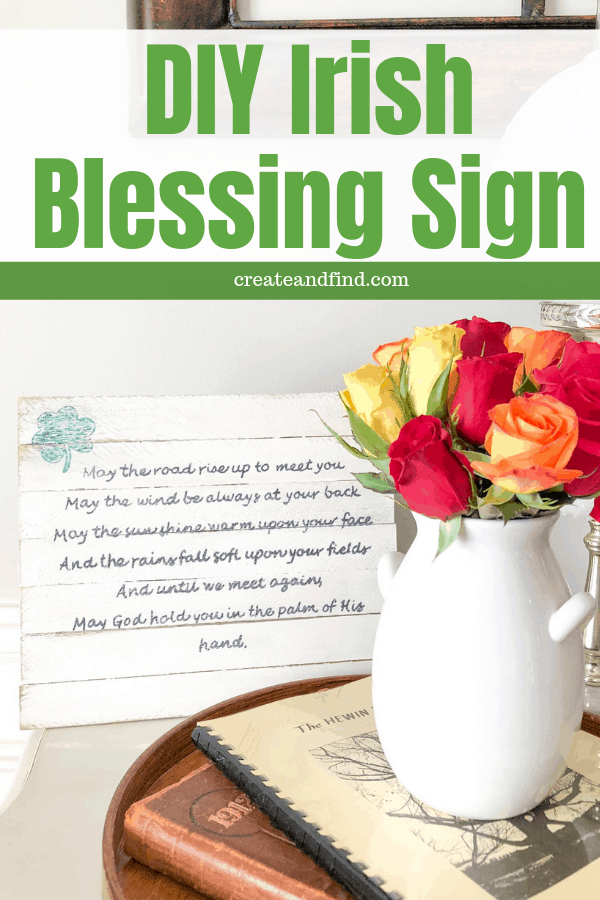
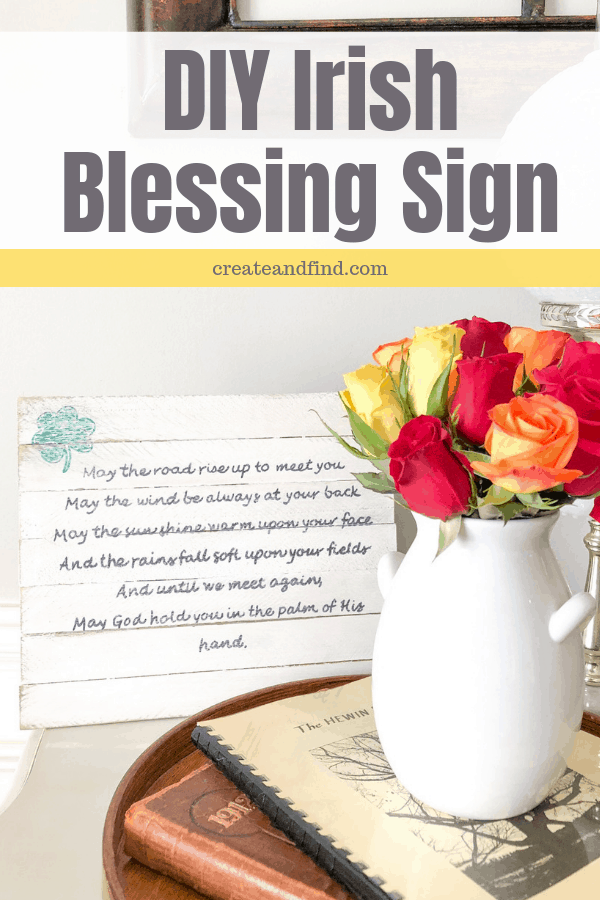
Make a fun and easy DIY project today that you can customize with any saying you like! I’m not one to decorate for every holiday, but every now and then I’ll add a few seasonal DIYs. I’m going to show you how easy it is to DIY your own seasonal decor for less. And with St Patty’s day coming up, a DIY Irish Blessing Sign is the perfect choice.
This DIY project is one that you can create cheap decor for any holiday! Pick your favorite saying, grab some wood shims and glue, and get started. Here’s how I made this DIY Irish Blessing sign.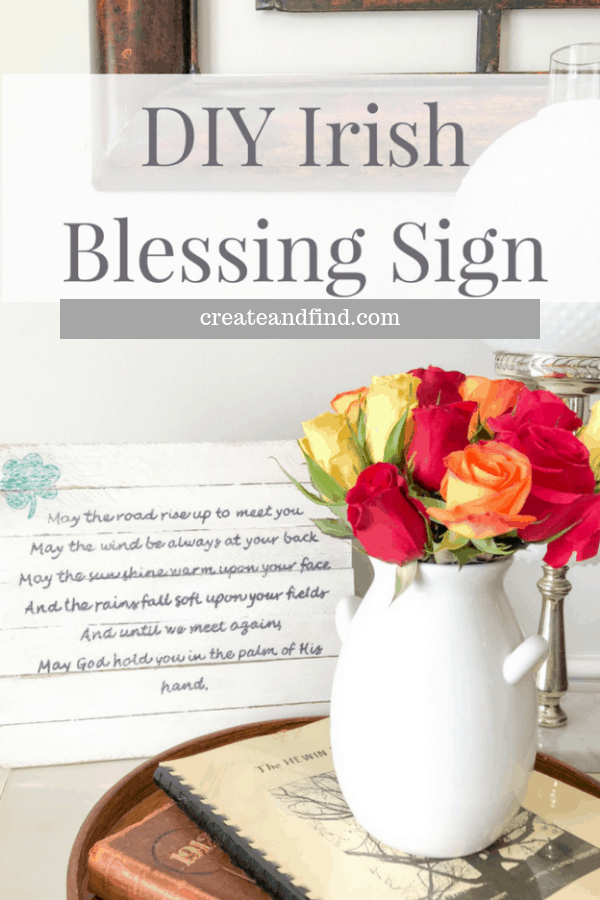
DIY Irish Blessing Sign
Supplies Needed
- Wood shims
- Printer
- Microsoft Word or some other way to create your words – you could use Adobe or Canva too. I chose Microsoft Word because I knew I could flip the text I was printing.
- Pencil
- Paint
- Paint Pen or Sharpie
- Restor-A-Finish
- Twine
- Wood glue or glue gun
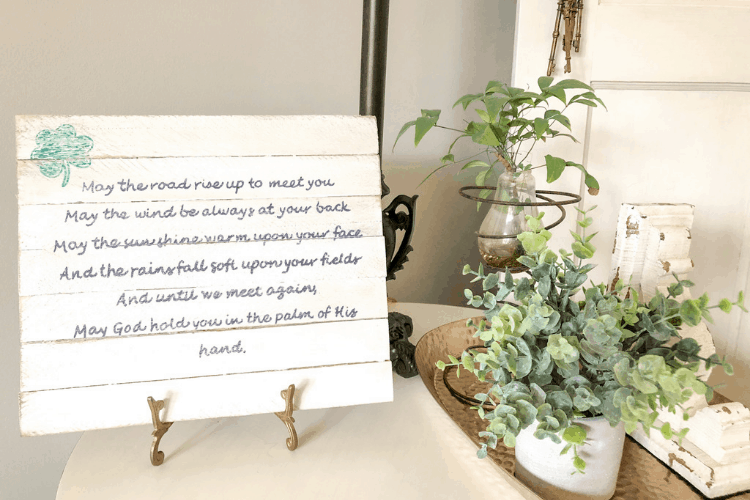
How to Make an Irish Blessing Sign
- Prep your Wood: I decided to use wood shims to give my sign some rustic character. Plus, they are super affordable and lightweight. Take two shims and line them up opposite each other (one fat end on one skinny end). Use the glue gun to attach them to each other. Repeat this 7 times.

- Line them up and use a the glue gun to attach them all to each other, then take two extra shims and glue them vertically down the back side for more reinforcement.

- Paint your wood or stain if you prefer. I chose a light coat of white craft paint.
- Create your Words – Open a blank document in Microsoft Word and change the orientation to landscape, choose your font and font size – I used Lucida Handwriting font with a size of 32. From the top menu, choose “insert” and then find “text box” (mine is on the far right side). Choose “draw text box”, draw a text box on your blank sheet covering the whole page and then type whatever words you are using – I also center spaced my words. Right click inside the text box and choose “format shape”, choose the icon that looks like a pentagon and then choose 3D rotation. Change the X rotation to 180 degrees – this will flip your text so you can print it and transfer it.
- Once your paint is dry, you can start transferring your words
- Flip your paper over and using a pencil, scribble all over the words while pressing down firmly on the wood. It may be necessary to cut your paper into strips so you can place it where you want.

- Now you can paint or use a Sharpie to trace over the words. I also traced a shamrock onto the wood for some fun St. Patty’s day vibes

- Distress the entire surface with a sanding block. After I sanded, I used a tiny bit of Restor-A-Finish in Dark Walnut to give my sign an aged look.

- Cut a small length of twine and hot glue it to the back of your sign and you’re done! Now you can either prop it up or hang it.

You can make any sign you want for just a few bucks – much better than store bought prices! And you’ll be proud of yourself for your thrifty DIY!
If you love good and inexpensive DIY’s, I think you’ll love these too!
DIY Bead Garland
Or this DIY 6 foot desk
Pin for Later!
Post originally shared on The Crazy Craft Lady