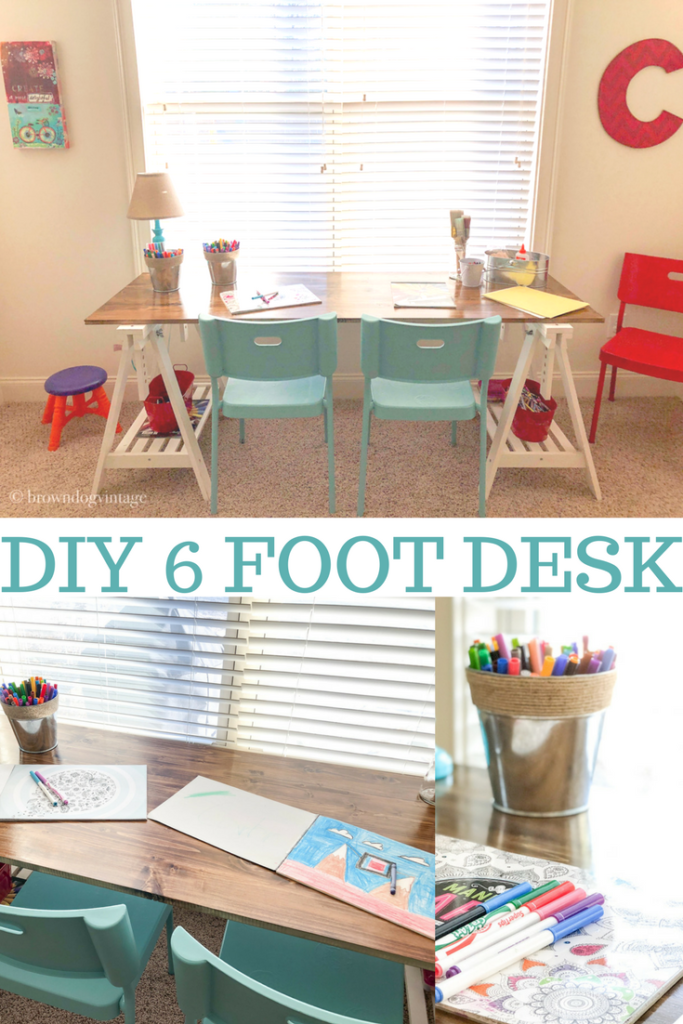
For our $100 Playroom Makeover, I had to get crafty and do some serious DIY projects so I could stay within my budget. In our playroom we had a very functional table but it was just too small. I need a desk that’s at least 6 feet long so it can fit two kids comfortably with room to spread out. Since I only had $100 for the entire room, a new desk was out of the question. Enter some crafty DIY skills and a very helpful husband and we have a new desk! Check out all the details on this DIY Desk!
You can see all the weekly updates of the $100 playroom below – Painted furniture, DIY Nerf gun wall, and of course, the reveal!
$100 DIY Playroom Makeover Reveal
In full disclosure, I hit the jackpot on the online yard sale when I came across two Ikea Finnvard Trestles for just $20. Both of them for $20 is a steal – they retail for $40 each. However, don’t let that discourage you. Even if you have to buy new trestles, you can still DIY this desk for much less than you would pay for a new one this size. IKEA does sell a desk made with these trestles, but it isn’t long enough for what we needed and I was going for more of a rustic look than the white.
Supplies for a DIY Desk
- 2 Ikea Finnvard Trestles
- 1 sheet of wood at least 24″ wide and 72″ long
- 4 Tee Nuts
- 4 Washers
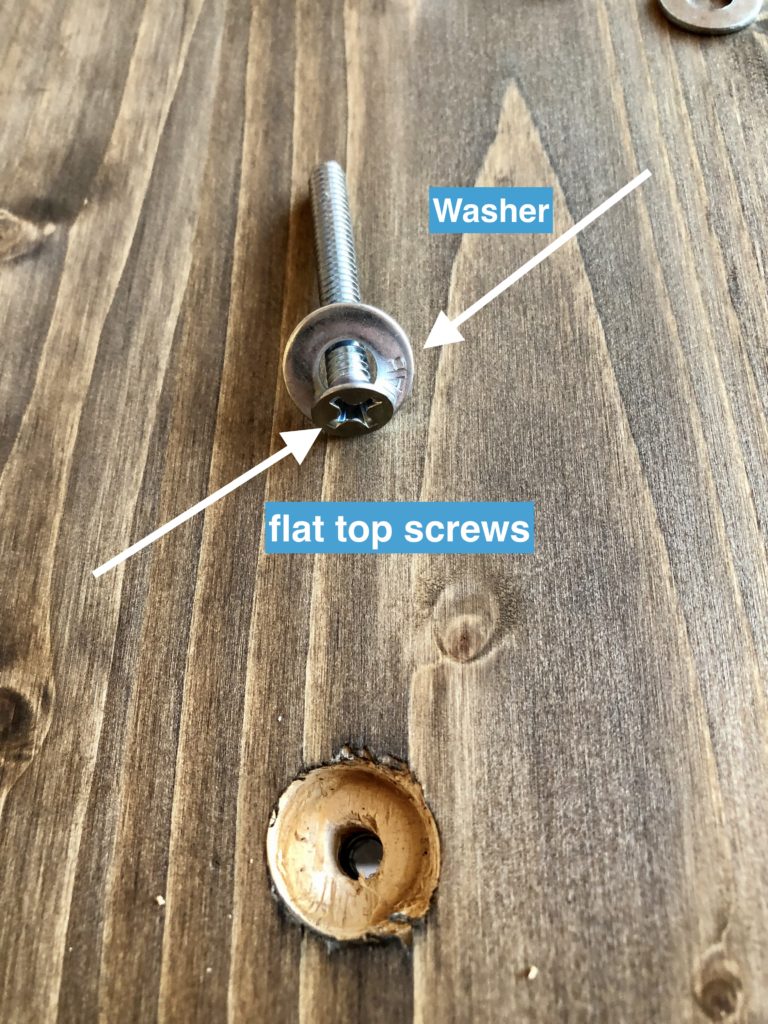
- 4 Flat Top Screws – Ours were 2″ long and you want the flat top so you can cover them easier with wood filler
- Sanding Sponge
- Wood Filler
- Stain
- Polyurethane
- Drill
- Clamps
- Rags/Brushes for staining (I use inexpensive brushes that I can toss out after for staining – just remember if you use a good brush, it can’t be cleaned with soap and water if you use oil based stain. You’ll need to use mineral spirits for this and dispose of it properly)
Building a DIY Desk
The trestles come in white or birch from what I can tell from the IKEA website. If you get the birch, you may want to paint or stain them depending on what you do for the top of the desk.
We chose the solid panel of wood versus adding planks so the surface would be smooth. Since this is going in a playroom and my kids do a lot of coloring and painting, I didn’t want too many groves or uneven surfaces. You could definitely use planks, but it was a time saver using this panel.
Measure how much overhang you want on either side of the trestles and mark exactly where your board is going. These trestles are almost 28 inches wide and our board is 24. They do have pre drilled holes for screws, but a 24 inch board didn’t make it to the pre drilled holes. You could always do a wider top and use those holes instead. I’ll give you the measurements based on what we used, but you can modify for any different top.
- We made all the holes first, then I took the wood to the garage to stain both sides. Let dry completely before assembling
- Space the trestles 55 inches apart. Position your top board how you like it. Ours extends about 5 inches past each trestle.
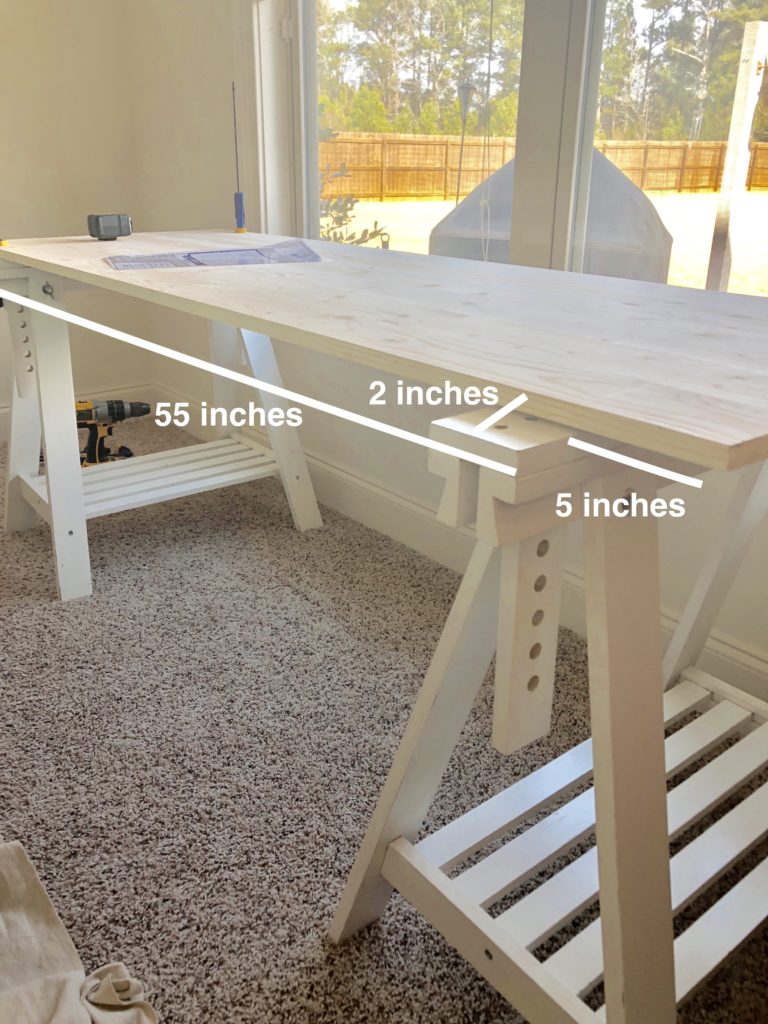
- Measure the center of the trestle – ours is 1&3/4″ – you need the center because this is where you’re going to drill the hole through the board into the trestle so you can add the tee nuts.
- Add the 5 inches of overhang plus the 1 &3/4″ to get 6 &3/4″

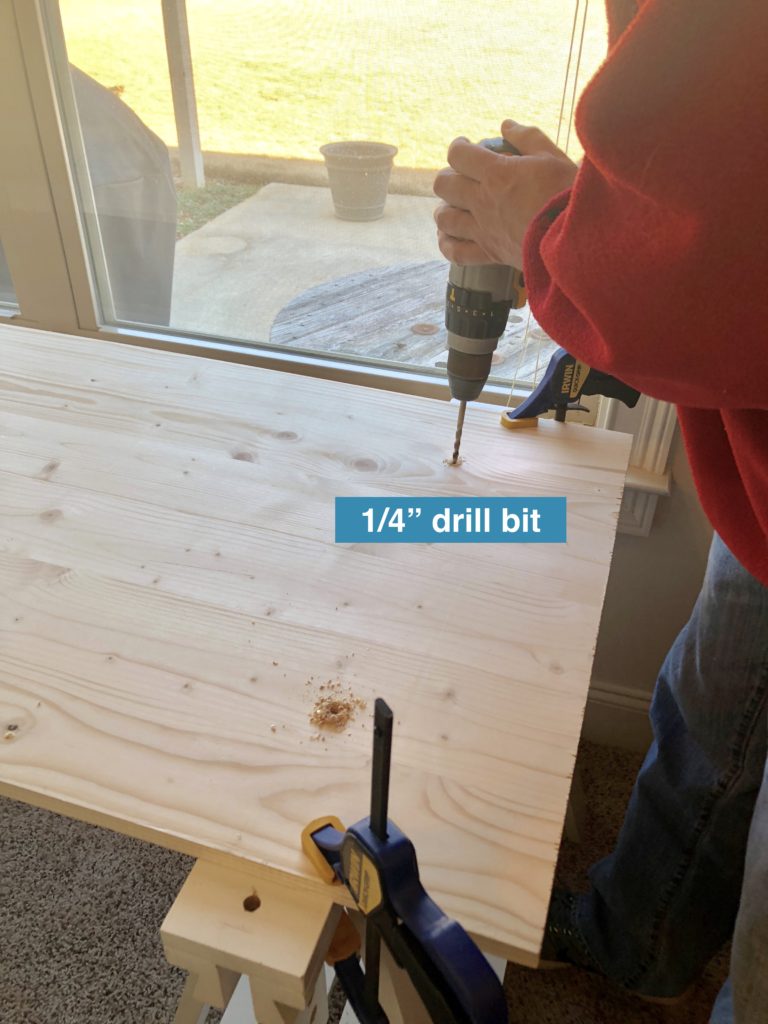
- Clamp the boards to the trestle so it doesn’t shift while you are drilling.
- We used a 1/4″ drill bit to drill a hole 6 & 3/4″ from the edge of the board – drill through the board and down into the trestle. Do this two times on each end.
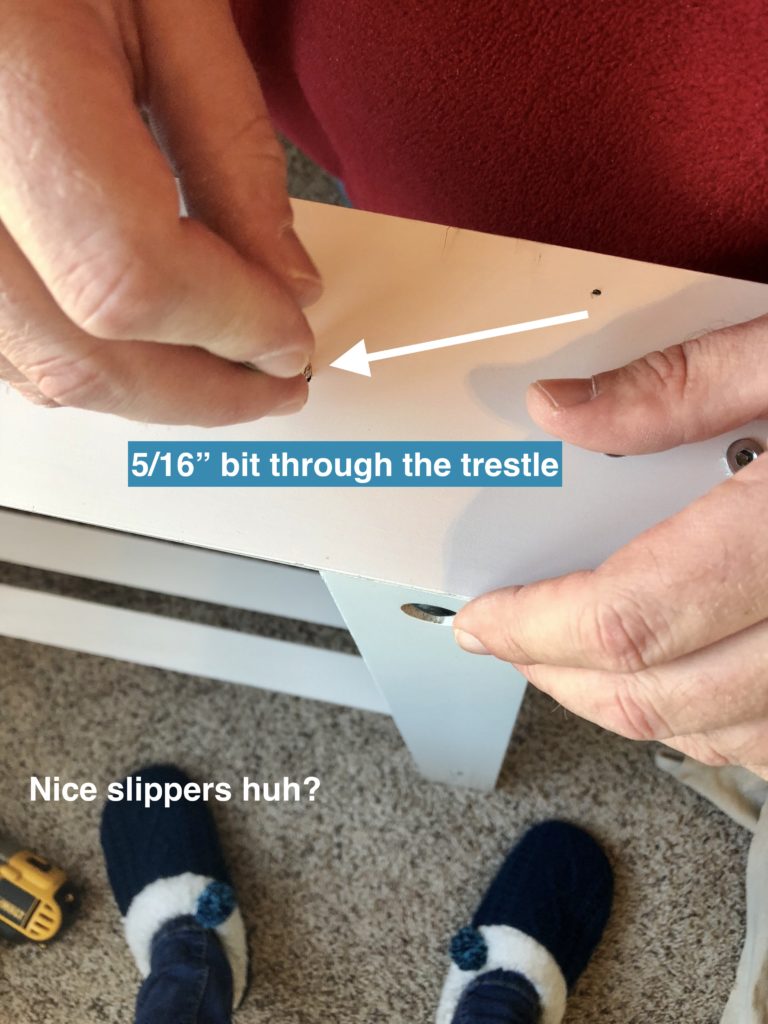
- Take the board off
- Use a 5/16″ drill bit to enlarge the hole through the trestle so the tee nuts will fit into the trestle
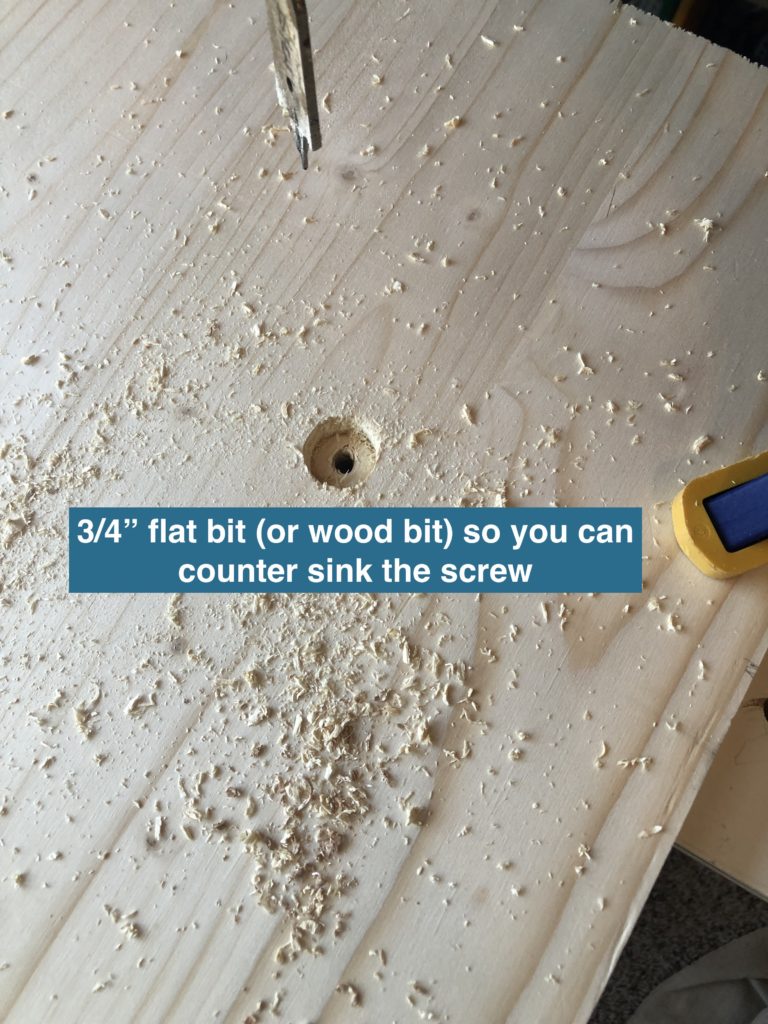
- Put the top back on and use 3/4″ flat bit (wood bit) and drill through the wood enough to counter sink the screw
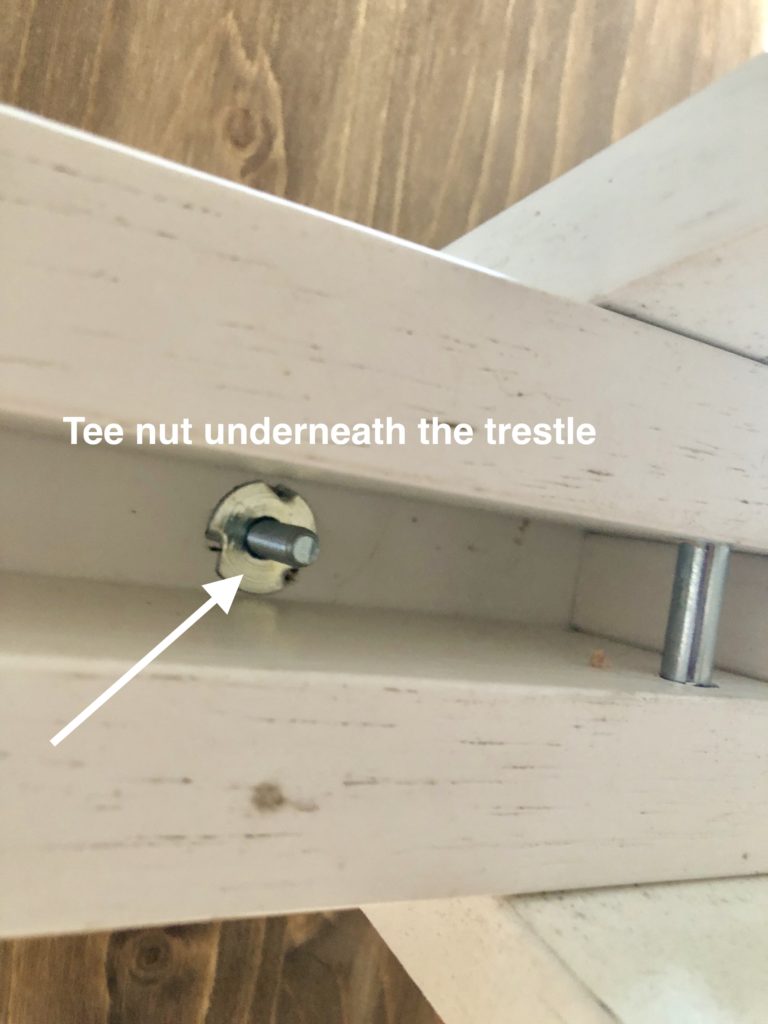
- You’ll likely need two people for this next step because the tee nut sometimes wants to fall out before you can actually screw into it
- Put the tee nut into the bottom groove of your trestle and then screw through the top of the board down into the tee nut – we added a washer to the screw as well. The tee nuts help to secure it tighter so it will be a stable surface. I’m sure there are tons of ways to assemble it, but this is what worked best for us.
- Fill the holes with wood filler, let it dry, sand and then add some more stain. Sanding where you filled will likely take off some of the stain so you’ll need to touch up. The wood filler I used is tinted so it was a bit easier. You can certainly tell they are there, but it kind of looks like additional knots in the wood and they get covered up from art supplies anyway. I’ve used stainable/paintable wood filler before and I’ve never had it match exactly perfect.
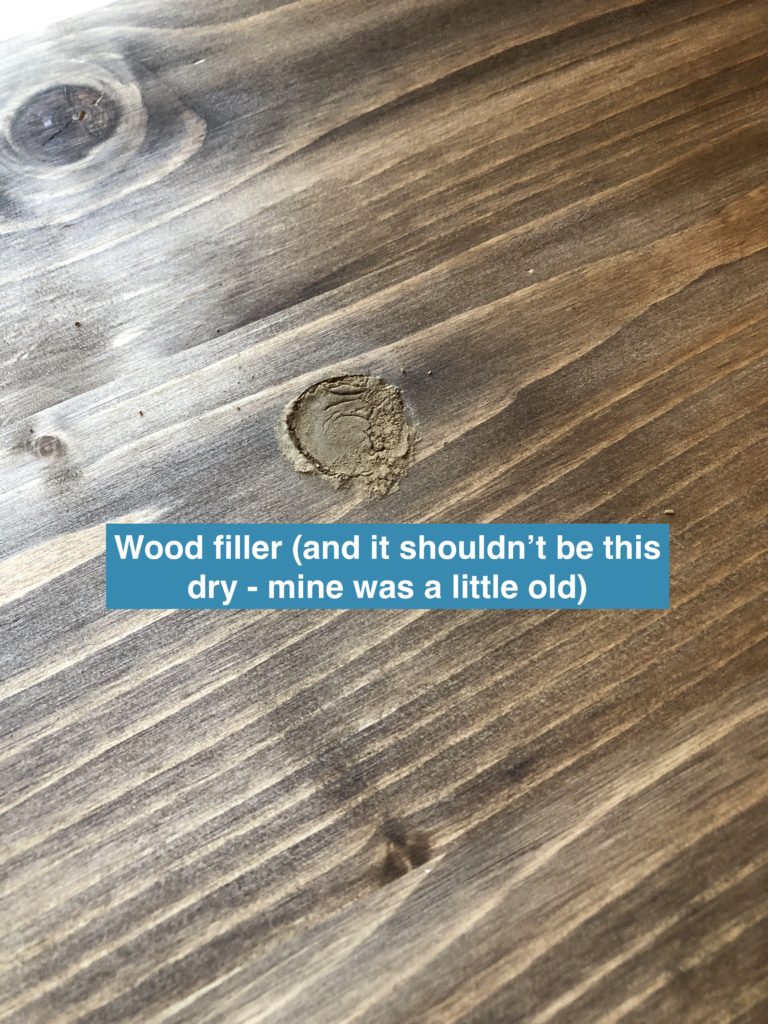
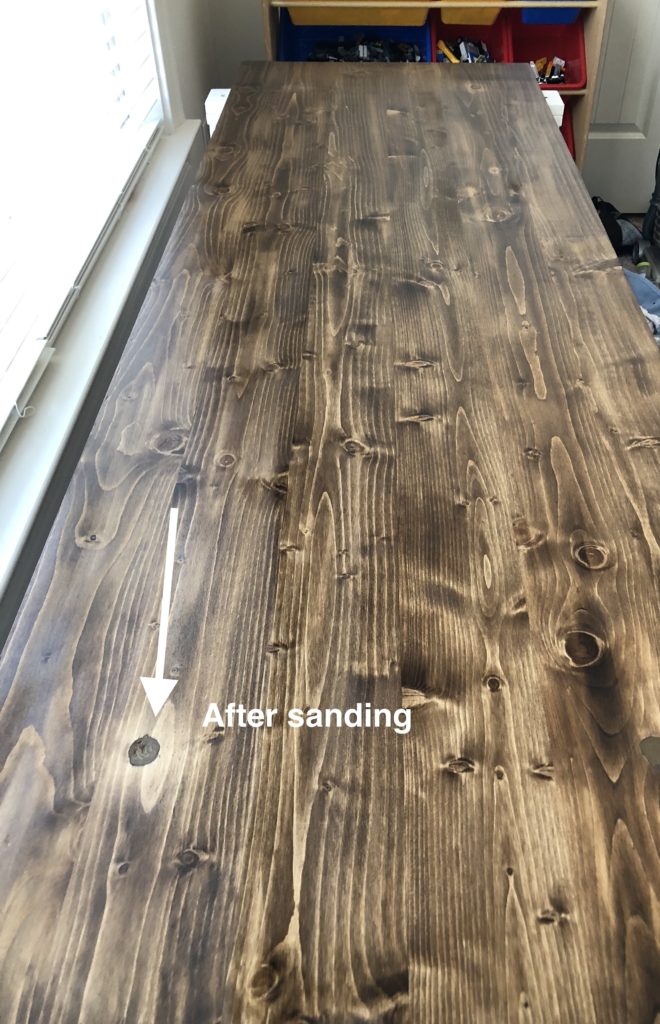

If this weren’t a playroom desk, I would’ve added more filler and sanded/stained better, but seriously, you can’t even notice them now.
- Add several coats of polyurethane to protect the newly finished top. I ended up with three coats just because I know this desk is going to take some abuse!
Finished DIY Desk!
I’ll be honest. My husband thought I was a bit nuts when I brought those trestles home and then the board I bought was too narrow for them, but he figured out a way to make it work. So yay for handy husbands!
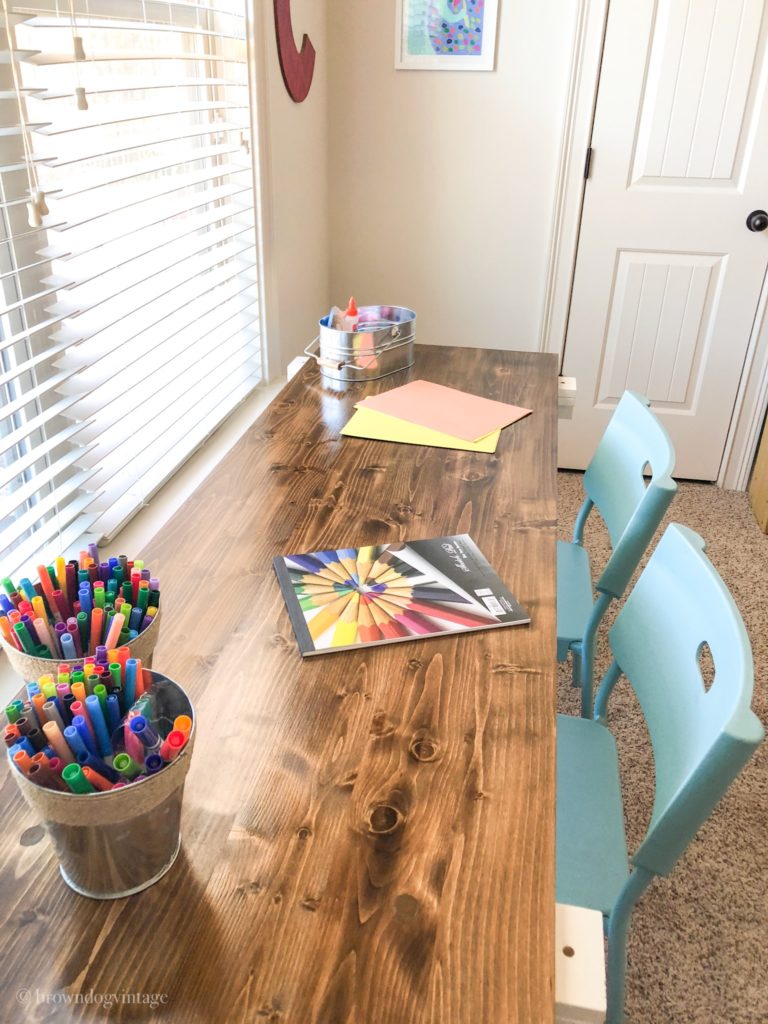

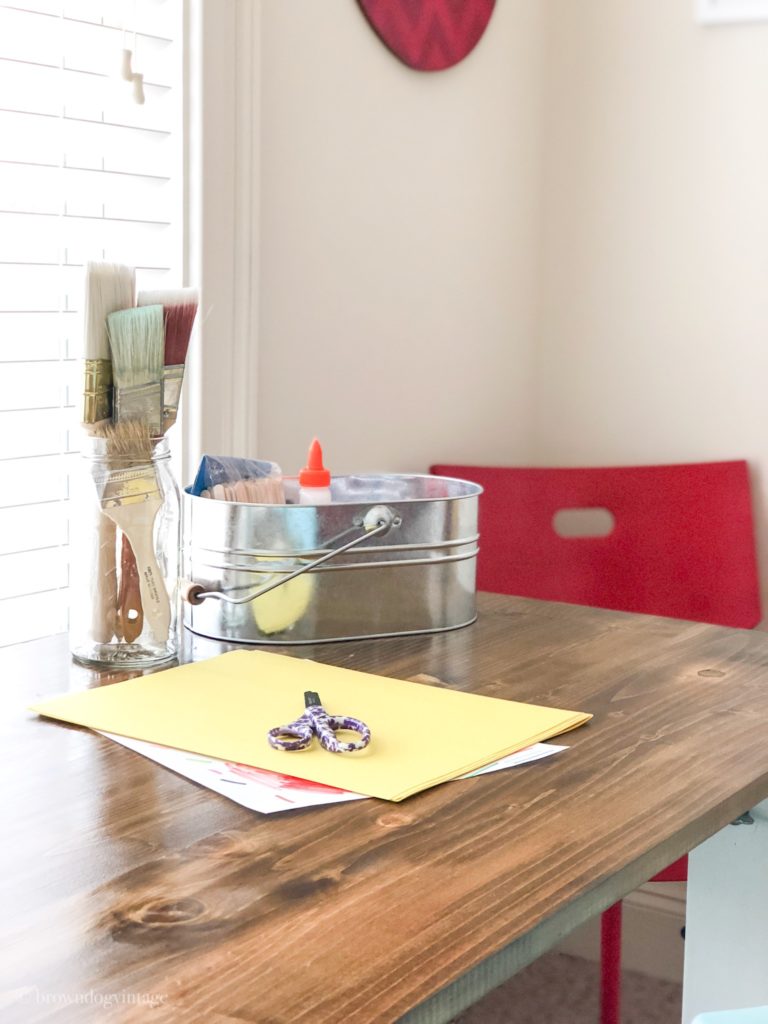
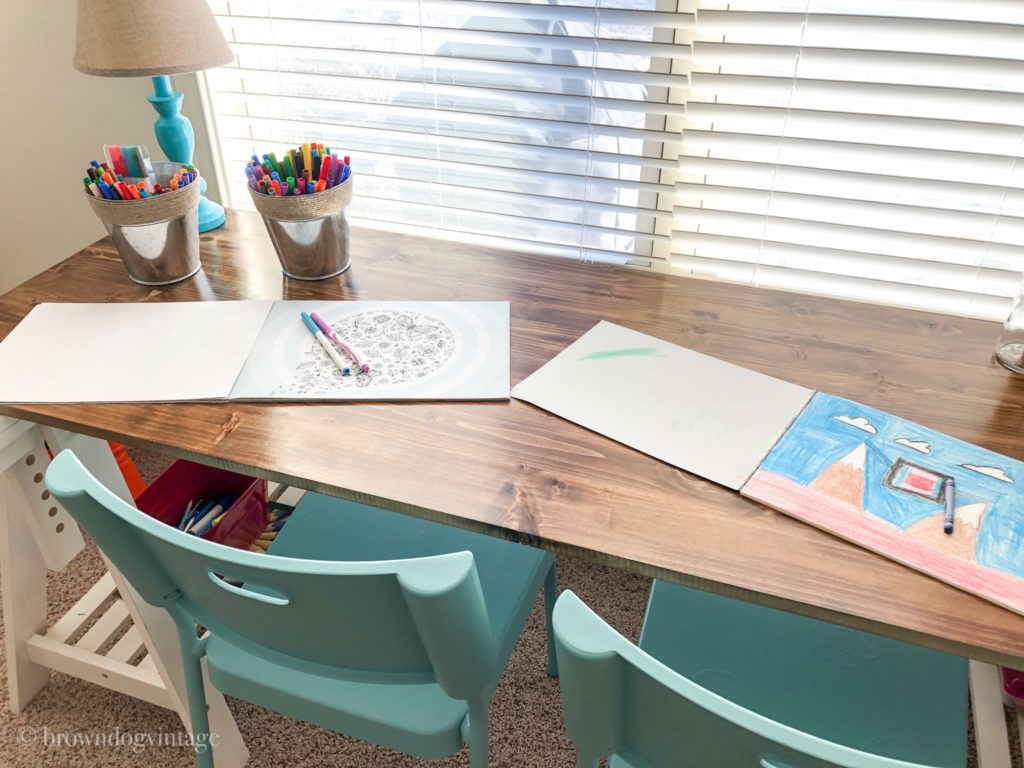
Now we have a desk that is 6 feet wide so both kids can fit under comfortably and there’s even room for me! And I spent a grand total of $65! $20 for the trestles, $40 for wood and $5 for screws/tee nuts. I already had stain and wood filler on hand. Even if you had to buy all the supplies for the desk, you would spend about $150 which is a steal for a desk this size. There’s plenty of workspace to spread out and make crafts, build Legos, and anything else. This would also be great for a home office or craft room.
I looked around and found several similar choices if you just aren’t into DIY! They aren’t as wide as our DIY desk, but very similar styles.

And don’t forget to check out our $100 playroom makeover where we use this fabulous new DIY desk! Thanks for stopping by and I’d love to see if you end up making your own desk!

Pin for Later


Elsie
Friday 6th of April 2018
This is exactly what I need these days since my kitchen table has become too small for everything and everybody now that my grandchildren is all "grown up" and wanting to do their things at this table. I am also using it to do online marketing so the laptop takes up quite a lot of space... cellphones are charged here... powerful dinosaur lego heroes are born here... lovely paper projects are born here... legends are born here... but the table is too small for all these wonderful adventures now. Thank you for this great tutorial on how to build a bigger desk. Now if I only could knock out the wall to make more space for a bigger desk!!!
Melissa
Friday 6th of April 2018
I understand Elsie! Sounds like you have some amazing uses for a bigger desk - better start knocking out some walls!
Natalie @ NeliDesign
Monday 26th of February 2018
So beautiful Melissa! I'm really in love with this desk! The kids must be so happy!
Melissa
Monday 26th of February 2018
Thanks Natalie! They are! It’s getting lots of love with legos and art projects!