


DIY Spring art is an affordable way to dress up your walls this year. You can make this easy project using scrap wood and any kind of greenery you like.
This DIY Spring art project is the perfect way to use up scrap wood and make a super simple art piece for your walls. It only requires a few cuts and basic building supplies to do it.
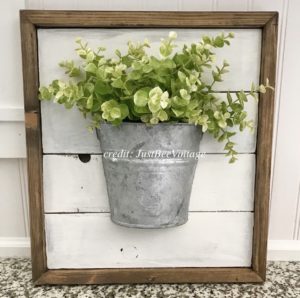
Spring is coming soon and it’s got me craving some color in my mostly neutral house. But I also wanted a quick and inexpensive project. I saw an amazing creation from Rianna and her hubs at JustBeeVintage on Instagram and this project is entirely inspired by their work! Definitely check out her feed for some incredible eye candy and inspiration!
DIY Spring Art Project
Supplies Needed
- scrap wood (I used leftover shiplap from our Master Bedroom Makeover)
- 1×2 pieces of wood for the frame (I used leftover pieces from our Nerf Gun Wall as you can see from the orange color)
- Restor-A-Finish
- black paint
- wood glue
- twine
- staple gun and staples (optional)
- nail
- D-ring hanger
- greenery
- miter saw (optional – you don’t have to have mitered corners for your frame)
How to make your new DIY Spring Art
Cut any length of scrap wood you want into two pieces. I’ll be honest – I initially intended this project to be larger, but I messed up the cuts not once but twice. Seriously – I might need to be a little more precise with my measurements!
I ended up with two boards that are 6 inches wide by 11.5″ long. I chose some leftover white paint for these boards. And sorry for the odd pics of the painted boards.

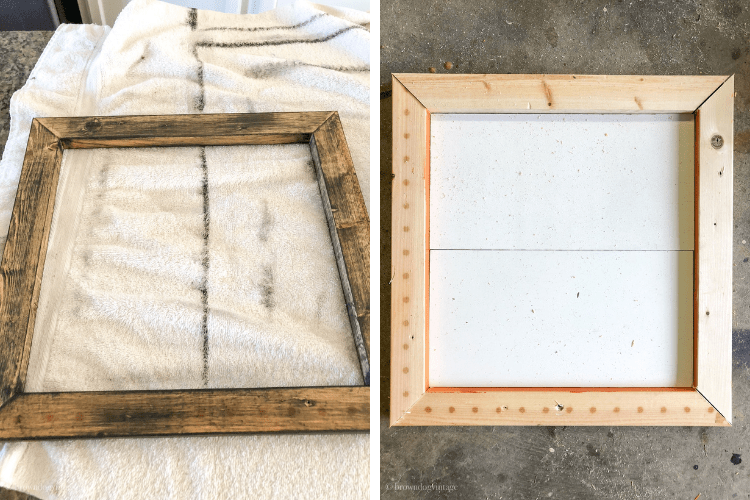
Once your shiplap is cut, lay it out and measure for your frame (and do better than I did!). I had two scraps leftover that I used for the short ends that already had mitered corners (this is where you turn the miter saw to 45 degrees and get those angled cuts in case you’re wondering).
So all I had to do was use my scrap 1x2s and measure for the long ends of the frame. And clearly, this is where I messed up because first, I turned the saw the wrong way, then I cut one too short. I had one scrap left and finally got it right!
The measurements of my frame are 14&1/2″ wide and 15 inches tall. I wanted a tight fit so I could basically just squeeze the shiplap into the frame. My corners aren’t perfect, but you can’t even tell once it’s painted.

Use wood glue to glue your frame together. Let it dry completely following the dry times on your glue. Mine was pretty solid after the wood glue, but I still added a few staples to each corner on the backside to be sure.
Now you can paint or stain the frame however you like. I had some orange sides showing because, well scrap wood and all, so I sanded it off the best I could. I wiped on some Restor-A-Finish in Dark Walnut with a clean rag. This step didn’t cover the orange good enough and it wasn’t quite the look I was going for.
So I used some flat black paint to dry brush over the frame. Dry brushing is amazing for projects like this. Basically, you get a tiny amount of paint on your brush, get off most of the paint before touching your project, and then haphazardly brush your piece. You can’t mess this up – if you get too much, sand it off.

Once it’s dry, add the shiplap to the frame. One of my pieces fit in perfectly and the other not quite – I had to do some light tapping with a hammer to get it in the frame. I left a small gap in the middle of the two boards.
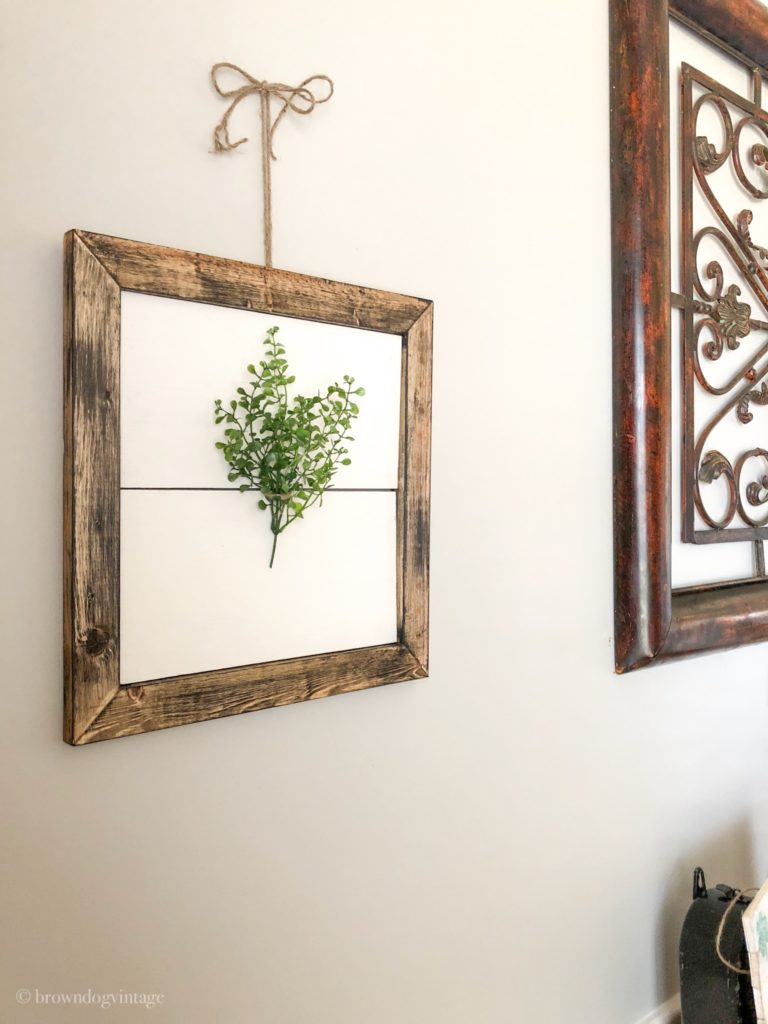
Now add a hanger to the back of the frame (I used a small D-ring hanger).
Add whatever greenery you like – I chose a small sprig of faux greenery that I cut off a small bunch from Hobby Lobby and using twine, I tied it through the gap in the shiplap and tied it in a knot in the back. The gap in the boards was just wide enough to squeeze the twine through it to secure my greenery. You could also use a glue gun and attach a sprig or two.
Tie another piece of twine through your D-ring on the back and hang on a nail, or you can simply hang from the D-ring. I used twine because I already had a nail in a stud in the wall from the previous wall art. Also, it wasn’t quite long enough when it was hanging from just the D-ring.
And there you have it – DIY spring art and even if you have to buy supplies, it won’t cost much at all!


Special thanks to Rianna from JustBeeVintage for the inspiration! Go check out her amazing project on Instagram!


Wendy
Sunday 4th of March 2018
This is so cute! I love the way you secured the greenery. Not sure I would have thought of that! Loving all your projects lately!!!!!
Melissa
Monday 5th of March 2018
Thanks so much Wendy! I'm hoping to get some mileage out of this DIY since I can easily switch out the decor on it.
Rebekah Purnel
Friday 2nd of March 2018
The article is very helpful and useful too. I was searching for the best way to make a spring art in an easy way and your ideas made it Melissa. Hope to get some like yours. Thanks for sharing such outstanding ideas!
Melissa
Monday 5th of March 2018
Thanks so much!
Natalie @ NeliDesign
Friday 2nd of March 2018
Melissa, this is so cute and simple! Love it!
Melissa
Friday 2nd of March 2018
Thanks friend!