When you realize you need furniture and you’re also on a budget, it’s a challenge sometimes to find what you need. That’s what happened with this nightstand makeover. I needed two nightstands. My budget was minimal. So I needed to DIY to save money. I found two matching nightstands at an estate sale, but they were hideous. Check out this nightstand makeover from ugly to functional with only paint!
When we moved into our current house, we finally had room for two nightstands after having a tiny cramped bedroom for years. I looked around on different sites for matching nightstands or even two that were similar, but everything seemed to be out of my price range. One lucky find at an estate sale changed all that.
Estate sales can be a goldmine for finding affordable furniture. Sometimes we hear “estate sales” and automatically think pricey. But I’ve found it’s worth checking out. My favorite way to search is estatesales.net – you just plug in your zip code and you can find local sales.
Nightstand Makeover
Here’s my treasure from this particular sale below. Not much of a “treasure” at this point, I know.

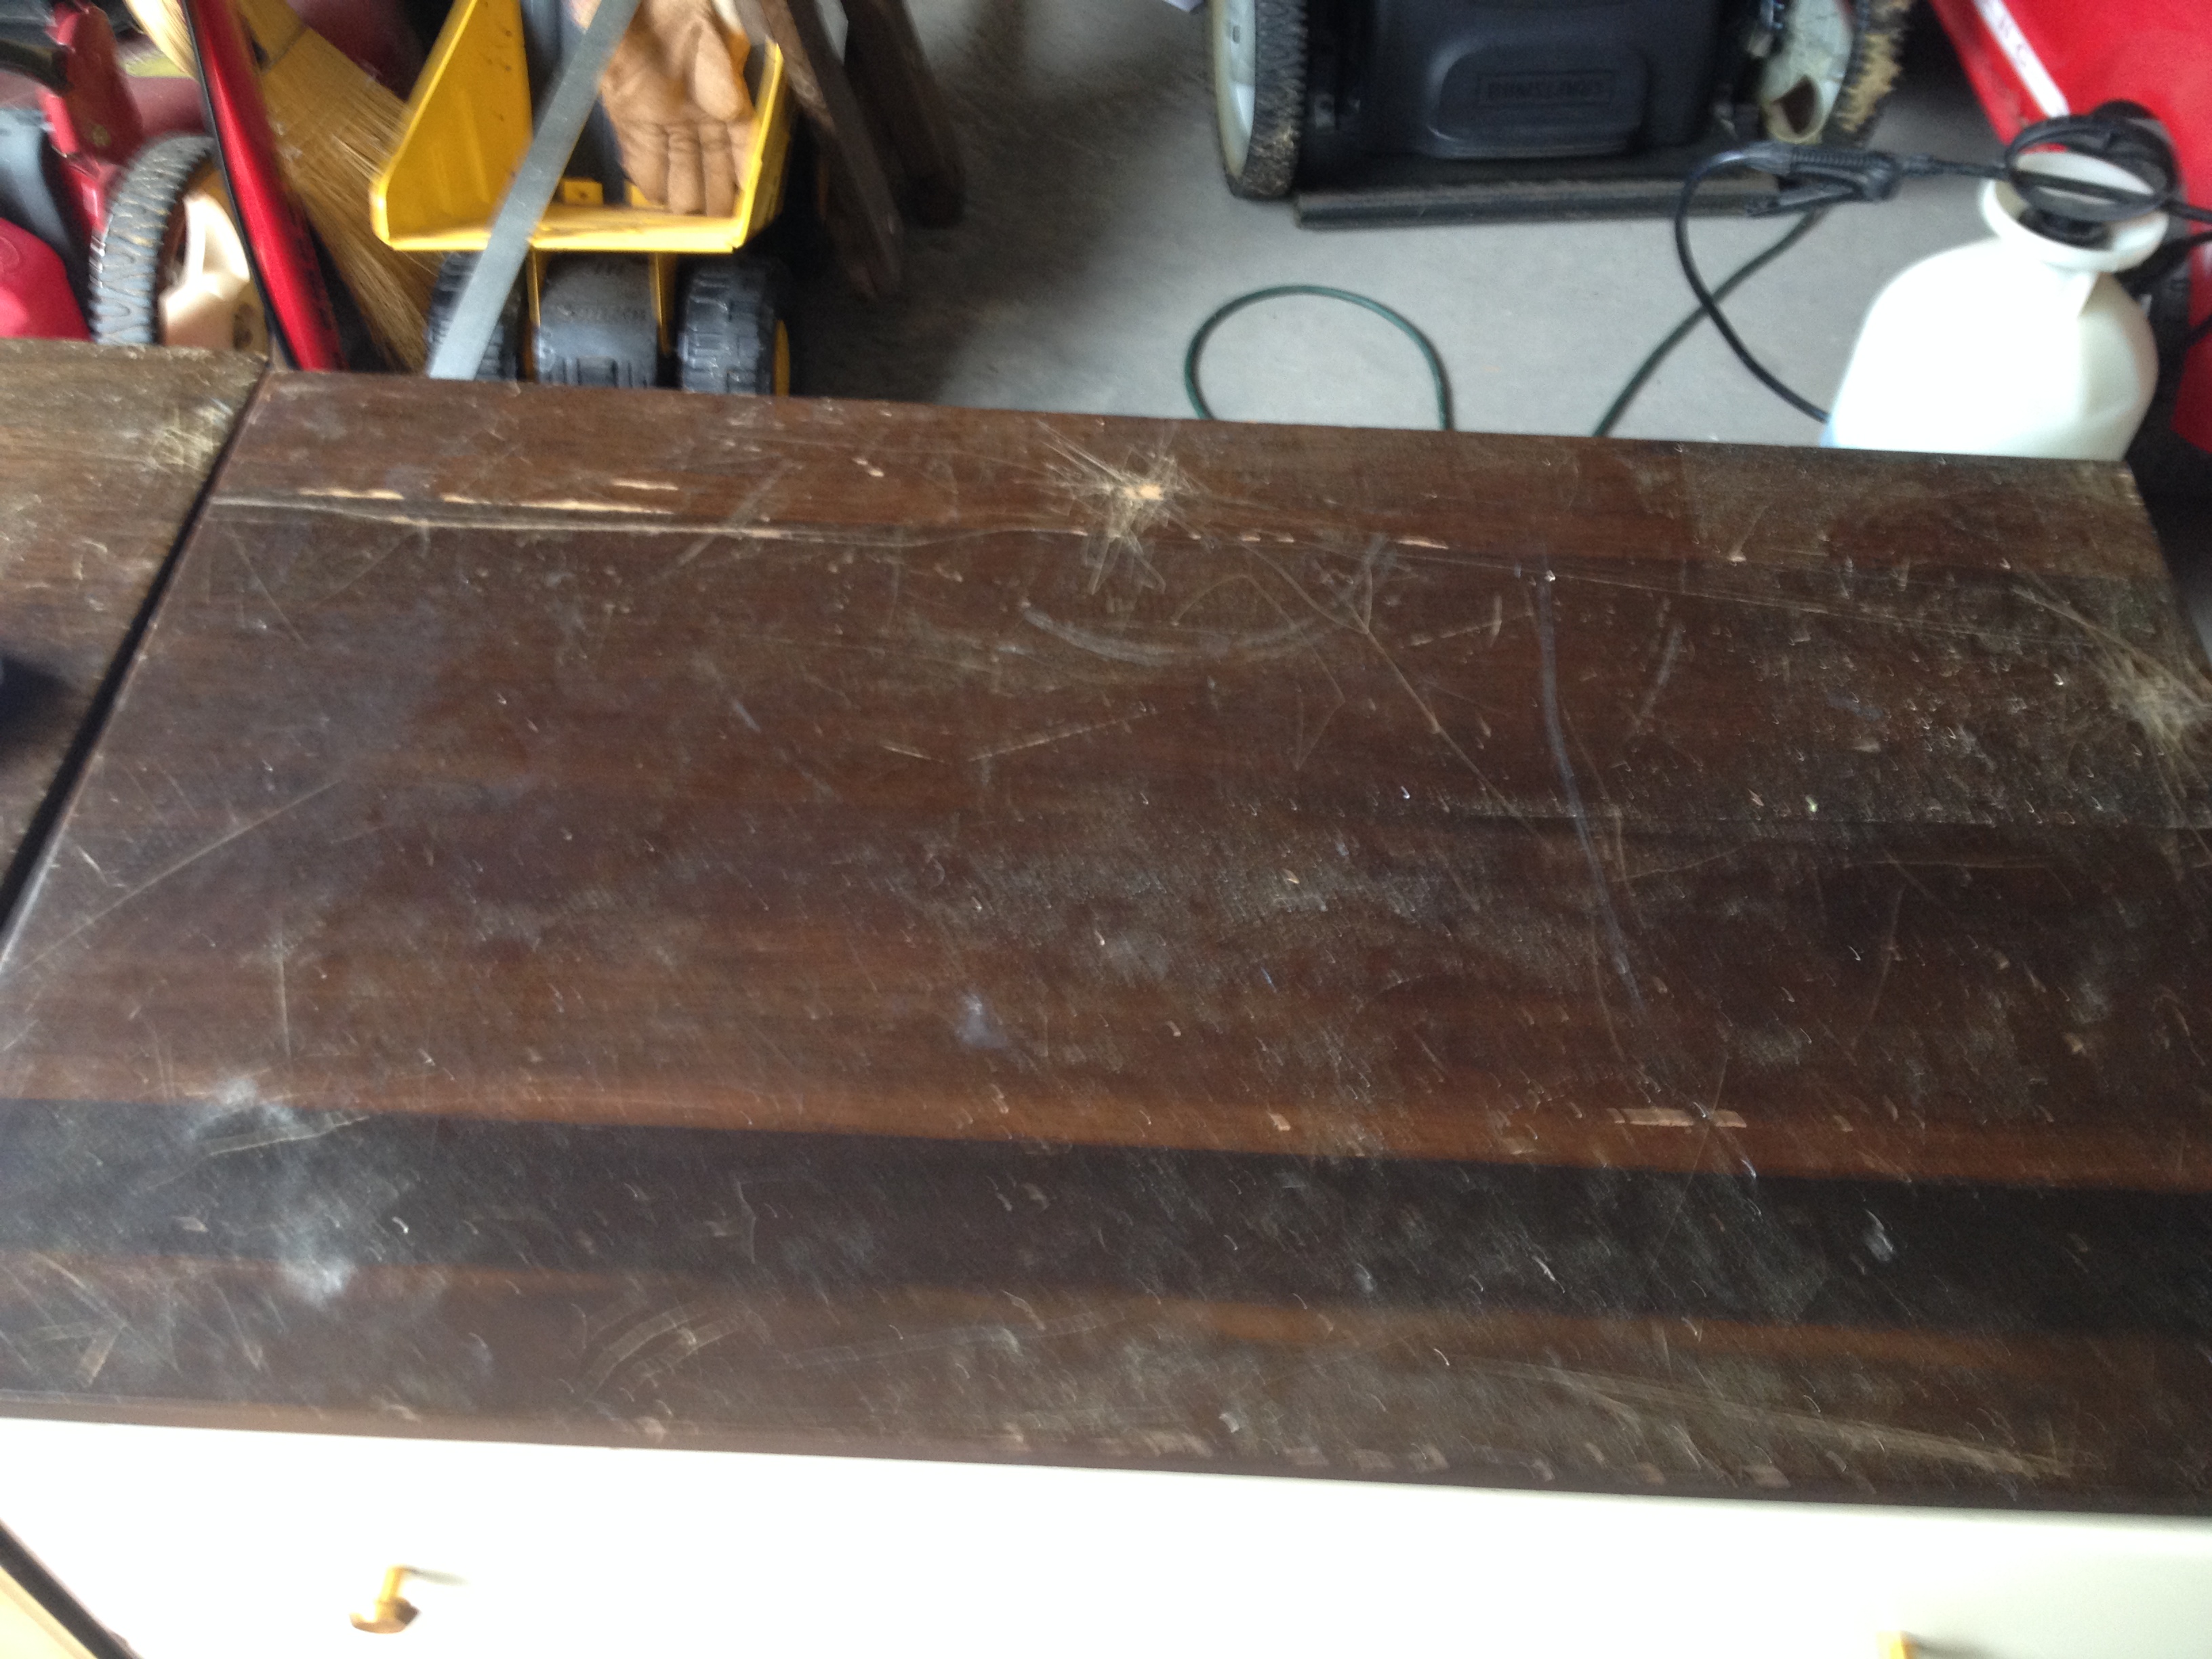
I apologize for the crappy pics – this was way before I even considered having a blog. These dusty beauties were a whopping $25 each. The drawers were perfect. They were lined with cedar planks, and the nice gentleman selling them even threw in a whole bag of tapered feet in case I wanted to change out the casters. And they were roomy!
Of course, my husband didn’t quite see the potential when I announced they would become our new nightstands. I believe the exact words were “those are the ugliest things I’ve ever seen”. I’ll admit the tops were in terrible shape and the color was a beigey yellow that I wasn’t quite in love with. But not for long.
Nightstand Makeover Supplies
- Restor-A-Finish
- Cleaner
- Paint
You can see the list of supplies is minimal. I knew I wanted to leave the tops stained and I didn’t have the time or patience to completely sand them back to original and restain. That’s why I use Restor-A-Finish. It’s my go-to product when I want to simply touch up stained wood surfaces. It doesn’t completely fix all the scratches, but it does a pretty good job with very little effort.
Normally, with tops that were this scratched, I would sand them like crazy and try a little harder to get them smooth. But these didn’t bother me that much. I knew they would constantly have things sitting on top and moving around so I was ok with the blemishes.

Then it was time for paint. I had blue paint in the garage from another project (Sea Salt from Sherwin Williams). I used two coats of paint and since it was a satin finish, I didn’t bother with a topcoat. If I let it cure for several days, I’ve found I can get away without a topcoat on satin latex paint. These have held up like champs – no chips at all.
You can read more about refinishing wood furniture in my complete guide here!
I cleaned the hardware but left the original knobs in order to save money. Remember, my budget was a shoestring size and there are 12 knobs between the two nightstands.
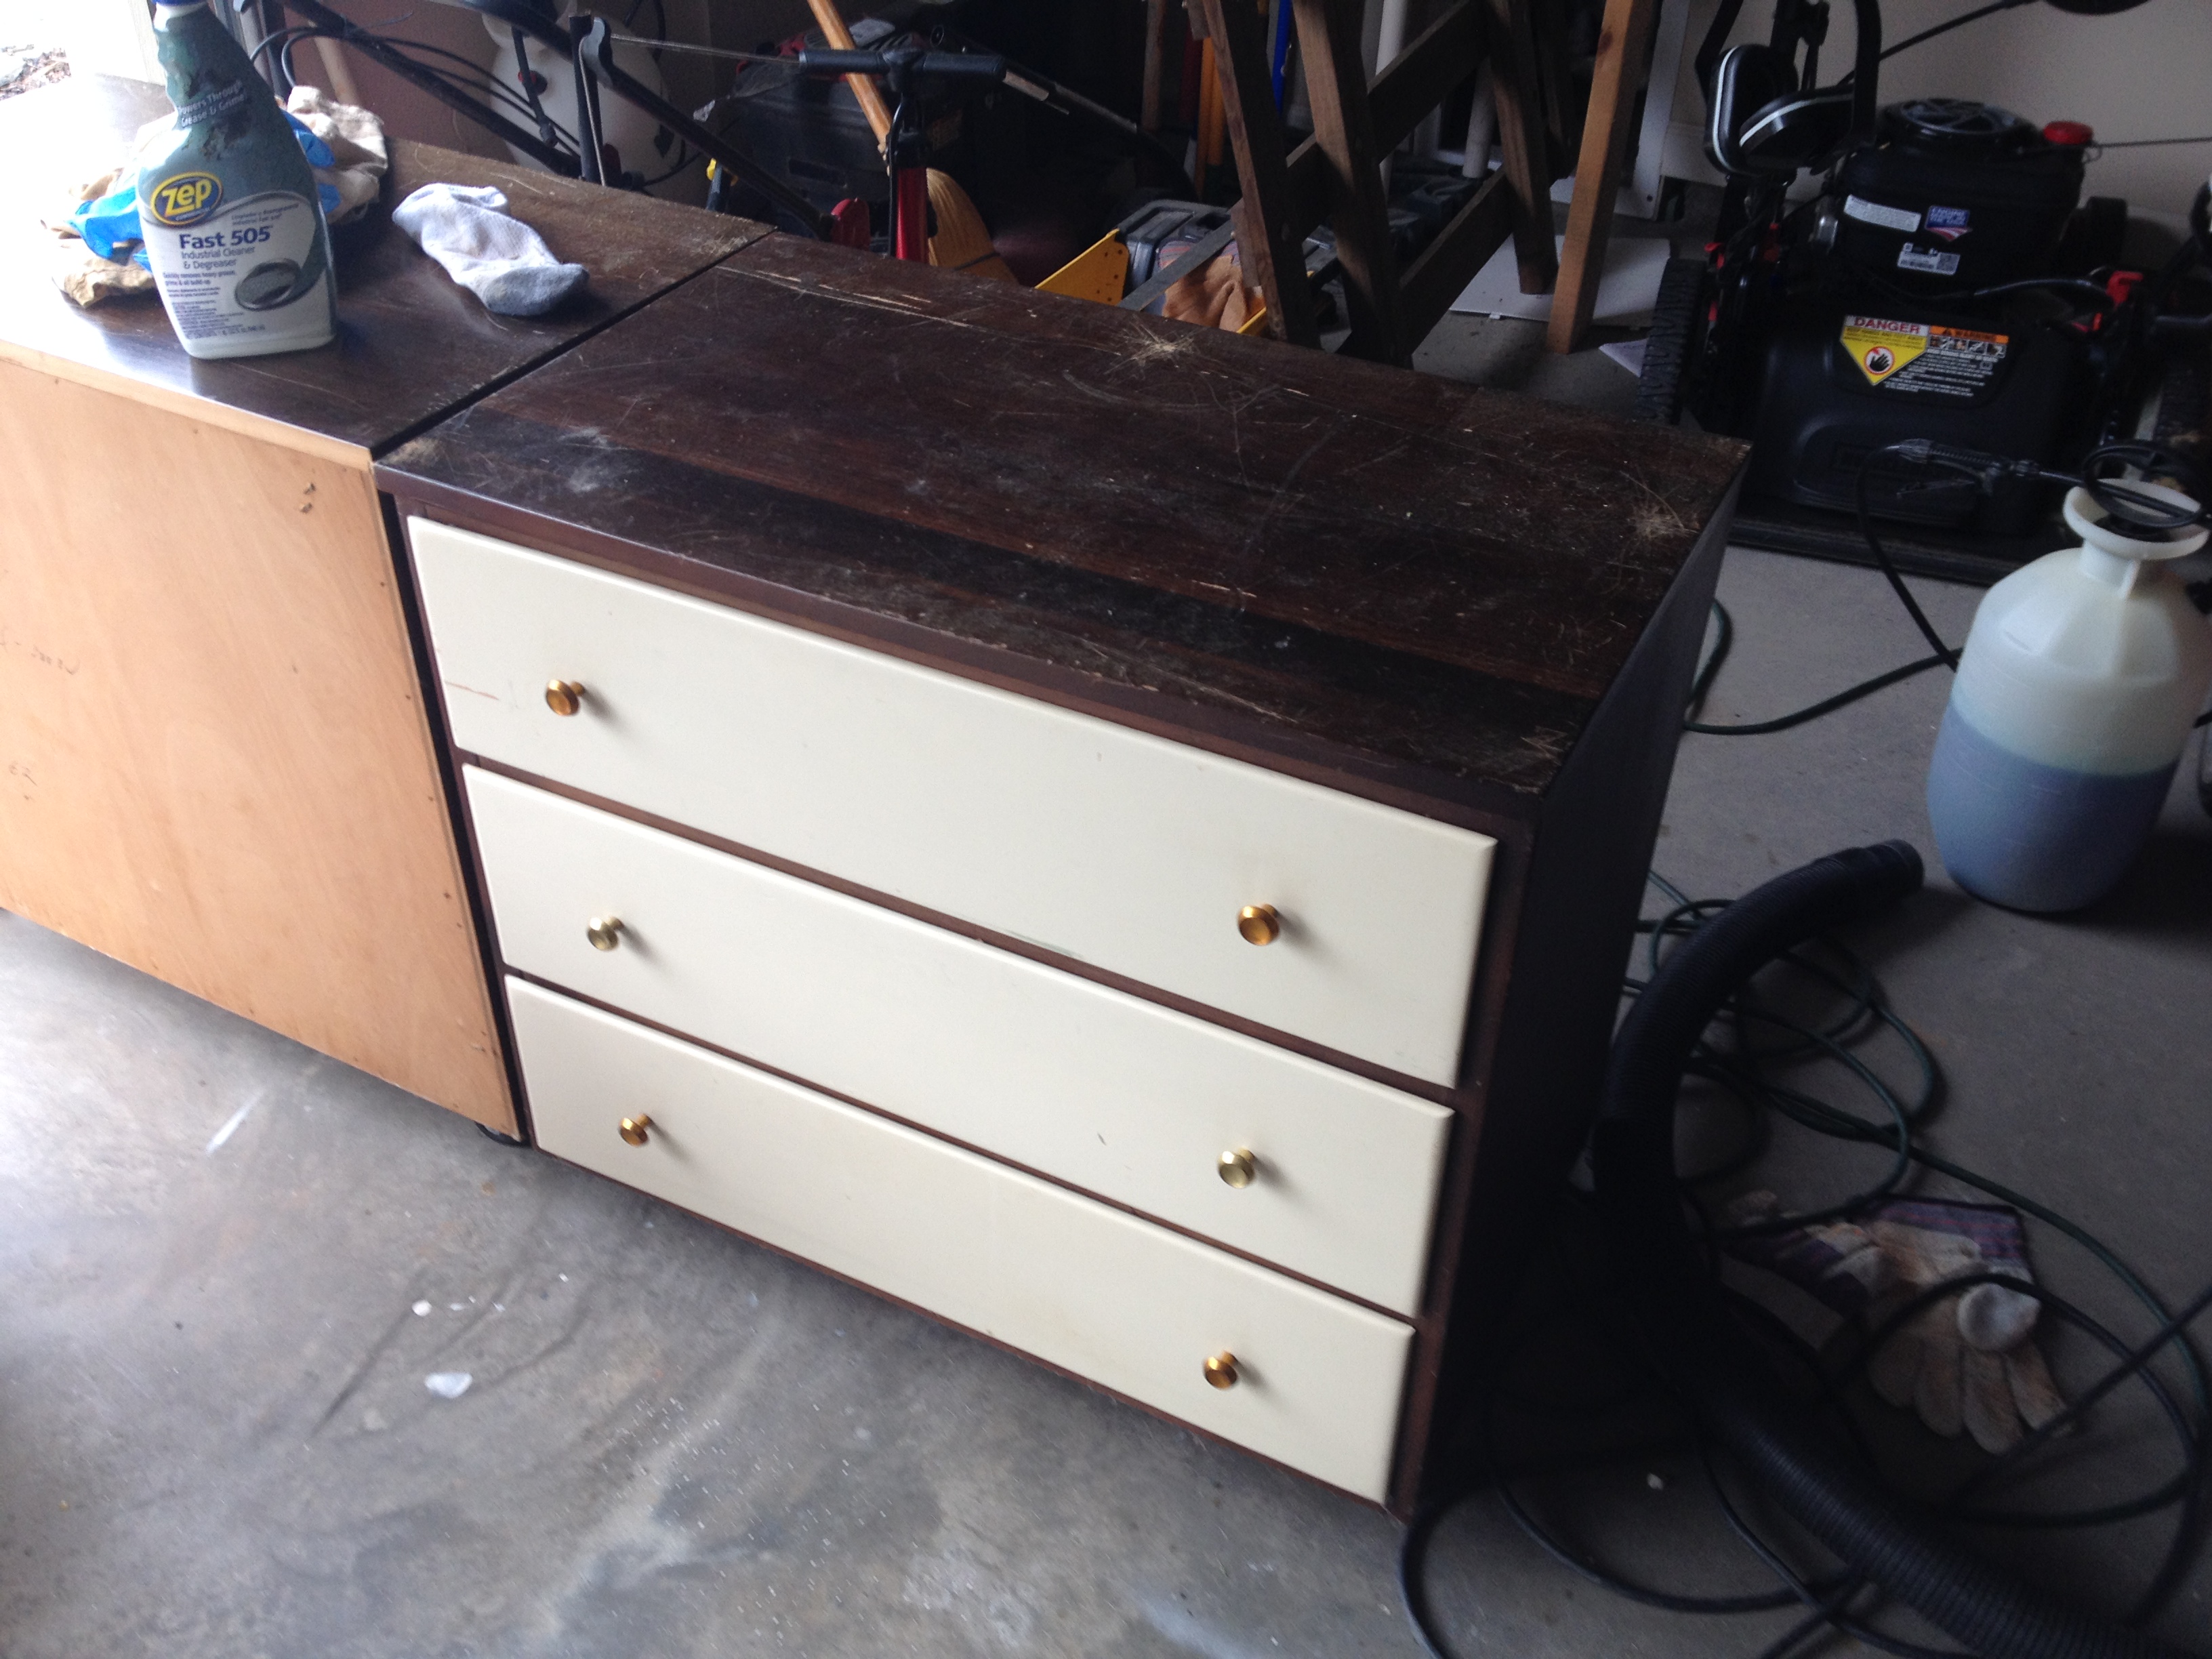
Finished Nightstand after Painting
The original nightstands had casters, but since I was given a bag of gold dipped feet, I changed these out. This made the nightstands a more appropriate height beside the bed.

Now we have two matching nightstands that cost a total of $50 for the nightstands, and zero dollars for the paint and Restor-A-Finish since I already had these in the garage.


These are definitely one of my favorite estate sale scores so far. They’ve come a long way from “the ugliest things I’ve ever seen”. They’re a perfect match with our DIY Shiplap wall.
New nightstands this size would’ve cost me hundreds of dollars. And when you need to decorate on a budget, hundreds of dollars isn’t an option.
Are these perfect? No. The scratches are still visible on the top, but guess what? No one here cares so that’s good enough for me. Things get moved around on the tops constantly and I didn’t need it to be perfect.
The drawers are huge and offer so much storage. I’ll trade a few scratches for the storage any day! This nightstand makeover was affordable and easy and that’s what mattered the most to me.
Don’t overlook something just because it’s ugly. Paint is a game-changer and a very budget-friendly way to update your furniture.

Pin for Later!