Welcome to Part 4 of our master bedroom makeover! This is an area that is often last on the list when it comes to updates, but not anymore my friends! So far we have DIY’ed a shiplap feature wall, made new lighting and now it’s time for my favorite part – painting and decorating! Check out how I finished out the makeover including the budget breakdown. You’ll be surprised how little I spent to change the whole look of this room!
This makeover has been a process over a few weeks due to the shiplap taking a bit longer than we expected. And it was a large area to paint. But, it’s such a change and I’m happy we took the time for it.
RELATED: Renter-Friendly Makeovers
Master Bedroom Makeover
Paint
My original plans (see them here) included as much paint as I could afford for our room. We have a very large master bedroom and paint isn’t cheap! I waited until Sherwin Williams was having a sale and purchased three gallons of their Super Paint in flat finish. We use Panda White because that’s the color of all the trim and doors in our house. I would prefer a brighter white, but again, this is a budget makeover. Can’t go changing everything at once. I got three gallons for $114.42 and supplies (roller covers, paint tray liners..) for about $30. Now, this is a little more than I was planning originally, but I lucked up and sold a piece of furniture that I wasn’t planning on keeping for $100. So boom! We are down to $44.42 for paint.
However, once I started painting, I realized that A. I’m not the world’s best wall painter and B. One coat was all I could manage in a few days. I have enough paint left to go back and do the second coat, but I just couldn’t pick up that roller one more time! The good thing is, it made a big difference even though the budget didn’t allow for the ceiling to be painted yet.
Furniture
I kept the large pieces of furniture. I sold one that just didn’t quite fit in anymore. I’m planning to paint the large armoire and the night stands, but for now they are fine. I scored a huge trunk at an estate sale for $40 and it now lives at the foot of the bed. It has some dings and scuffs and one of the leather handles broke, but that’s ok – adds to the vintage charm!

I’m planning to use it for storing all my extra frames and pictures. I have these stuffed in random drawers throughout the house and I think it’ll be good to have them all in one area now.
And I found a beautiful antique table from a neighbor for my little sitting area. I sold the previous one there for $15 so this was a score for the budget.

I’ve got a new to me buffet that no one else wanted and some DIY farmhouse style decor from a few yardsale finds. I added my copper planters from the Target Dollar Spot and some faux greenery. And there’s brown dog himself peering out the window!


Decor
The other main addition to the room is a gorgeous piece of art from a sweet friend. Sadly, she is moving and had to unload a few things before her move. This is one that I was interested in months ago but just didn’t have the money at the time. She gave me a major friend discount on this one and she’s letting me pay her later after I can sell some more furniture! (Thanks Kelly!)

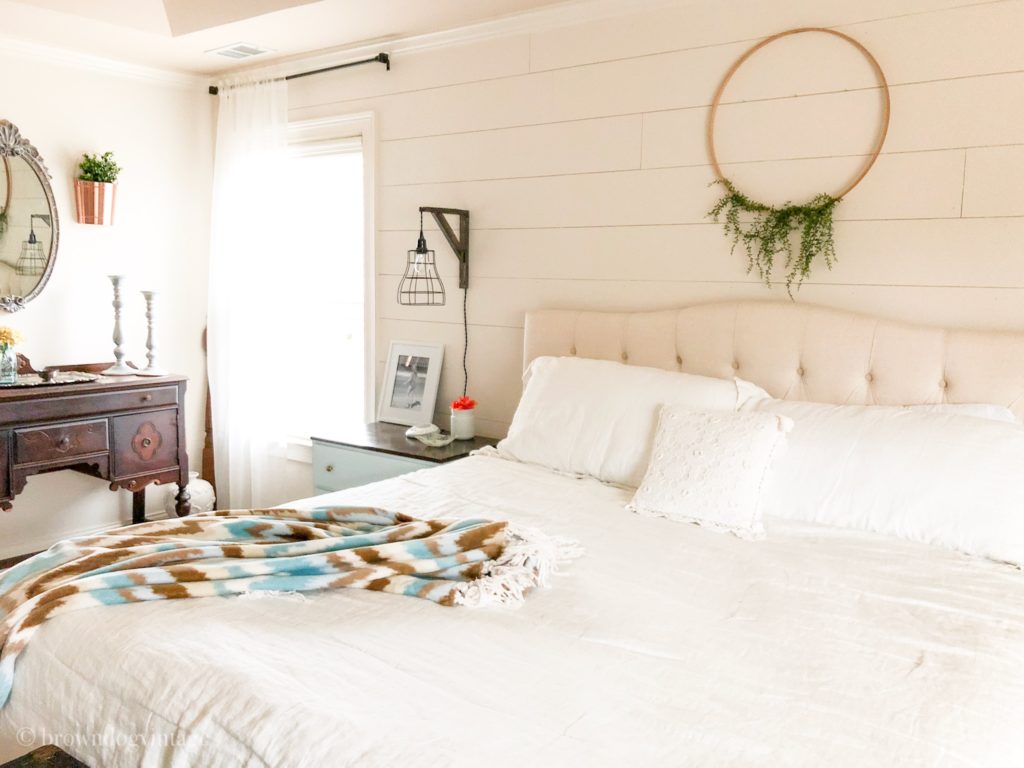
I threw in some Target faux succulents, and shopped my house for the rest. I added the DIY floral hoop wreath above the bed (you can see the tutorial here). Of course, you can always add real succulents (see my guide for how to grow succulents indoors), or try any of these plants for small places. Just a little greenery will brighten up your bedroom!
There are a few things that didn’t get done but overall I am excited about how it turned out. The shiplap and light fixtures made a dramatic impact and didn’t cost me a lot of money. You can check out the shiplap here and the light fixtures here.


FINAL BUDGET BREAKDOWN
- Shiplap $143
- Paint $44 (originally $144 but I sold a piece of furniture for $100)
- DIY Lights $40
- Trunk $40
- Table $20
- Accessories $6 (faux succulents from Target and a $1 yard sale silver tray)
TOTAL: $293.00
For less than $300, we transformed this space from this:
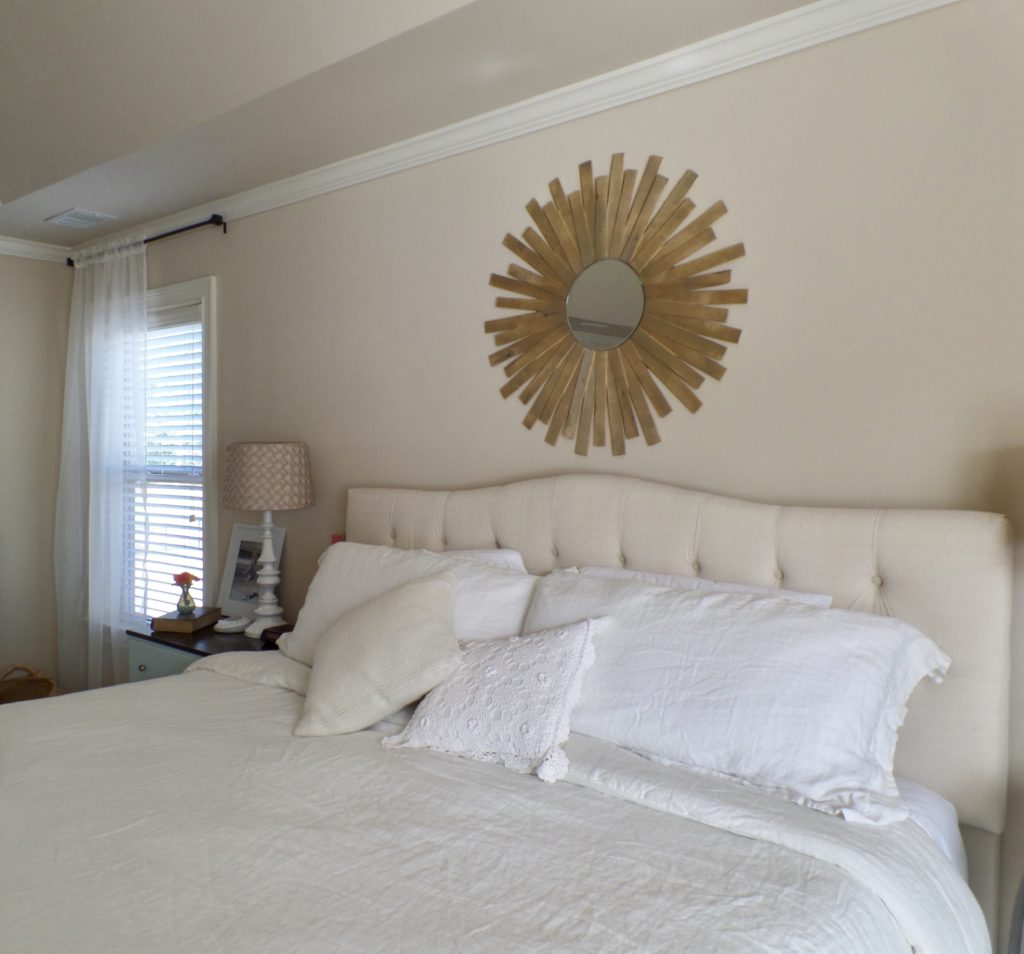
To this:
Pin for later!

And in case you missed it, click these links to check our progress from start to finish:
1. Master Bedroom Update On a Budget Part One, The Plan
2. Master Bedroom Update – Part Two, Shiplap
3. Master Bedroom Update – Part Three -DIY Pendant Lights and Brackets