
If you have a tile floor in your bathroom that you just don’t love, you have options to fix it. And when you don’t want to do a complete tile demo and makeover, painting might be an option. I’ll show you how to paint bathroom tile floors for an affordable bathroom DIY makeover.
Can you paint bathroom tile floors? Absolutely. The key is proper prep, cleaning, and materials to ensure that you end up with a gorgeous floor that stands up to foot traffic. I’ll show you what a difference painting our tile bathroom floors made and exactly how to do it.
How to Paint Bathroom Tile Floors
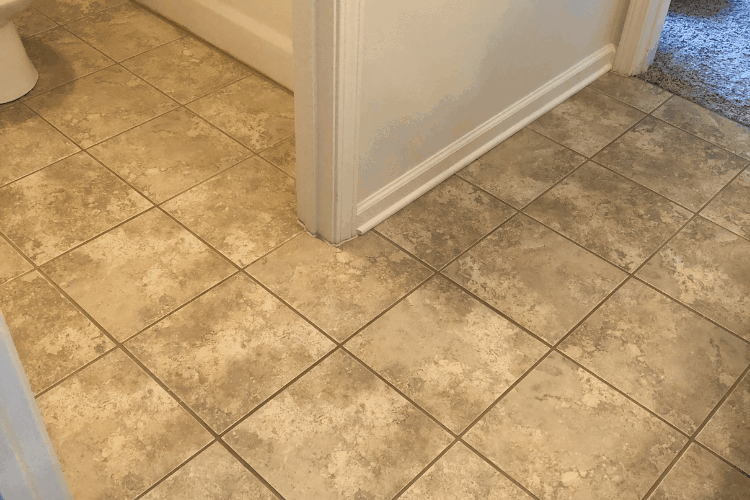
For this project, I’m painting over ceramic tiles in my daughter’s bathroom. This bathroom gets used daily for showers, teeth brushing, etc. I needed to make sure whatever I do can withstand daily use.
I’ve painted the tiles in our kitchen, but not tiles that are going to get walked on daily so this was new for me.
This post is a long one! But it’s a complicated project with a few steps that need to be done correctly.
RELATED: Renter-Friendly Apartment Upgrades
Materials for Painting Tile
I’ll show you what I used and then explain a bit more about each step.
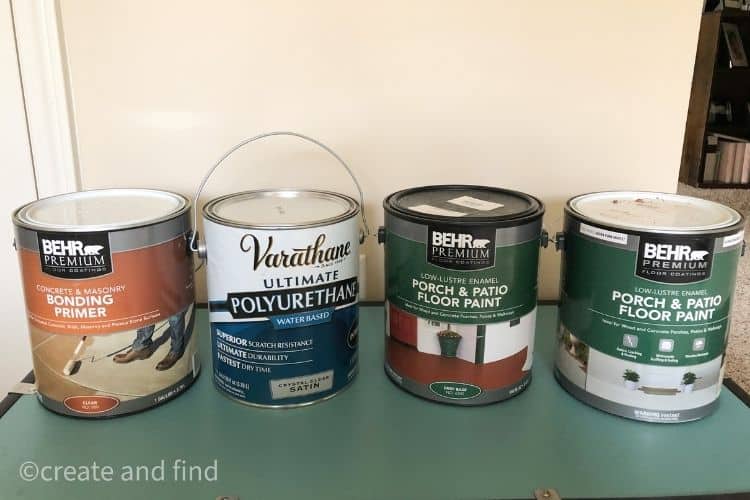
- Behr Concrete and Masonry Bonding Primer
- Behr Porch and Patio Floor Paint in the base color and stencil color
- Varathane Ultimate Polyurethane Water Based in Satin
- 3/8″ nap roller covers – I used small rollers due to the small space I’m painting
- Stencil
- foam roller covers
- paint trays – I use the same one and line it with tin foil each time
- paintbrushes for filling in grout and beside the toilet, tub, cabinet, etc
- craft brushes for touching up
- TSP for cleaning
- Painters Tape
- Sandpaper (coarse)
- Liquid Deglosser
- Sponges
- Old Rags
Prep Your Room
- Remove anything you don’t want paint on.
- Tape around cabinets, toilet, tub, or any other surface you might accidentally paint.
- Anything that can come out of the room needs to come out.
- Prepare yourself with lots of trash bags (I use old grocery bags), paper towels, stir sticks, and other random supplies you like to use while painting.
- Remove the doors if possible – especially in a bathroom, space can be tight. You’re going to want as much room as possible while crawling around on the floor painting.
Also – a handy tip for removing doors. If you have the kind with pins in them, you don’t even need to remove all the screws and hinges. You simply pop the pins out and your door comes out. Ask me how I know this and if I did it the hard way before my husband corrected me – ha!
How to Clean and Prep Tile Floors Before Painting
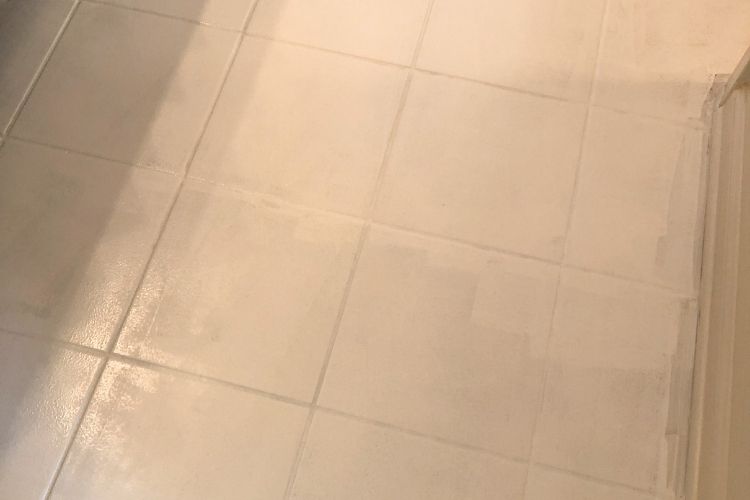
This is a super important step when painting any surface, particularly tile floors. Dust, debris, oils, residue from cleaners, hair products, makeup – you name it. Your bathroom floors can be caked with stuff.
You want a clean surface to make sure you get the best results possible.
I cleaned with TSP cleaner first, rinsed with warm water, then wiped down with liquid deglosser, and again rinsed with warm water.
Then I took a coarse sanding block and roughed up the surface a bit more. Now our tiles are not slick or shiny. If they were, I would’ve used my power sander all over to make sure I got a rough surface.
Wipe down again to make sure all the dust is gone, let dry fully before using a primer.
What Kind of Primer to Use for Painting Tile Floors?
I asked around for several recommendations from people that had actually painted their tile floors. I wanted to see what they liked, what held up the best, and what will give the best results.
Behr Concrete and Masonry Bonding Primer came up in the answers time and time again so I figured it would be a winner.
**one note about this primer that I wasn’t expecting – it doesn’t have the consistency of a normal primer like I was thinking. I expected something similar to Kilz, but it’s got the consistency of polycrylic or other sealers. It’s very thin and runny.
I applied the primer with a 4 inch 3/8″ nap roller starting at the back of the bathroom and worked my way out. There were a few bubbles and it didn’t look smooth but apparently, this is the norm for this product.
Let your primer dry completely based on the instructions. The back of the can says 2 hours for drying time and 4 hours before top coating with paint.
I did one coat of primer. And unfortunately forgot to take a pic of this step, but it didn’t change the look of the tile. Kind of white and milky going on but very thin. There are some bubbles as you roll it on, but they evened out when drying.
What Kind of Paint Do You Use to Paint Bathroom Tile Floors?
Again – I trusted the recommendations of several others that had years of wear and tear on their painted tile floors. They’ve done it and know what holds up and what doesn’t.
The most common answer is Behr Porch and Patio Paint. Several tutorials I saw said their floors are still holding up beautifully years later with this paint.
I bought the base coat in white and the stencil color in black. Drying time for this paint states it’s dry to the touch in 1 hour, but wait at least 4-6 hours before adding a second coat.
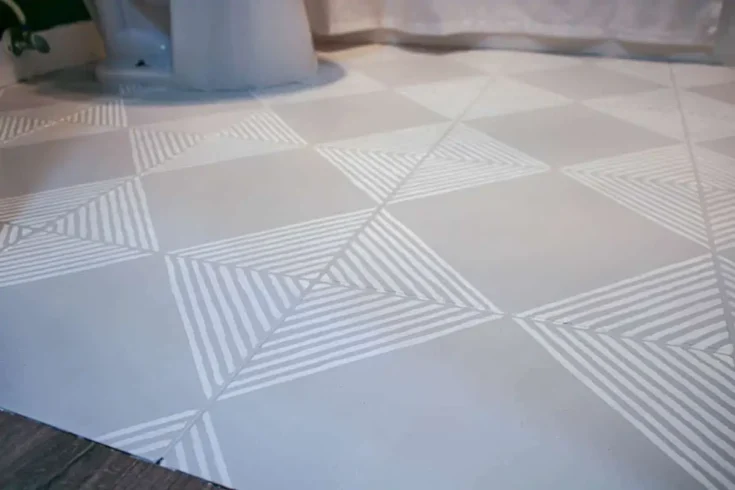
Using a Stencil for a Pattern
This bathroom is used primarily by my 10-year-old daughter. I let her choose the colors and the stencil she liked.
We originally purchased this stencil from Etsy in a size medium, but you could make your own if you have a cutting machine.
However, I had to buy a new stencil. This one was huge. I didn’t realize how tough it would be to get around the tub and toilet with such a large stencil.
Our tiles are 12″x12″ and this stencil is 18.15″ x 32.2″. It just didn’t work or I’m not skilled enough to figure out how not to completely mess it up. It’s a gorgeous and high quality stencil though so I’ll certainly use it in another project.
New Stencil – We opted for this one in a 12×12 size. This way I can lay it directly on one tile with no overlap on the grout.
Do You Have to Seal Painted Tile Floors?
I have read both options – not sealing is ok if it’s not high traffic and yes, you need to seal. So I’m opting for sealing. This isn’t going to be a quick project and I don’t want to have to touch up in a few months.
For sealing the bathroom floors, I’m using Varathane Ultimate Polyurethane water-based sealer in a satin finish.
Cost of Painting Bathroom Tile Floors
- $22 – Primer (I have tons leftover)
- $60 – Paint (high because I bought two colors and I will use it for other projects)
- $50 – Sealer (again, I bought a gallon because I will use it in other projects)
- $5 – Sponges
- $15 – Roller covers
- All other materials I already had on hand.
In total, I spent around $140. What I actually used since I have so much leftover was probably closer to $50 in supplies, but I wanted to show you a real total.
This is definitely not cheap, but I have enough supplies left to do another bathroom and more. I’ll use the paint and sealer for other projects.
I’m unsure about the primer – I used very little out of the gallon and I don’t have another project lined up except another bathroom. However, I’d still purchase it again based on the recommendations if it’s the key to making sure my paint adheres.
How to Paint Bathroom Tile Floors – Outline
Here’s a simple breakdown of the painting process:
- Prep the room and floor
- Paint one coat of primer, let dry – I used a roller for this step
- Paint the base coat, let dry, repeat – A brush for the grout, roller for the bigger areas
- Stencil with your second color – Foam roller
- Touch up any mishaps with artists brushes
- Seal with 3 coats of sealer (**I did three because that’s what the product recommended). My product specifically said do not use a roller for this so I used a brush. Keep your brush in one of these in between – it’s life-changing.
- Let sit for at least 3 days with no traffic on the floors
From start to finish, the actual prep, painting, and sealing part took me right at 2 weeks. However, I also work part-time and had a few days I didn’t do a thing to it.
Tips for Painting Tile Floors
I was not prepared for how tedious this project would be. Your back will ache, your fingers will hurt and I messed up so many times it wasn’t even funny.
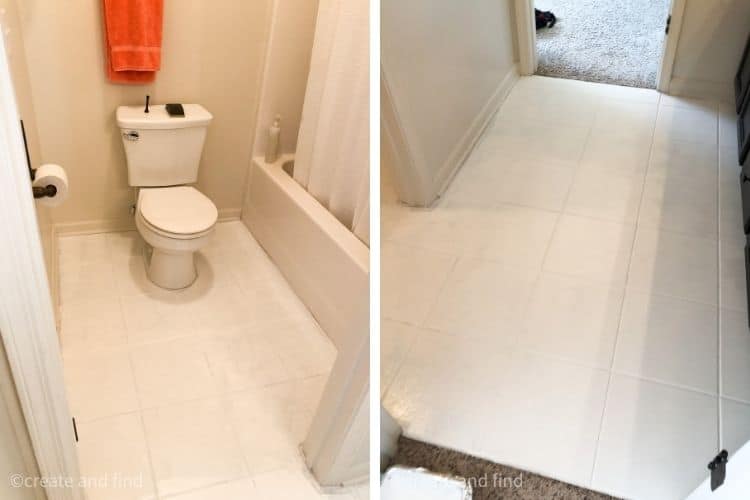
Base Coat
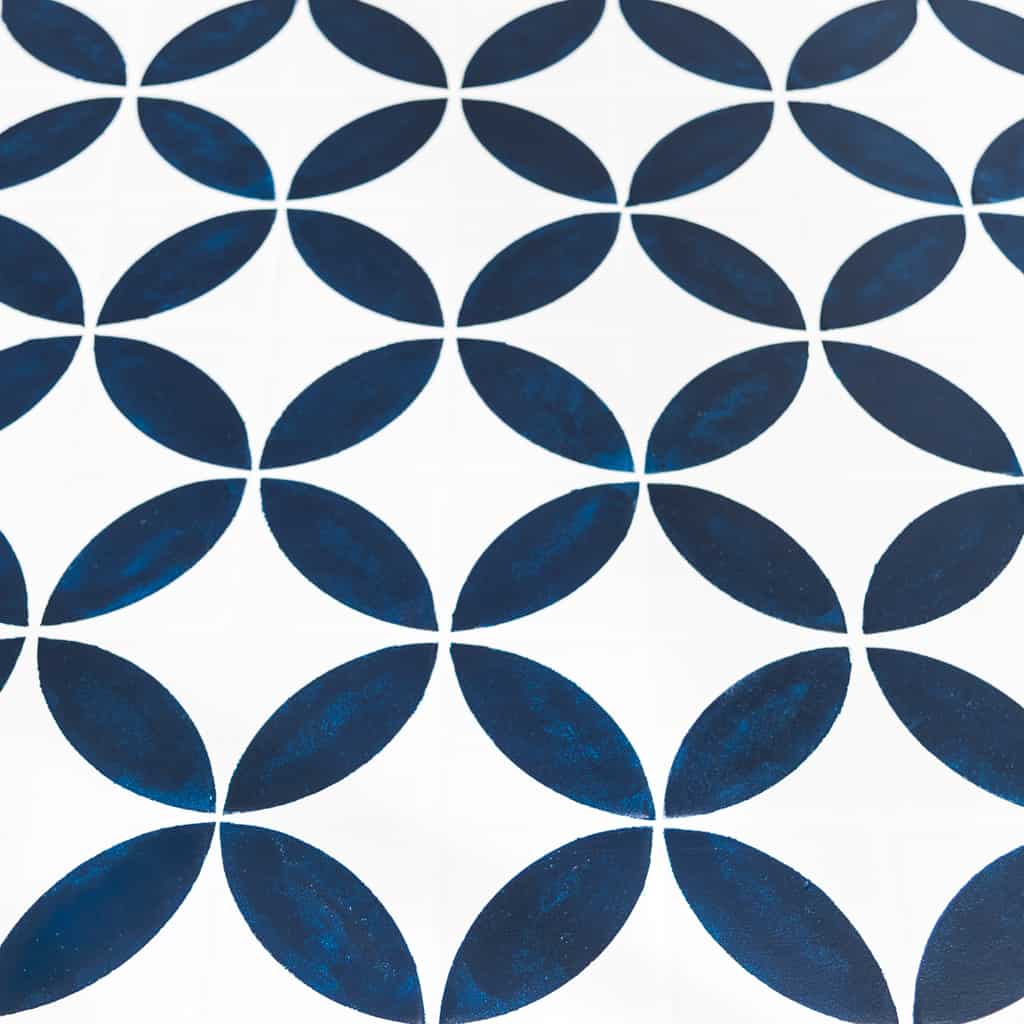
This is the color that you’ll see most of when you’re done. I chose white for the base coat and black for the stencil color.
My floors needed two coats of the base color.
Where to Start Painting
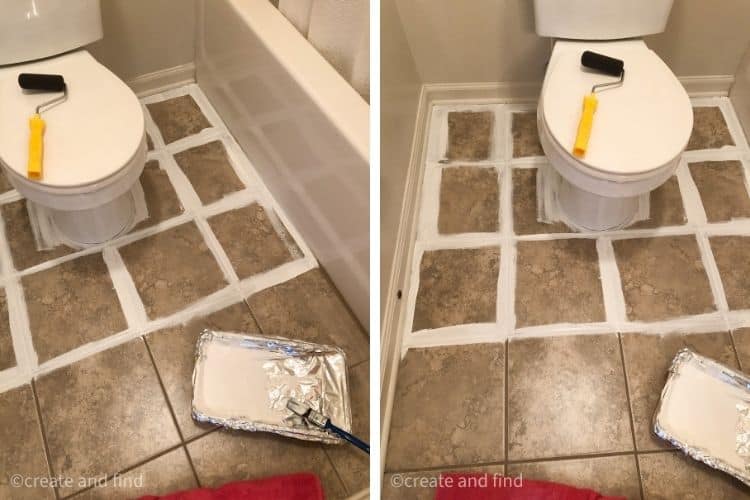
Since my room was divided into an uneven vanity room and toilet/tub room, I couldn’t follow everyone’s directions to start in the center and work my way out. I started behind the toilet and worked my way into the vanity room.
When painting, I used a brush to paint the grout lines first, then rolled the rest. I did a small section at a time and worked my way out.
How to Paint Bathroom Floors – Using a Stencil
When getting paint on your roller to start painting on the stencil, use a few paper towels to roll off any excess paint before you apply it to the stencil. You don’t want a drippy, runny roller.
I kept a doggy potty pad handy with paper towels on it. I didn’t want to risk having my paint seep through so I used the doggy pad. Keep a damp rag handy at all times also.
Keep a piece of cardboard, a towel, or something else you can set your stencil on safely while getting more paint on your roller. I would paint on it, turn it upside down and wipe it down with an old lint-free rag to get any paint bleeds off.
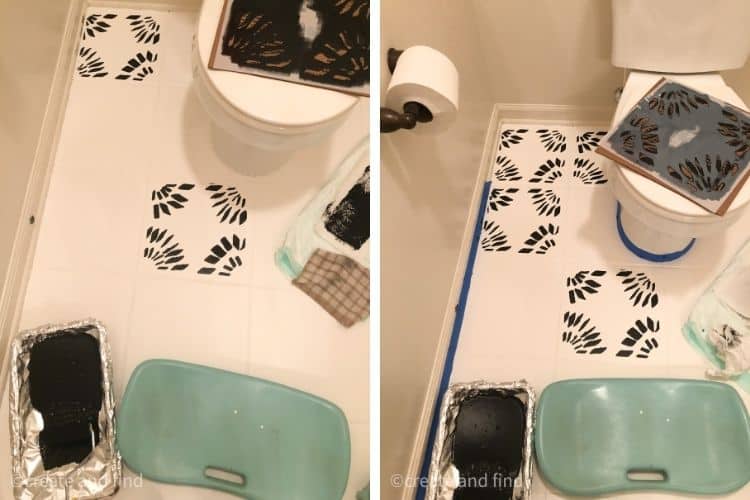
The parts that weren’t quite a full tile were ridiculous for me. I had so many blobs and gobs of paint that it looked like a disaster. For example, all the tiles beside the tub are not full 12×12 tiles. So I had to bend the stencil in a strange way and it wasn’t very effective.
You can see in the pic below what I mean by disaster! At this point, I’m worrying because it isn’t going so well. I was calculating the cost of having someone retile the floor.

However – don’t worry. It’ll clean right up when you either wipe it quickly or touch up. Keep a damp rag close by. And you’ll touch it all up at the end.
The stencil I chose seemed a bit flimsy, but I never use stencils so that may be normal. I noticed a lot of bleed through to the back of the stencil.
This led to paint where it shouldn’t be and lots of touchups. I washed the stencil in between uses and in the end, I had to cut it to get to the narrow portions under the cabinet.
Do this last though if you have to cut it. In hindsight, I would’ve purchased at least two stencils.


I made sure the stencil was facing the same way each time. There was a tiny cut-out on one end that I’m assuming is a guide so you know which way to face the stencil.
And if you’re using a paint tray, keep a few grocery bags to set it on so you can easily pull it around the room with you without risking drips.
Take your time and be patient. I struggled with this. It is super tedious.
And after what feels like 4 million years, you’ll be done!

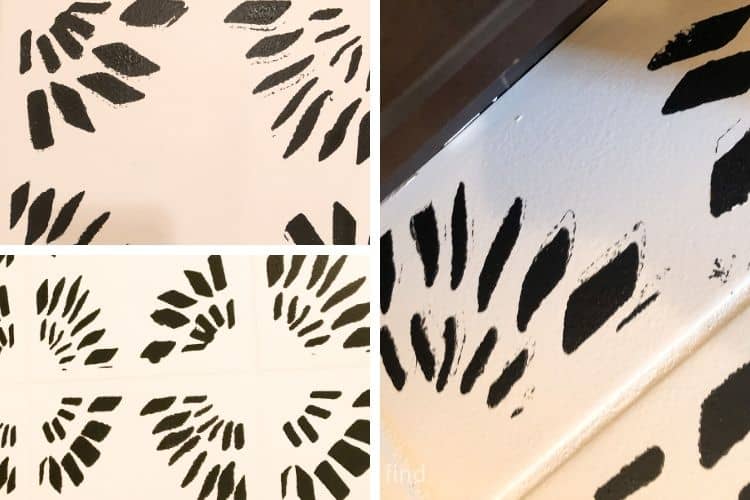
Touching Up the Painted Floors
Once you are done with the stenciling, you can touch up any mishaps. And if you’re like me there will be plenty. I used a small craft brush to touch up first the white paint and then the black.
One thing I do really like about this stencil is the wild-ish pattern. I feel like it gave me more room for error. It didn’t have to be perfect.
I spent a few days on touch-ups before adding the sealer. You can see a few of the mistakes below and there were plenty! Most were made when I had to bend the stencil or when I had too much paint and it seeped through the stencil.
Sealing the Painted Tile Floors
After all the touch-ups, it’s time to seal. I wouldn’t skip this step especially in such a high-traffic area like a bathroom.
I used a regular 2-inch paintbrush and brushed a thin coat of sealer on and let it dry completely before adding a 2nd and 3rd coat.
Tip** If you don’t have a paintbrush cover, get one, it will change your painting life. For every single project, I use this thing. It keeps your brush perfectly fresh between coats.
Once you’re done sealing the floors, let them sit untouched for at least 3 days if possible. This gives you the best chance of not messing up your hard work.
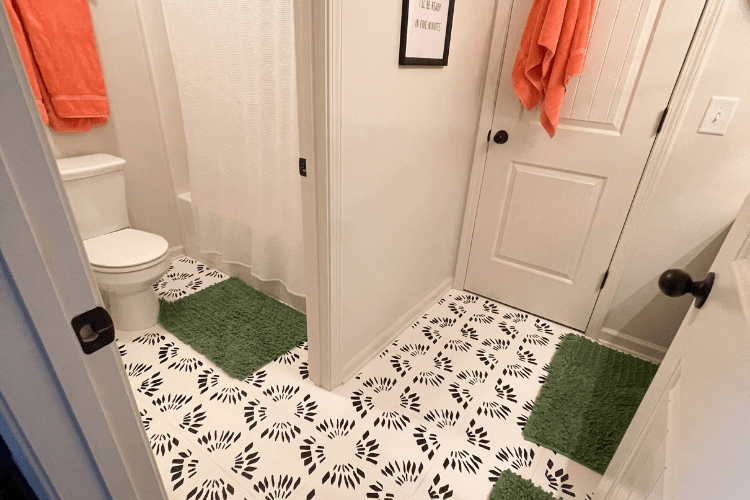
Before and Afters – Painted Bathroom Tile Floor

Hopefully, this gives you a realistic idea of how to paint bathroom tile floors. It’s not an easy DIY project and will definitely test your patience. But, it’s far cheaper than replacing the tile and it 100% changes the look of the room.
More Inspiration from Around the Web:
DIY Painted Tile Floors
Here's a simple beginner tutorial for modern boho painted tile floors that anyone can do.
Stunning painted tile floors, using a stencil and a painted method that won't peel!

This simple tutorial turns outdated bathroom floors into a modern masterpiece, using paint and a stencil.
For more transformations:
Painting Wallpaper – How to Do it Right


Salem Tile Setters
Monday 16th of June 2025
Great blog! This guide on how to paint bathroom tile floors is perfect for anyone looking to refresh their space without a full remodel. With easy-to-follow steps and tips on prepping and sealing, it makes transforming tired tiles into a stylish new surface both affordable and achievable.
Krystal
Saturday 16th of October 2021
I am debating doing this in our bathroom. How do you feel it has held up over time?
create and find
Saturday 16th of October 2021
It's holding up great. It was definitely a tough project, but it looks amazing and there are no scratches or areas where the paint chipped. The only tiny issue I had is I set the toilet bowl cleaner down behind the toilet and a little area was stained from it. But it's barely noticeable. Good luck if you do it!